My web
Remediation Options
![]()
Throughout each step of the remediation process, you can select one of the following options from the Take Action drop-down menu to take action in response to a Resolution Request.
Appeal
Note: Before you Appeal - Ensure that each Significant Defect is addressed, otherwise take the full 60 days to obtain all documents needed. For All defects, go to the Documents tab and look for documents Fannie Mae linked to defects labeled Significant Defect Support Docs for details on the defects we cite and which require remediation. You may need to use the arrows at the top right corner of the Documents tab to review each page thoroughly. For appraisal defects, ensure the original appraiser has addressed each Alternate Comparable sale we provided, as to their analysis and why it was excluded when more similar in proximity, size, age, and/or condition. 
-
On the Loan Details/Remedy Status screen, click Take Action > Appeal to open the Appeal screen.
There are two sections on the Appeal Screen to provide the information supporting your Appeal: 1. Explain Your Appeal and 2. Link Supporting Documents.
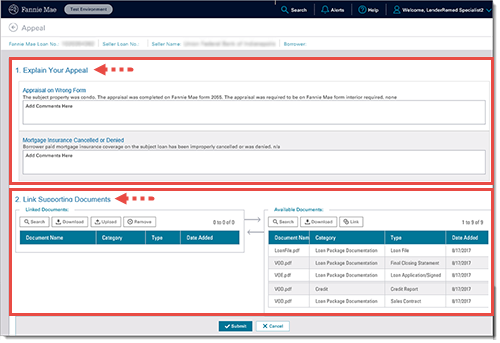
- Enter the reasons for appealing each defect in the Explain Your Appeal text box.

-
Complete the Link Supporting Documents section by uploading new documents that support the Appeal that have not already been reviewed in Loan Quality Connect. See Linking and Uploading Supporting Documents for instructions.
-
Click Submit or Cancel to return to the previous screen and continue working.
Note: Remember, once you click Submit, you cannot go back to a previous step.

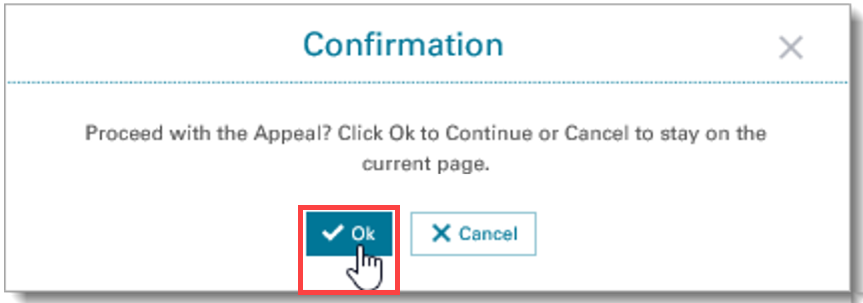
The Confirmation window opens, asking if you want to proceed with the Appeal.
-
Click Ok to finalize the Appeal or Cancel to return to the previous screen.
A banner appears on the Loan Details screen, indicating that the Appeal has been sent to Fannie Mae.
-
Click Close to return to the Loan Details screen.

-
Click the progress bar at the top of the screen to verify that it displays Appeal Received.

Note: If the second appeal is reaffirmed, you will receive an Alert in Loan Quality connect. See Lender Action Alerts for more information about alerts.
(New) Request Repurchase Alternatives
This option gives the lender the ability to request an Repurchase Alternative (RA) when a resolution request has been made available and the letter doesn't currently have an RA or Agreement offer. This will provide a consistent process for the lender to request the loan be reviewed for a RA. This process will utilize one of the lender's two available appeals and thus should be utilized when at least one significant defect can not be cured and loan will otherwise be repurchased.
-
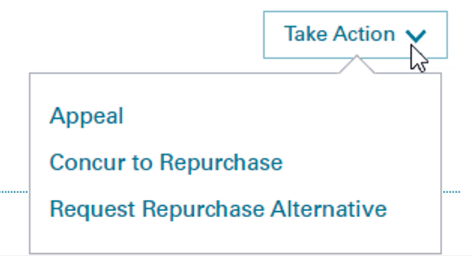
On the Loan Details/Remedy Status screen, click Take Action > Request Repurchase Alternative.
-
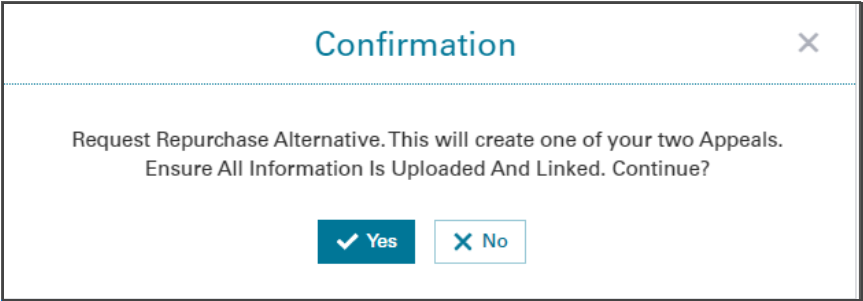
The Confirmation window opens informing you this will create one of two appeals allowed on the review.
-
Click Yes, and provide a comment for the RA Request.
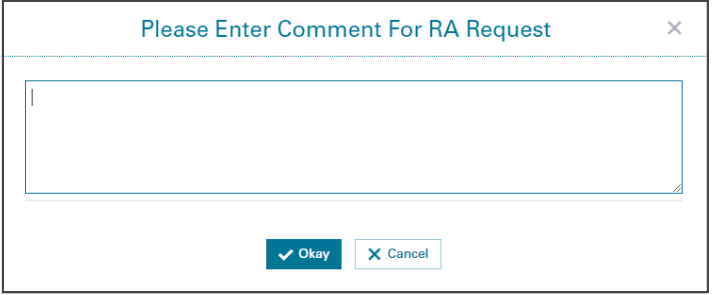
-
Remedy Status will now display 1st Appeal Sent – Repurchase Alternative Requested.

Request an Extension (Request Late Delivery)
-
From anywhere on the Loan Details screen, click the Tasks tab.

The Tasks window opens.

-
Click the Clock icon next to Resolution Request on the task bar.

The Request Late Delivery window opens.
-
Enter the reason for requesting additional time, including what you plan to deliver if additional time is granted and the amount of additional time needed (i.e., 0 to 30 days). Click Save.
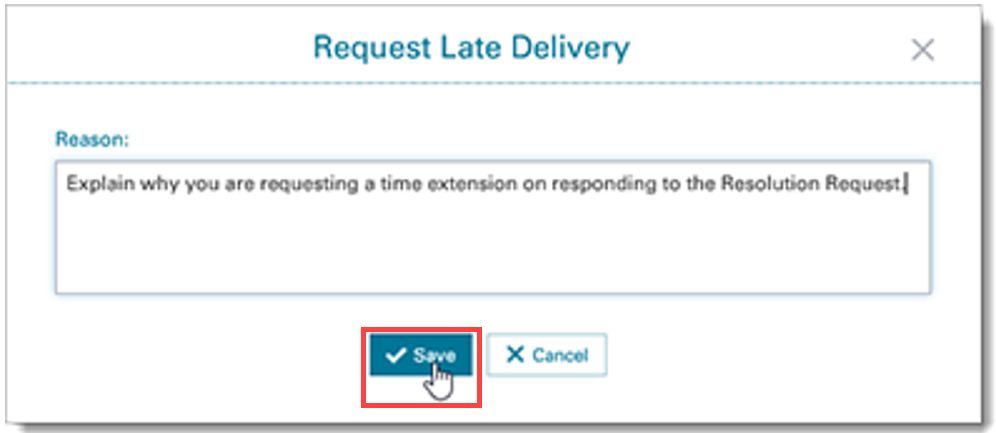
You are returned to the Loan Details screen. Fannie Mae will notify you as of its decision and the next due date by which you must take action (to Appeal or Concur).
Request an Impasse Review/Call
At the conclusion of the first or second appeal, you can challenge the existence of the defect by initiating the impasse process. To do so, you must notify Fannie Mae of your desire within 15 days of receiving denial of the first or second appeal. The notification to initiate an impasse can be in writing or through an electronic submission.
Note: Per the Selling Guide, lenders are allowed only two rebuttals prior to an impasse step.
-
On the Loan Details/Remedy Status Screen, click Take Action > Request Impasse to open the Request Impasse screen.
The Request Impasse screen has two sections that must be completed before submitting the impasse request: 1. Provide an Explanation and 2. Link Supporting Documents. Sharing comments and providing documentation is critical to the loan review process.
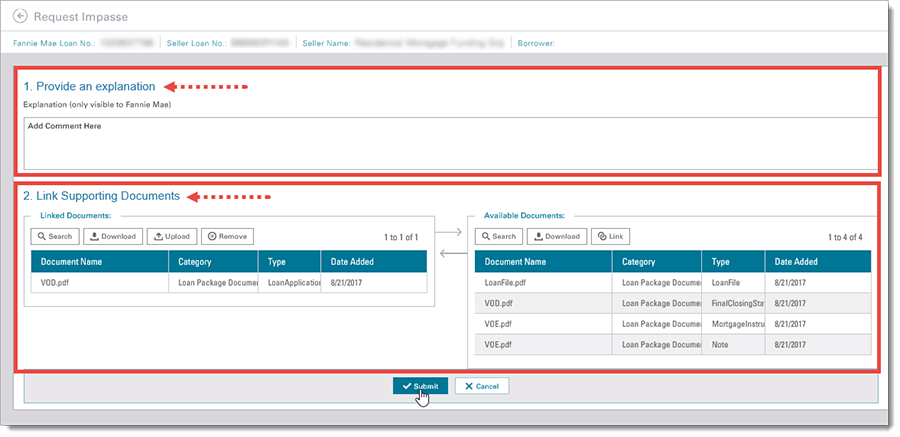
-
Enter the reasons for requesting and impasse in the Provide an Explanation text box. This is a requirement that avoids exchanging emails outside of Loan Quality Connect.
-
Complete the Link Supporting Documents section. by uploading new documents and any information that supports the impasse request. All information, facts, and documents that the lender want to be considered in any subsequent IDR process must be submitted to Fannie Mae no later the end of the impasse period or such information will not be considered in a subsequent IDR proceeding, See Linking and Uploading Supporting Documents for instructions.
-
Click Submit or Cancel to return to the previous screen and continue working.

The Confirmation window opens.
-
Click Ok to proceed with requesting an impasse or Cancel to return to the previous screen.
Note: Once you click Ok, you will be unable to return to previous steps.
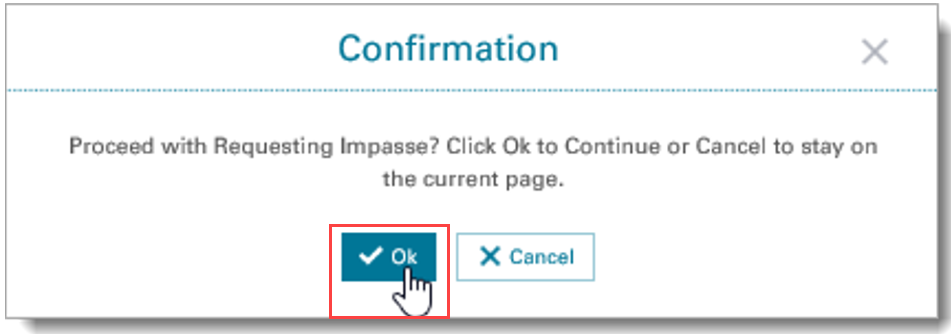
A banner appears on the Loan Details screen, indicating that the loan has been moved to impasse.
-
Click Close to return to the Loan Details screen.

-
Click the last circle on the progress bar to verify the impasse request was received by Fannie Mae.

After requesting an impasse on a Resolution Request, the Impasse Requested BI card will increase by one. In the event the loan fails to move to the BI card, confirm the Impasse documents have uploaded and the Impasse Reason appears in the Review Comment section; If the Impasse documents have uploaded and the Impasse Reason appears under the Review Comment section, the Fannie Mae Remediation Specialist will automatically be notified to review the request and confirm status. If additional attempts to upload the Impasse documents fail, notify your assigned Fannie Mae contact using information in the top right corner of the screen.
Note: The explanation for requesting an impasse is appended to the Lender Comments dialog box on the Comments screen. You can go back and review them later if the need arises.
Request Management Escalation
-
On the Loan Details/Remedy Status screen, click Take Action > Request Management Escalation to open the Request Management Escalation screen.
The Request Management Escalation screen has two sections that must be completed before submitting the management escalation: 1. Provide an Explanation and 2. Link Supporting Documents.
-
Enter your rationale for requesting a Management Escalation in the Provide an Explanation text box. This avoids exchanging emails outside of Loan Quality Connect.

-
Complete the Link Supporting Documents section by uploading new documents that support the management escalation and linking documents already in the system to it. See Linking and Uploading Supporting Documents for instructions.
-
Click Submit or Cancel to return to the previous screen and continue working.

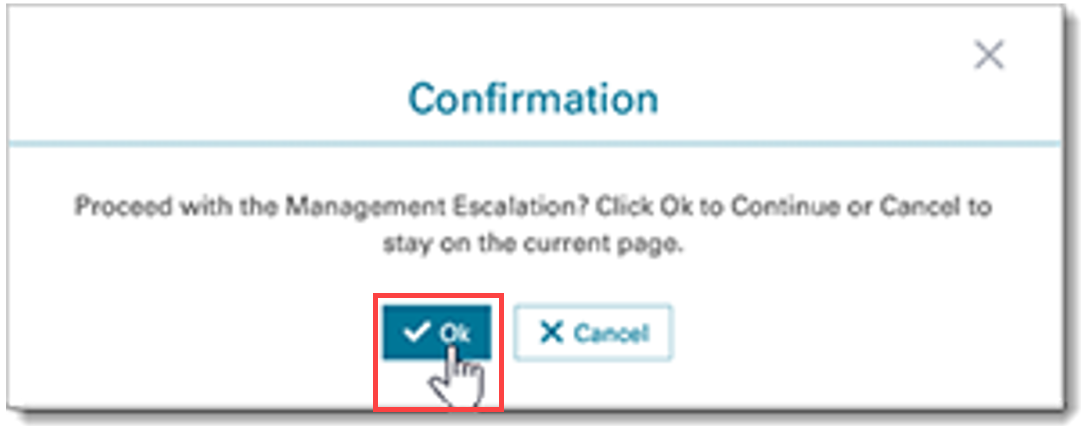
The Confirmation window opens.
-
Click Ok to proceed with management escalation or Cancel to return to the previous screen. Once you click Ok, you will not be able to return to the previous steps.
-
Click the last circle on the progress bar to verify the Management Escalation Request was received by Fannie Mae.

After requesting a Management Escalation on a Resolution Request, the Management Escalation BI card will increase by one. In the event the loan fails to move to the BI card, confirm your Escalation documents have uploaded and your Escalation Reason appears in the Review Comment section; If the Escalation documents have uploaded and the Escalation Reason appears under the Review Comment section, the Fannie Mae Remediation Specialist will automatically be notified to review the request and confirm status. If additional attempts to upload the Escalation documents fail, notify your assigned Fannie Mae contact using information in the top right corner of the screen.
Concur to Repurchase Alternative
-
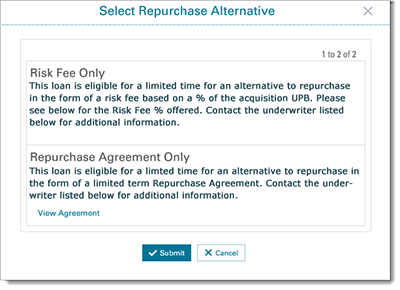
On the Loan Details/Remedy Status screen, click Take Action > Concur to Repurchase Alternative to open the Select Repurchase Alternative window.
-
Click on the Repurchase Alternative text and the system will highlight your selection in blue. Then click Submit.

Note: When multiple Repurchase Alternatives are offered, you may select only one.
-
Once you select a Repurchase Alternative, follow the steps below to request an electronic signature agreement via DocuSign.
-
Enter a comment for your Fannie Mae contact to initiate your electronic signature process. The comment should include the name, title, building address, and email address of the officer whom will execute the agreement along with the email address of any person whom should be copied on the email notices for the document for execution. The DocuSign email notification will have a 15-day expiration. you click Submit, you cannot go back to a previous step.
-
Note: After concurring to a Repurchase Alternative, Fannie Mae sends via DocuSign to the designated signer the lender identifies. The lender has 15 days to execute the agreement before it expires. After execution by Fannie Mae, the lender will receive an email notification that the agreement has been completed. The notification will include the link for the lender to retrieve the fully executed copy for their records. The Fannie Mae contact on the loan will upload an executed copy to Loan Quality Connect.
Post Concur Actions for a Repurchase Alternative Agreement
When you concur to a repurchase alternative, the action increases the Concur Awaiting Remittance BI card count by one.
Note: When you concur to a repurchase alternative, the Remedy Status changes to Resolution Closeout – Lender Action Required and you receive an Alert in Loan Quality Connect. See Lender Action Alerts for more information about alerts.
Follow these steps to upload the executed Repurchase Alternative Agreement after logging in to Loan Quality Connect:
-
Click Resolution Queue, and then click the Concur Awaiting Remittance BI card.
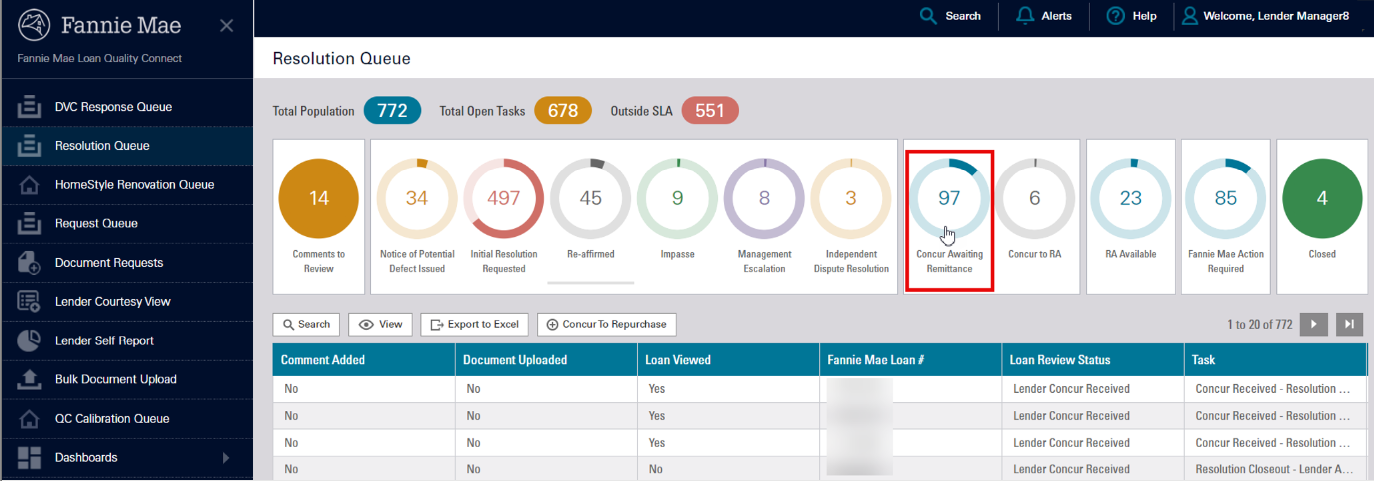
Loans with a status of Lender Concur Received populate the search result area below the BI cards. -
Click the loan of your choice, and then click View – or simply double click the loan – to open the Loan Details page and perform further actions on that loan.

The Loan Details screen appears, indicating Resolution Closeout - Lender Action Required.
-
If you haven't already executed the agreement, click View Agreement on the Loan Details screen to open and download it for execution.

Note: Make sure that the executed agreement is properly named and saved in PDF format (i.e., FanniemaeLoanNumber_ExecutedRepurchaseAlternativeAgreement.pdf) to your computer hard drive.
-
Once the agreement is executed, click Upload Signed Agreement.

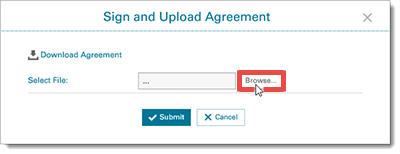
The Sign and Upload Agreement window opens. -
Click Browse.
-
Select the Repurchase Alternative Agreement on your hard drive, and then Open. The document must be in PDF format and named properly, that is FanniemaeLoanNumber_ExecutedRepurchaseAlternativeAgreement.pdf.
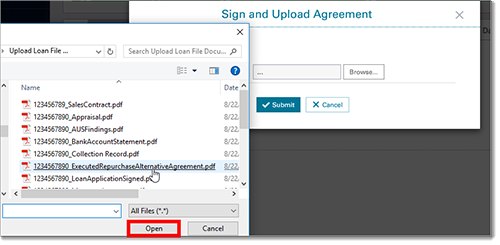
Note: Once the executed Repurchase Alternative Agreement is uploaded in Loan Quality Connect, the “Complete Resolution” task is automatically completed. There are no other tasks to complete. Fannie Mae is notified for the Repurchase Alternative Agreement to be executed and a final copy is uploaded and stored in Loan Quality Connect for future reference by both parties.
Concur to an Indemnification Agreement
- On the Loan Details/Remedy Status screen, click Take Action > Concur to Indemnification Agreement to open the Concur window.
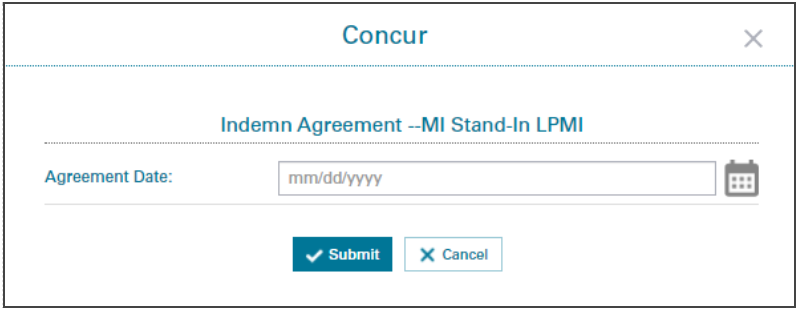
- Click the calendar icon to select an agreement date.
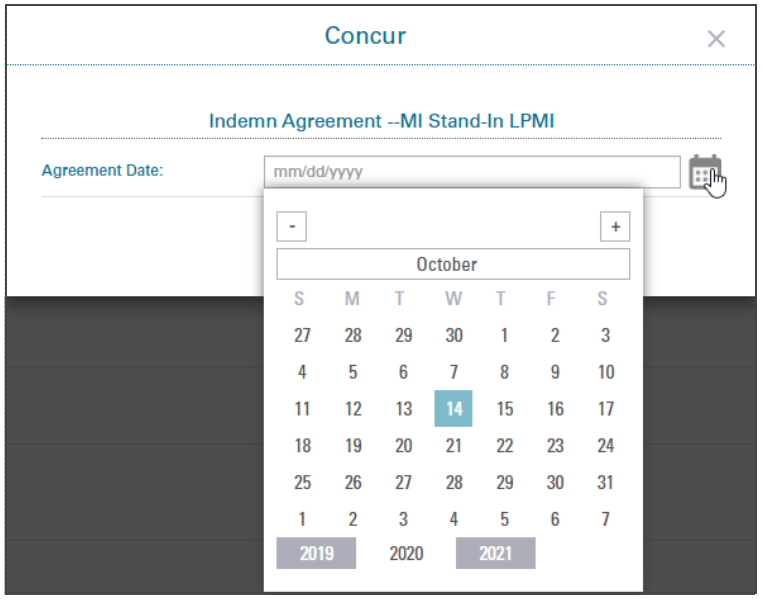
Note: Remember, once you click Submit, you cannot go back to a previous step.
- Click Submit.
- Click Okay to return to the Loan Details screen.

Note: When you concur to an Indemnification Agreement, the Remedy Status changes to Resolution Closeout - Lender Action Required.
- Once you select the Concur to Indemnification Agreement, follow the step below to request an electronic signature agreement via DocuSign:
-
Enter a comment for your Fannie Mae contact to initiate your electronic signature process. The comment should include the name, title, building address, and email address of the officer whom will execute the agreement along with the email address of any person whom should be copied on the email notices for the document for execution. The DocuSign email notification will have a 15-day expiration.
-
Post Concur Actions for Indemnification Agreement
This section shows users how to locate the agreement on the loan and open the agreement to view, download, print, and upload upon execution. This requires the use of a scanner and printer to manually perform the steps avoided by using the preferred DocuSign electronic execution process.
After concurring to an Indemnification Agreement, generate the agreement for execution and return it to Fannie Mae. Lenders have 15 calendars days to execute the Indemnification Agreement and upload it in Loan Quality Connect.
When you concur to an Indemnification Agreement, the action increases the Concur Awaiting Remittance BI card count by one. You must take additional steps in Loan Quality Connect to complete the transaction, including:
- View, print, execute, scan, and save the Indemnification Agreement.
- Upload the executed Indemnification Agreement in Loan Quality Connect.
- Notify Fannie Mae the Initial Executed Indemnification Agreement has been uploaded.
Follow these steps to view, print, and download the executed Indemnification Agreement after logging in to Loan Quality Connect:
- Click Resolution Queue, and then click the Concur Awaiting Remittance BI card.
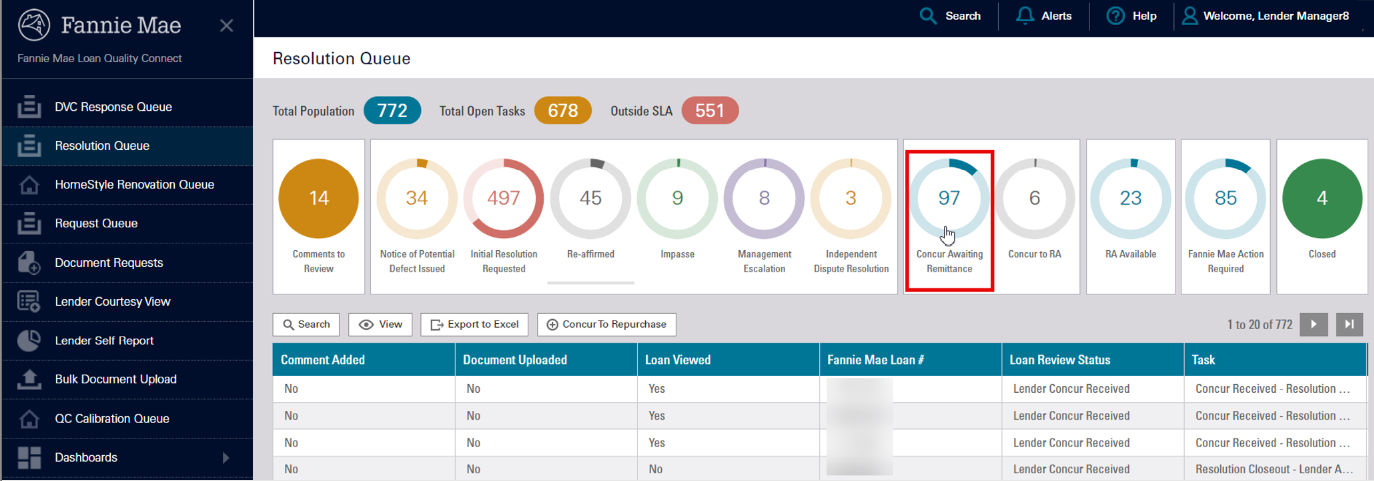
Loans with a status of Lender Concur Received populate the search result area below the BI cards.
- Click the loan of your choice, and then click View – or simply double click the loan – to open the Loan Details page and perform further actions on that loan.

The Loan Details screen appears, indicating Resolution Closeout - Lender Action Required.

- On the Remedy Status tab scroll down to the Agreement section and click View Agreement to generate the Indemnification Agreement.
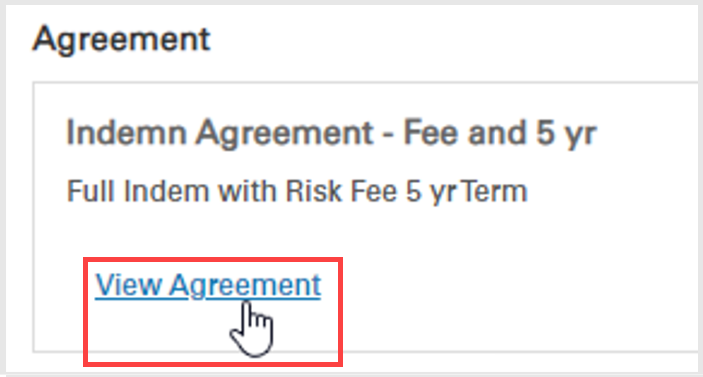
- Indemnification Agreement opens. Click Download PDF.

- Open the PDF located at the bottom left corner of the screen.

- From the PDF document, click the download button to save the document to your computer hard drive. The document must be a PDF.

- After the document has been downloaded, get the officer signature and upload the Agreement in Loan Quality Connect. Follow these steps to upload the executed agreement:
a. From the Documents tab, click Upload Additional Document.

b. On the Upload Document screen, select the following values:
Category = Resolution
Type = AppealSupportingDocument
Description = Enter a description (optional)
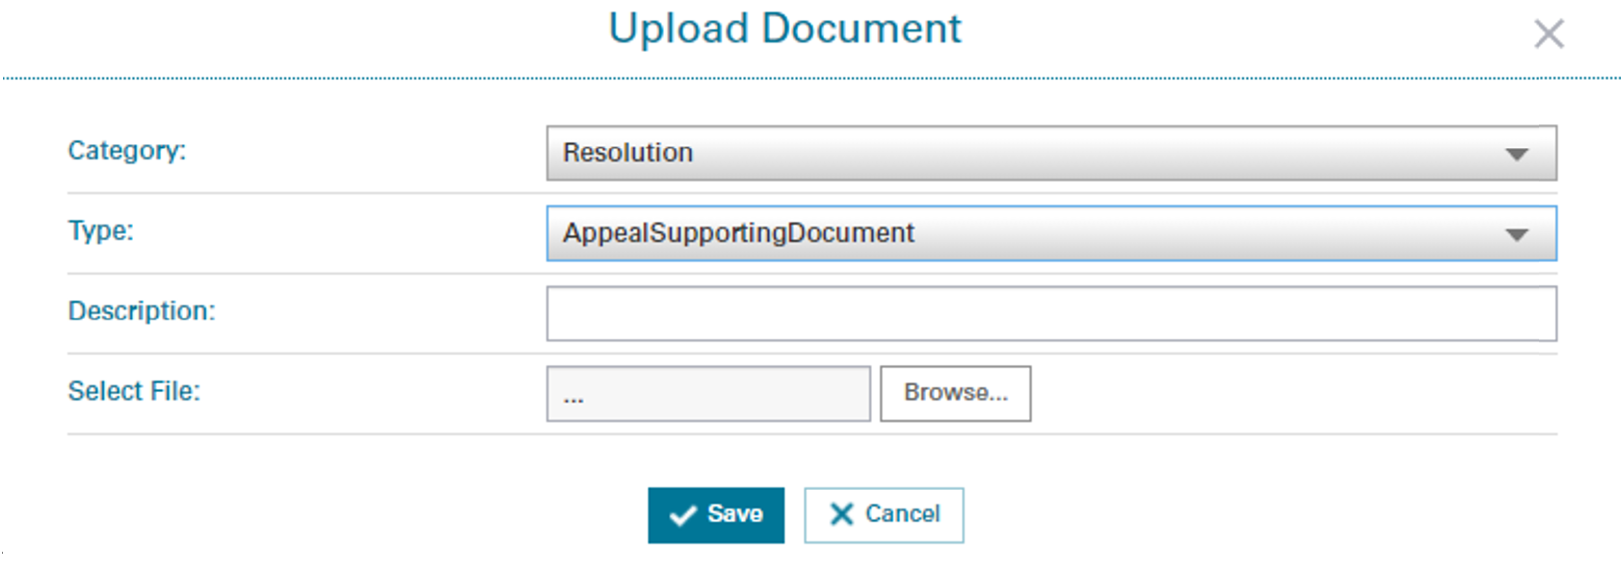
c. Click Browse. Select the Initial Lender Executed Indemnification Agreement on your hard drive, and then click Open.
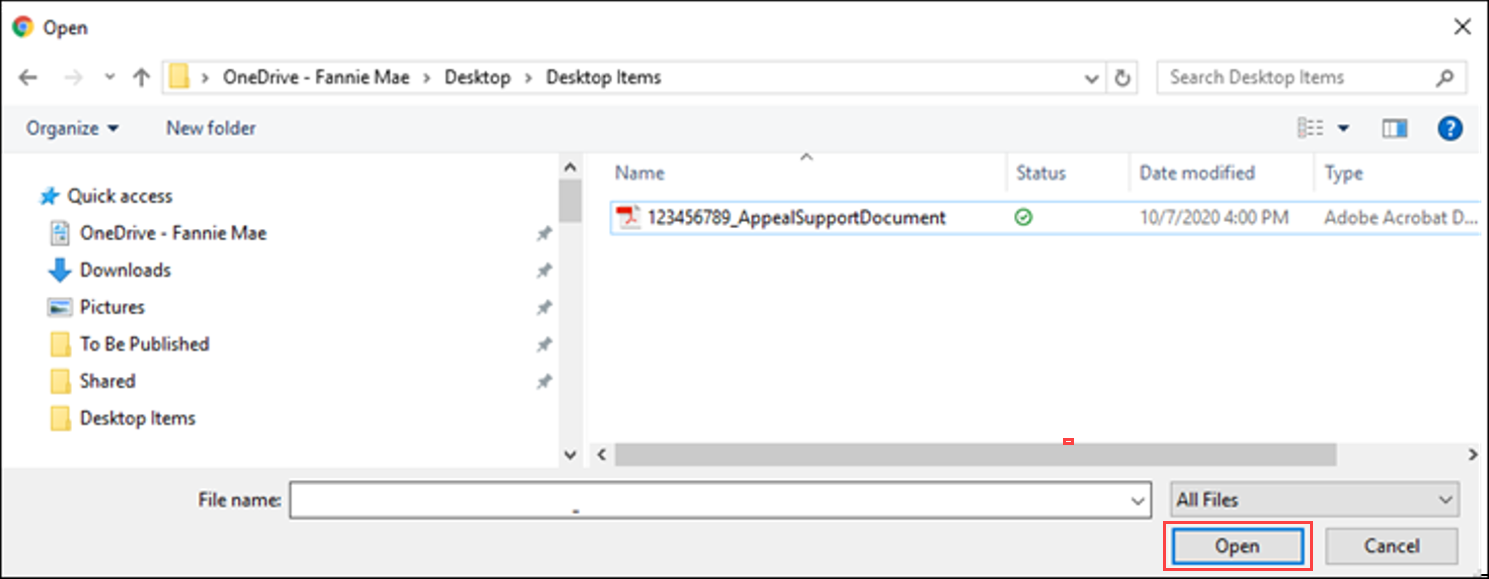
d. Click Save.

e. Navigate to the Comments tab and enter comments informing Fannie Mae the Indemnification Agreement document has been uploaded.
f. Navigate to the Remedy tab. Click Take Action and select Complete Resolution to complete the lender task for the loan.
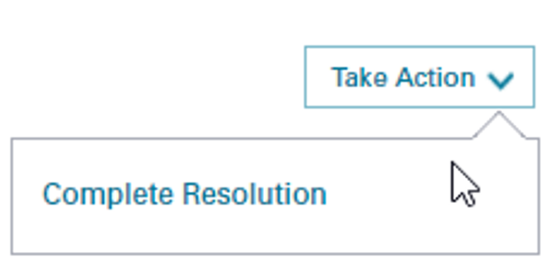
8. The Remedy Status tab will display Resolution Closeout – Lender Action Required. However, if you navigate to the status tab you will notice the Resolution Closeout – Lender Action Required task status indicates it’s Complete.

Note: Once Fannie Mae executes and processes the final Indemnification Agreement, Fannie Mae will upload the Final Executed Indemnification Agreement document to the Documents tab and will close the review to remove the loan from the Concur Awaiting Remittance BI Card. The loan remains searchable and the agreement viewable after closure of the review.
Concur to Repurchase - Single Loan
-
On the Loan Details/Remedy Status screen, click Take Action > Concur to Repurchase to open the Concur to Repurchase window.

-
Click the calendar icon to select a remit date.
Note: Select a date of 15 calendar days for loans delivered as cash or the last business day of the next reporting cycle month for MBS loans.
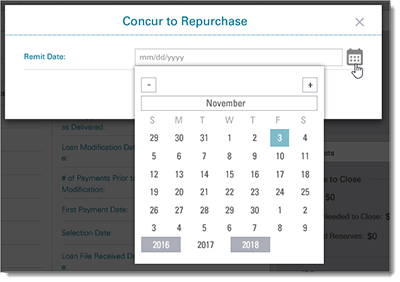
The Information window opens.
-
Click Submit.
Note: Remember, once you click Submit, you cannot go back to a previous step.
-
Click Okay to finalize the Concur to Repurchase.

Concurring to a Repurchase increases the Concur Received BI card count by one.
(New) Concur to Repurchase - Bulk Loans
The Resolution Queue grid includes an action button to concur to repurchase. The lender can select one or more loans in the queue and click the Concur to Repurchase action to manage efficiently a group of loans.
Note: The Concur to Repurchase action button is Not used for concurring to a Repurchase Alternative.
- From the Resolution Queue, select the loans on which to concur.
- Click on the Concur to Repurchase button.

- Click on Concur if you want to proceed or Cancel to return to the Resolution Queue.

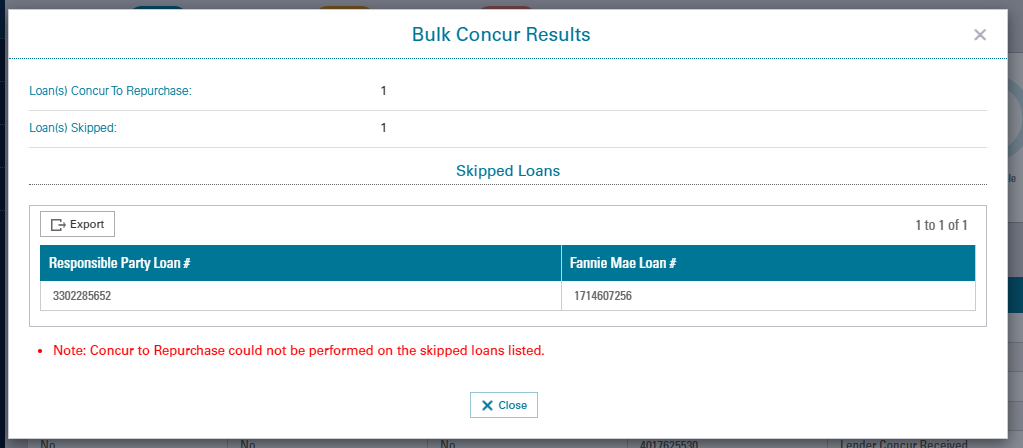
After you select Concur, a pop-up window Bulk Concur Results will display the number of loans that successfully were updated to concur to repurchase.
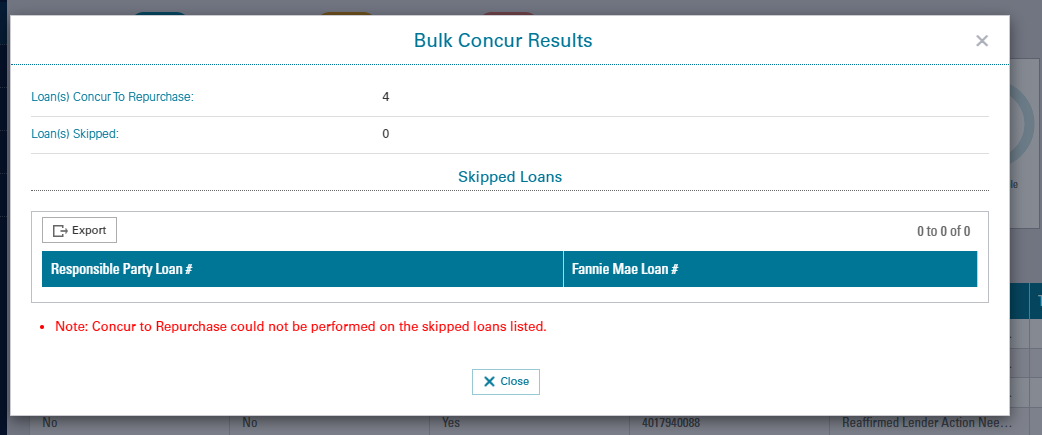
The Bulk Concur Results will display the loan number(s) that are not update. (e.g. loan was already in concur, or there is no task for the lender).
Post Concur Actions for a Repurchase
When you concur to a repurchase, the action increases the Concur Received BI card count by one. You must take additional steps in Loan Quality Connect to complete the transaction, including:
- Selecting the date the funds will be remitted to Fannie Mae.
- Completing the Resolution
Note: When you concur to a repurchase, the Remedy Status changes to Resolution Closeout – Lender Action Required and you receive an Alert in Loan Quality Connect. See Lender Action Alerts for more information about alerts.
Follow these steps to complete the repurchase transaction after logging in to Loan Quality Connect.
-
Click Resolution Queue, and then click the Concur Awaiting Remittance BI card.
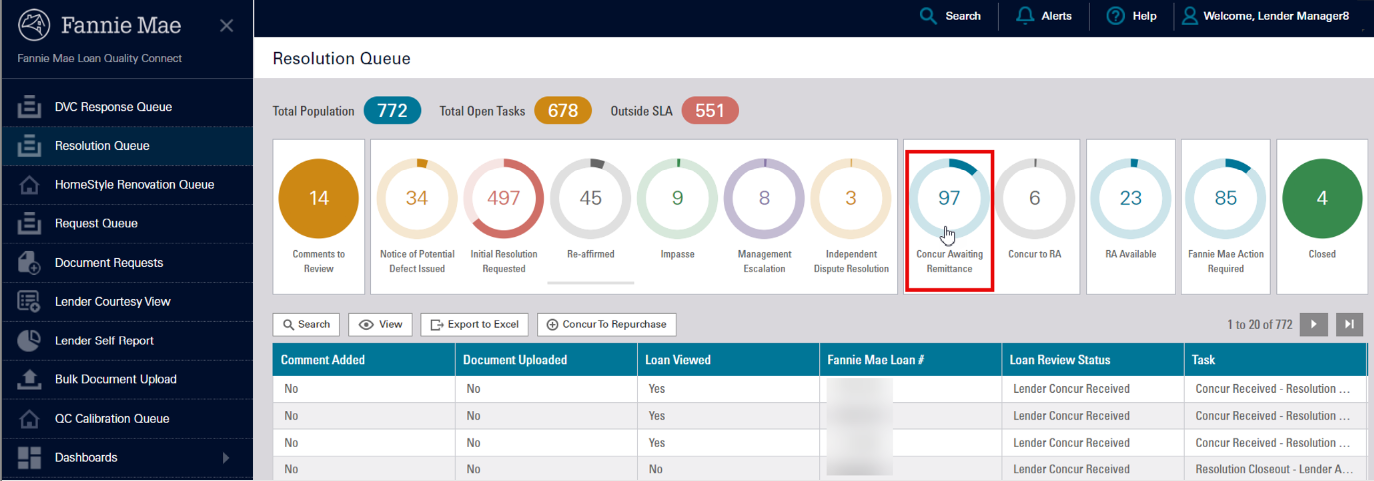
Loans with a status of concur received populate the search result area below the BI cards. -
Click the loan of your choice, and then click View – or simply double click the loan – to open the Loan Details page and perform further actions on that loan.

The Loan Details screen appears, indicating Resolution Closeout - Lender Action Required. -
Click the calendar icon to open the date picker.

-
Select a repurchase remittance date, and then click Save.
The projected remittance date is expected to be 15 calendar days for loans delivered as cash and MBS loans – to be reported end of month for the next reporting cycle.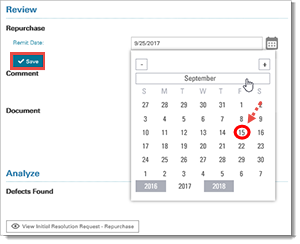
-
Click Take Action, and then Complete Resolution.

The Confirmation window appears. -
Click Proceed to confirm to proceed with the Resolution Completion.

(New) Determining How to Remit Funds on a Repurchase Request
After you concur to a repurchase request, follow these steps to determine whom to contact for the amount to remit and next steps:
-
First determine if the loan is Active or Liquidated. To do this simply navigate and expand the Remedies widget. The data will be displayed in the SIR Loan Status field.
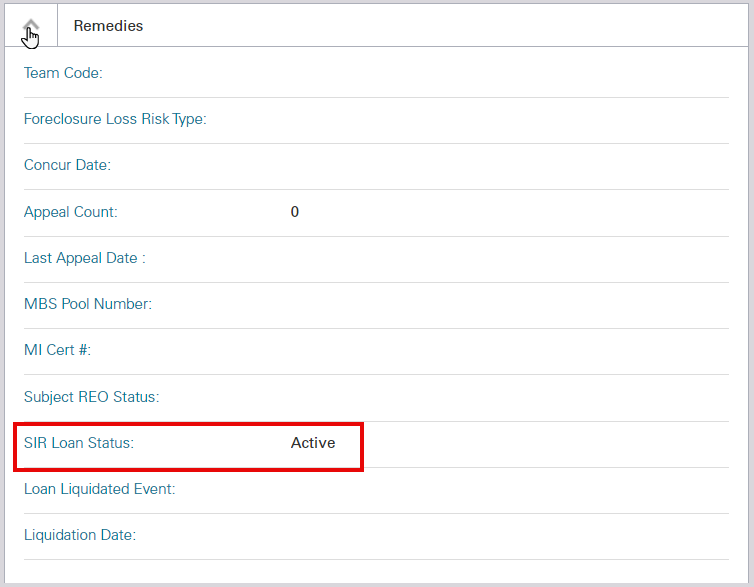
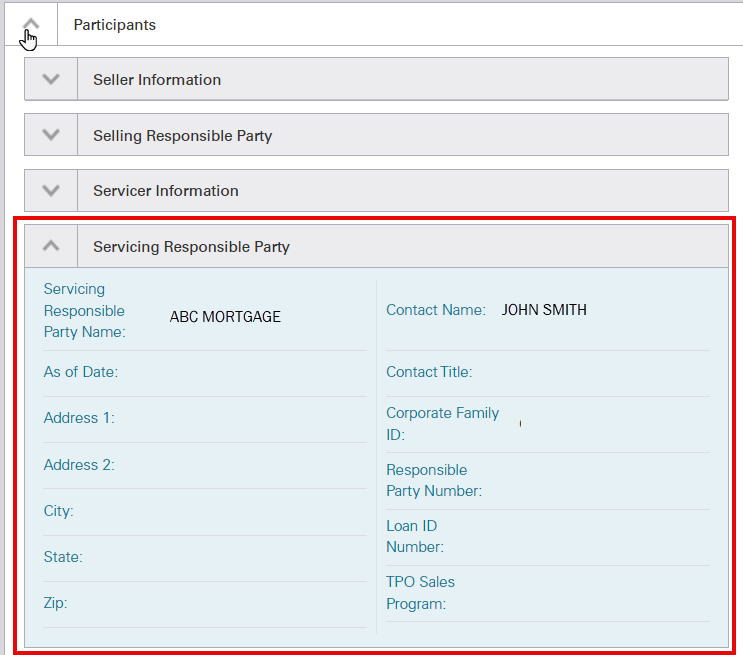
- For Active loans, locate the Servicer on the loan by expanding the Participants widget and reviewing the Contact Name that is located under the Servicing Responsible Party section.
-
Once you locate the servicer information, you will need to send an email to the Servicer requesting wiring instructions and the calculations of the repurchase remittance amount. Please ensure a copy of the resolution request letter is attached to the email. Refer to Viewing Letters and Historical Communications to download a copy of the resolution request letter.
-
For Liquidated/REO loans, send an email to [email protected] for a loss reimbursement/repurchase statement from Fannie Mae.
Note: Refer to the Determining the Amount to Remit job aid for additional instructions.