My web
Linking and Uploading Supporting Documents - Manager
![]()
When performing loan remediation tasks, you often need to upload new documents or link those already in the system to correct a specific loan defect. Loan Quality Connect enables you to perform these two functions from the same screen to respond to a Notice of Potential Defect or submit an Appeal to a Resolution Request, an Impasse, a Management Escalation, or an Independent Dispute Resolution (IDR). In other words, document management capabilities are at your fingertips exactly when you need them – and you don't have to navigate outside Loan Quality Connect or even change screens. You can see exactly which documents you have already submitted to Fannie Mae and upload new ones in real time when necessary.
This job aid describes the procedures for linking documents already in Loan Quality Connect to a specific request from Fannie Mae. It also describes how to upload new documents to support your response to Fannie Mae. The steps work the same whether you are responding to a Notice of Potential Defect or submitting an Appeal, Impasse, Management Escalation, or IDR.
First you must navigate to the screen where you are taking an action that requires linking existing or uploading new documentation. Follow these steps to do so:
- Click Initial Resolution Queue, and then the appropriate BI card for the task you want to perform. The Initial Resolution Request BI card is the one used in this example.
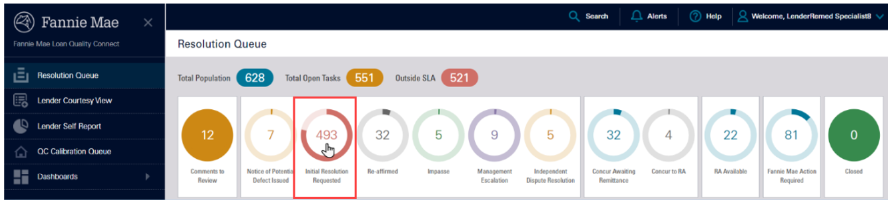
Note: Because the Initial Resolution Request BI card was selected, loans with a Resolution Request populate the search result area below the BI cards.
- Click the loan of your choice, and then click View – or simply double click the loan – to open the Loan Details page and perform further actions on that loan.
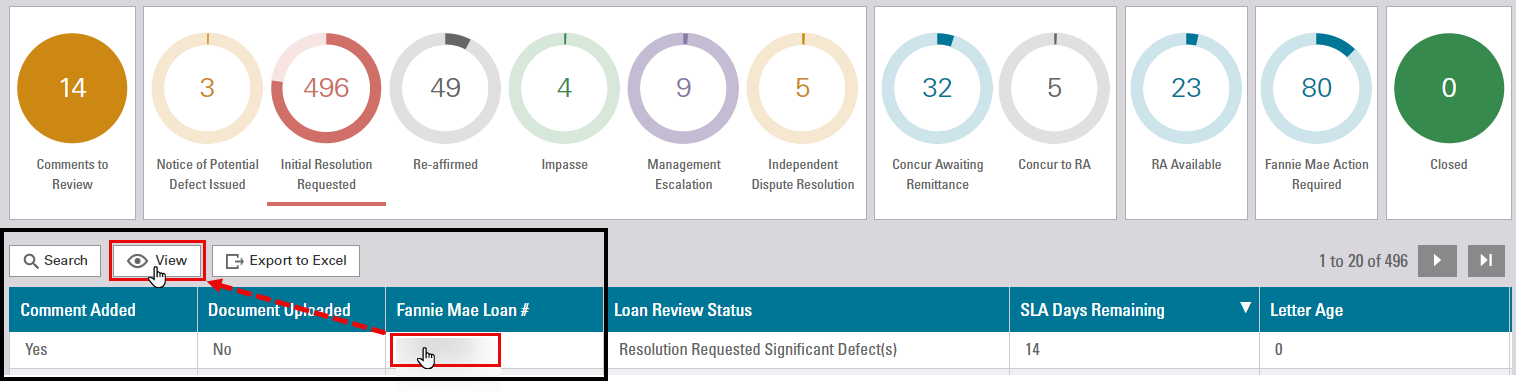
Note: The Loan Details page opens, defaulting to the Remedy Status screen.
-
Open the Initial Resolution Request letter using the following two options:
-
Click the icon under the Resolution Request on the progress bar at the top of the page, then click View Resolution Request. The Resolution Request letter opens.

-
Scroll down the Loan Details page and click View Initial Resolution Request. The Resolution Request letter opens.

-
-
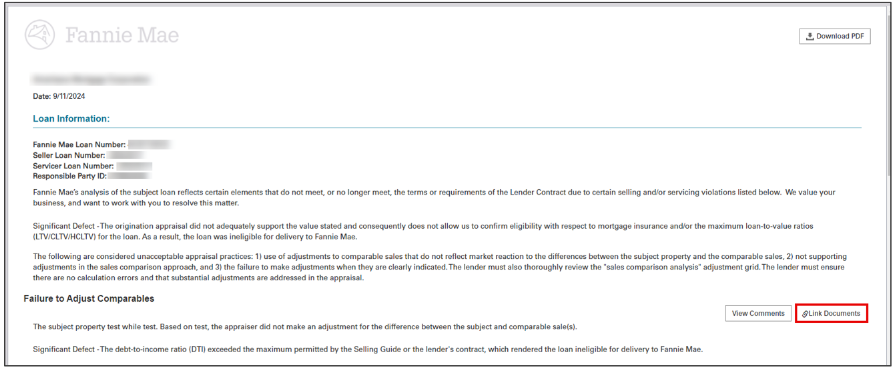
Scroll down the Resolution Request letter and click Link Documents.
-
Follow the instructions on the screen.
Note: From the Link Existing Document screen you can link documents already in Loan Quality Connect to support the action you are taking. Here you an also upload new documents.
Link Documents
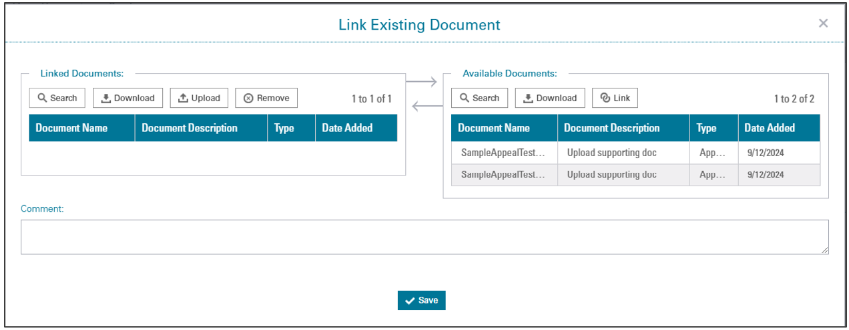
Follow these steps to link supporting documents to the remediation action you are taking:
-
Select a document in the Available Documents column and click Link.
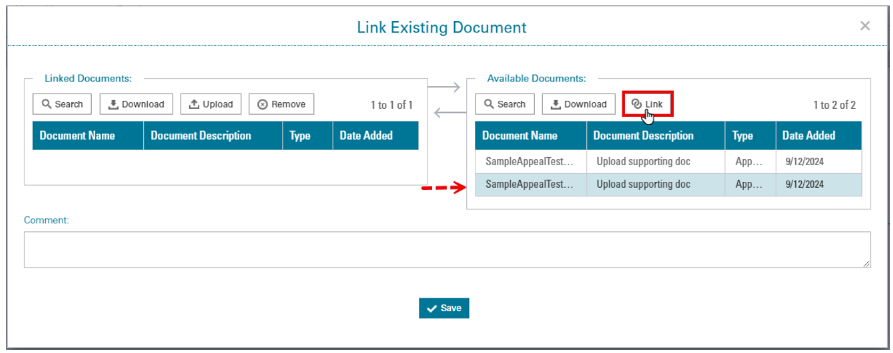
Note: The document now appears in the Linked Documents column.
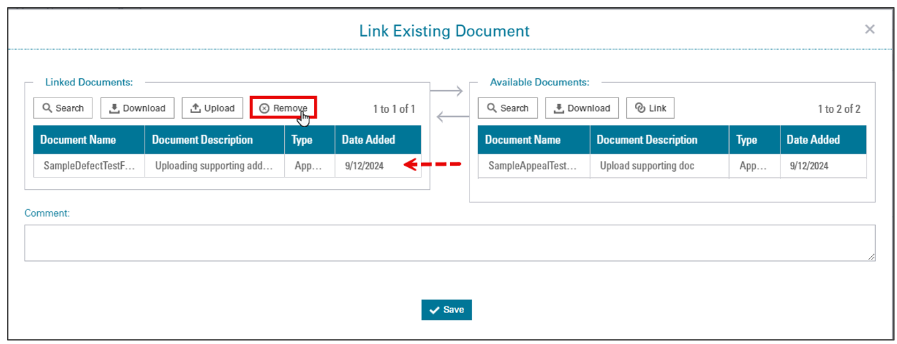
-
Click Remove to send it back to Available Documents.
Upload New Documents
Follow these steps to upload new documentation that supports the remediation action you are taking:
-
Click Upload in the Linked Documents column.
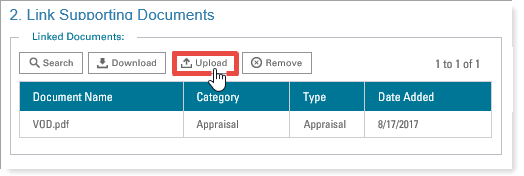
The Upload Document window opens.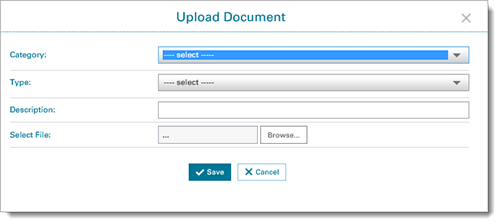
-
Select the Category and Type of document you want to upload from the drop-down menus, and then enter a Description of the document.
Important: Please avoid selecting LoanFile as the Document Type unless a loan file is specifically requested, as this may cause delays in the review process.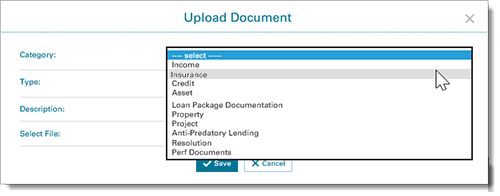
-
Click Browse to open your local directory. Select the document you want to upload, and then Open.
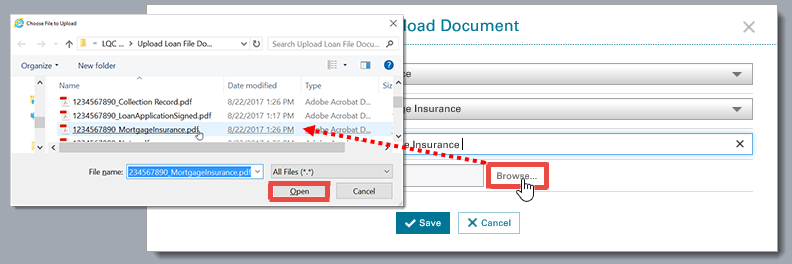
Note: The Upload Document window now displays information about the document, its directory path, and the file name.
-
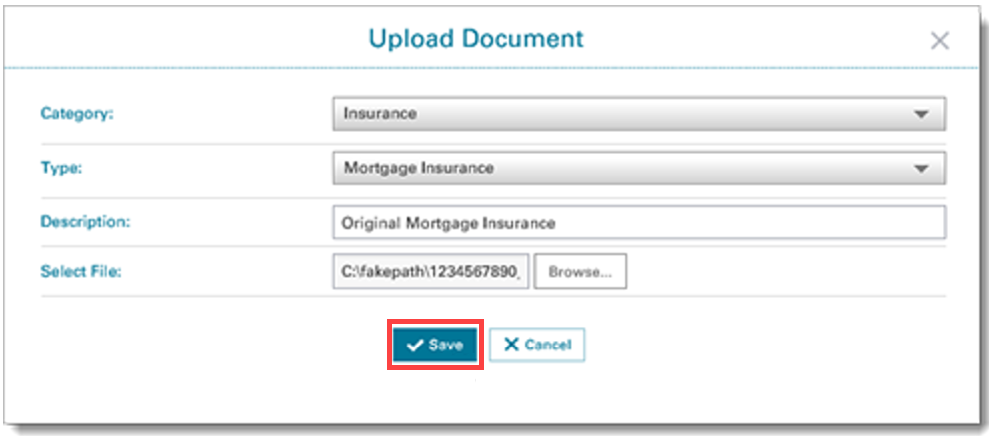
Click Save.
-
Click Okay if the message indicates the file uploaded successfully. If there is an error message instead, return to Step 3 and repeat the process.
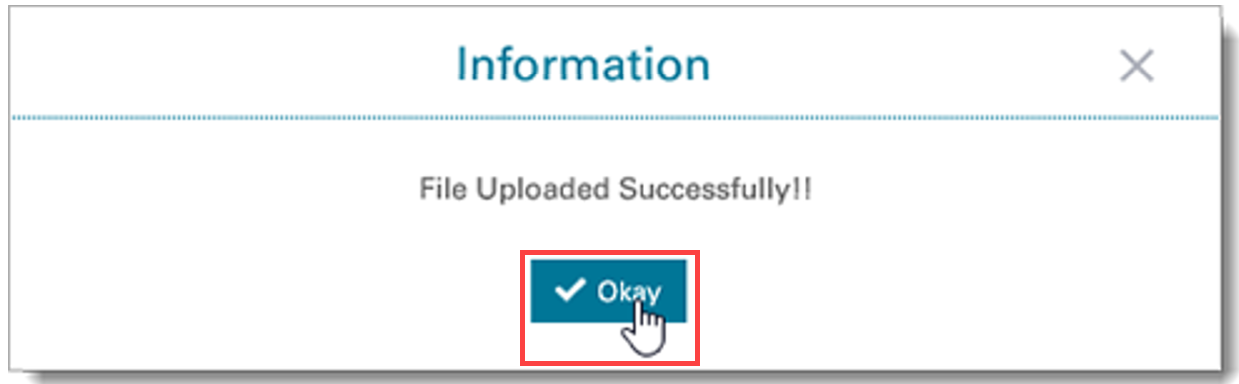
Note: The uploaded document now displays in the Linked Documents queue.