My web
Manage Applications Multifamily Non-Seller
![]()
This job aid explains how to manage applications and approvals for Multifamily (MF) Non-Seller User Administrators only.
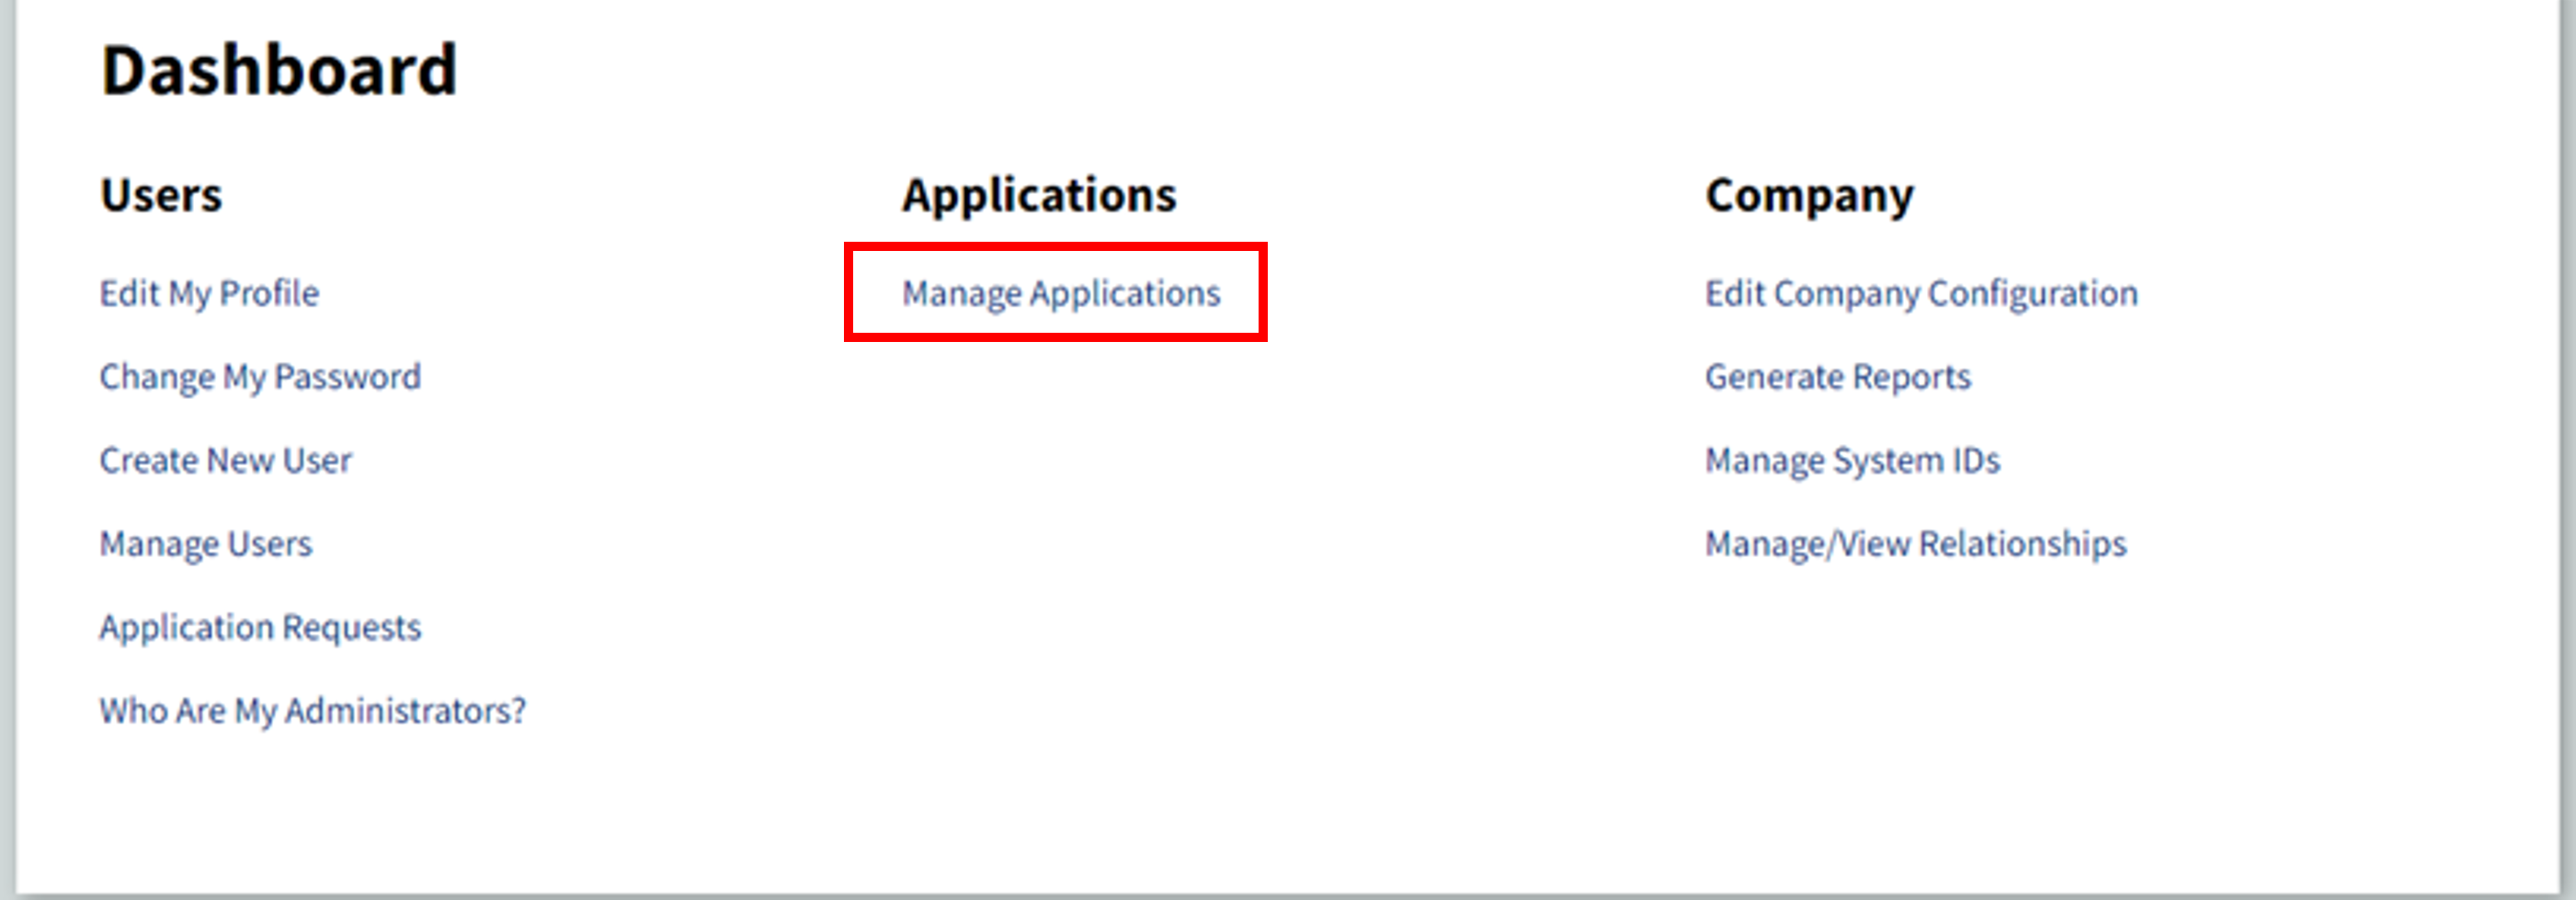
- From the Dashboard, select Manage Applications.
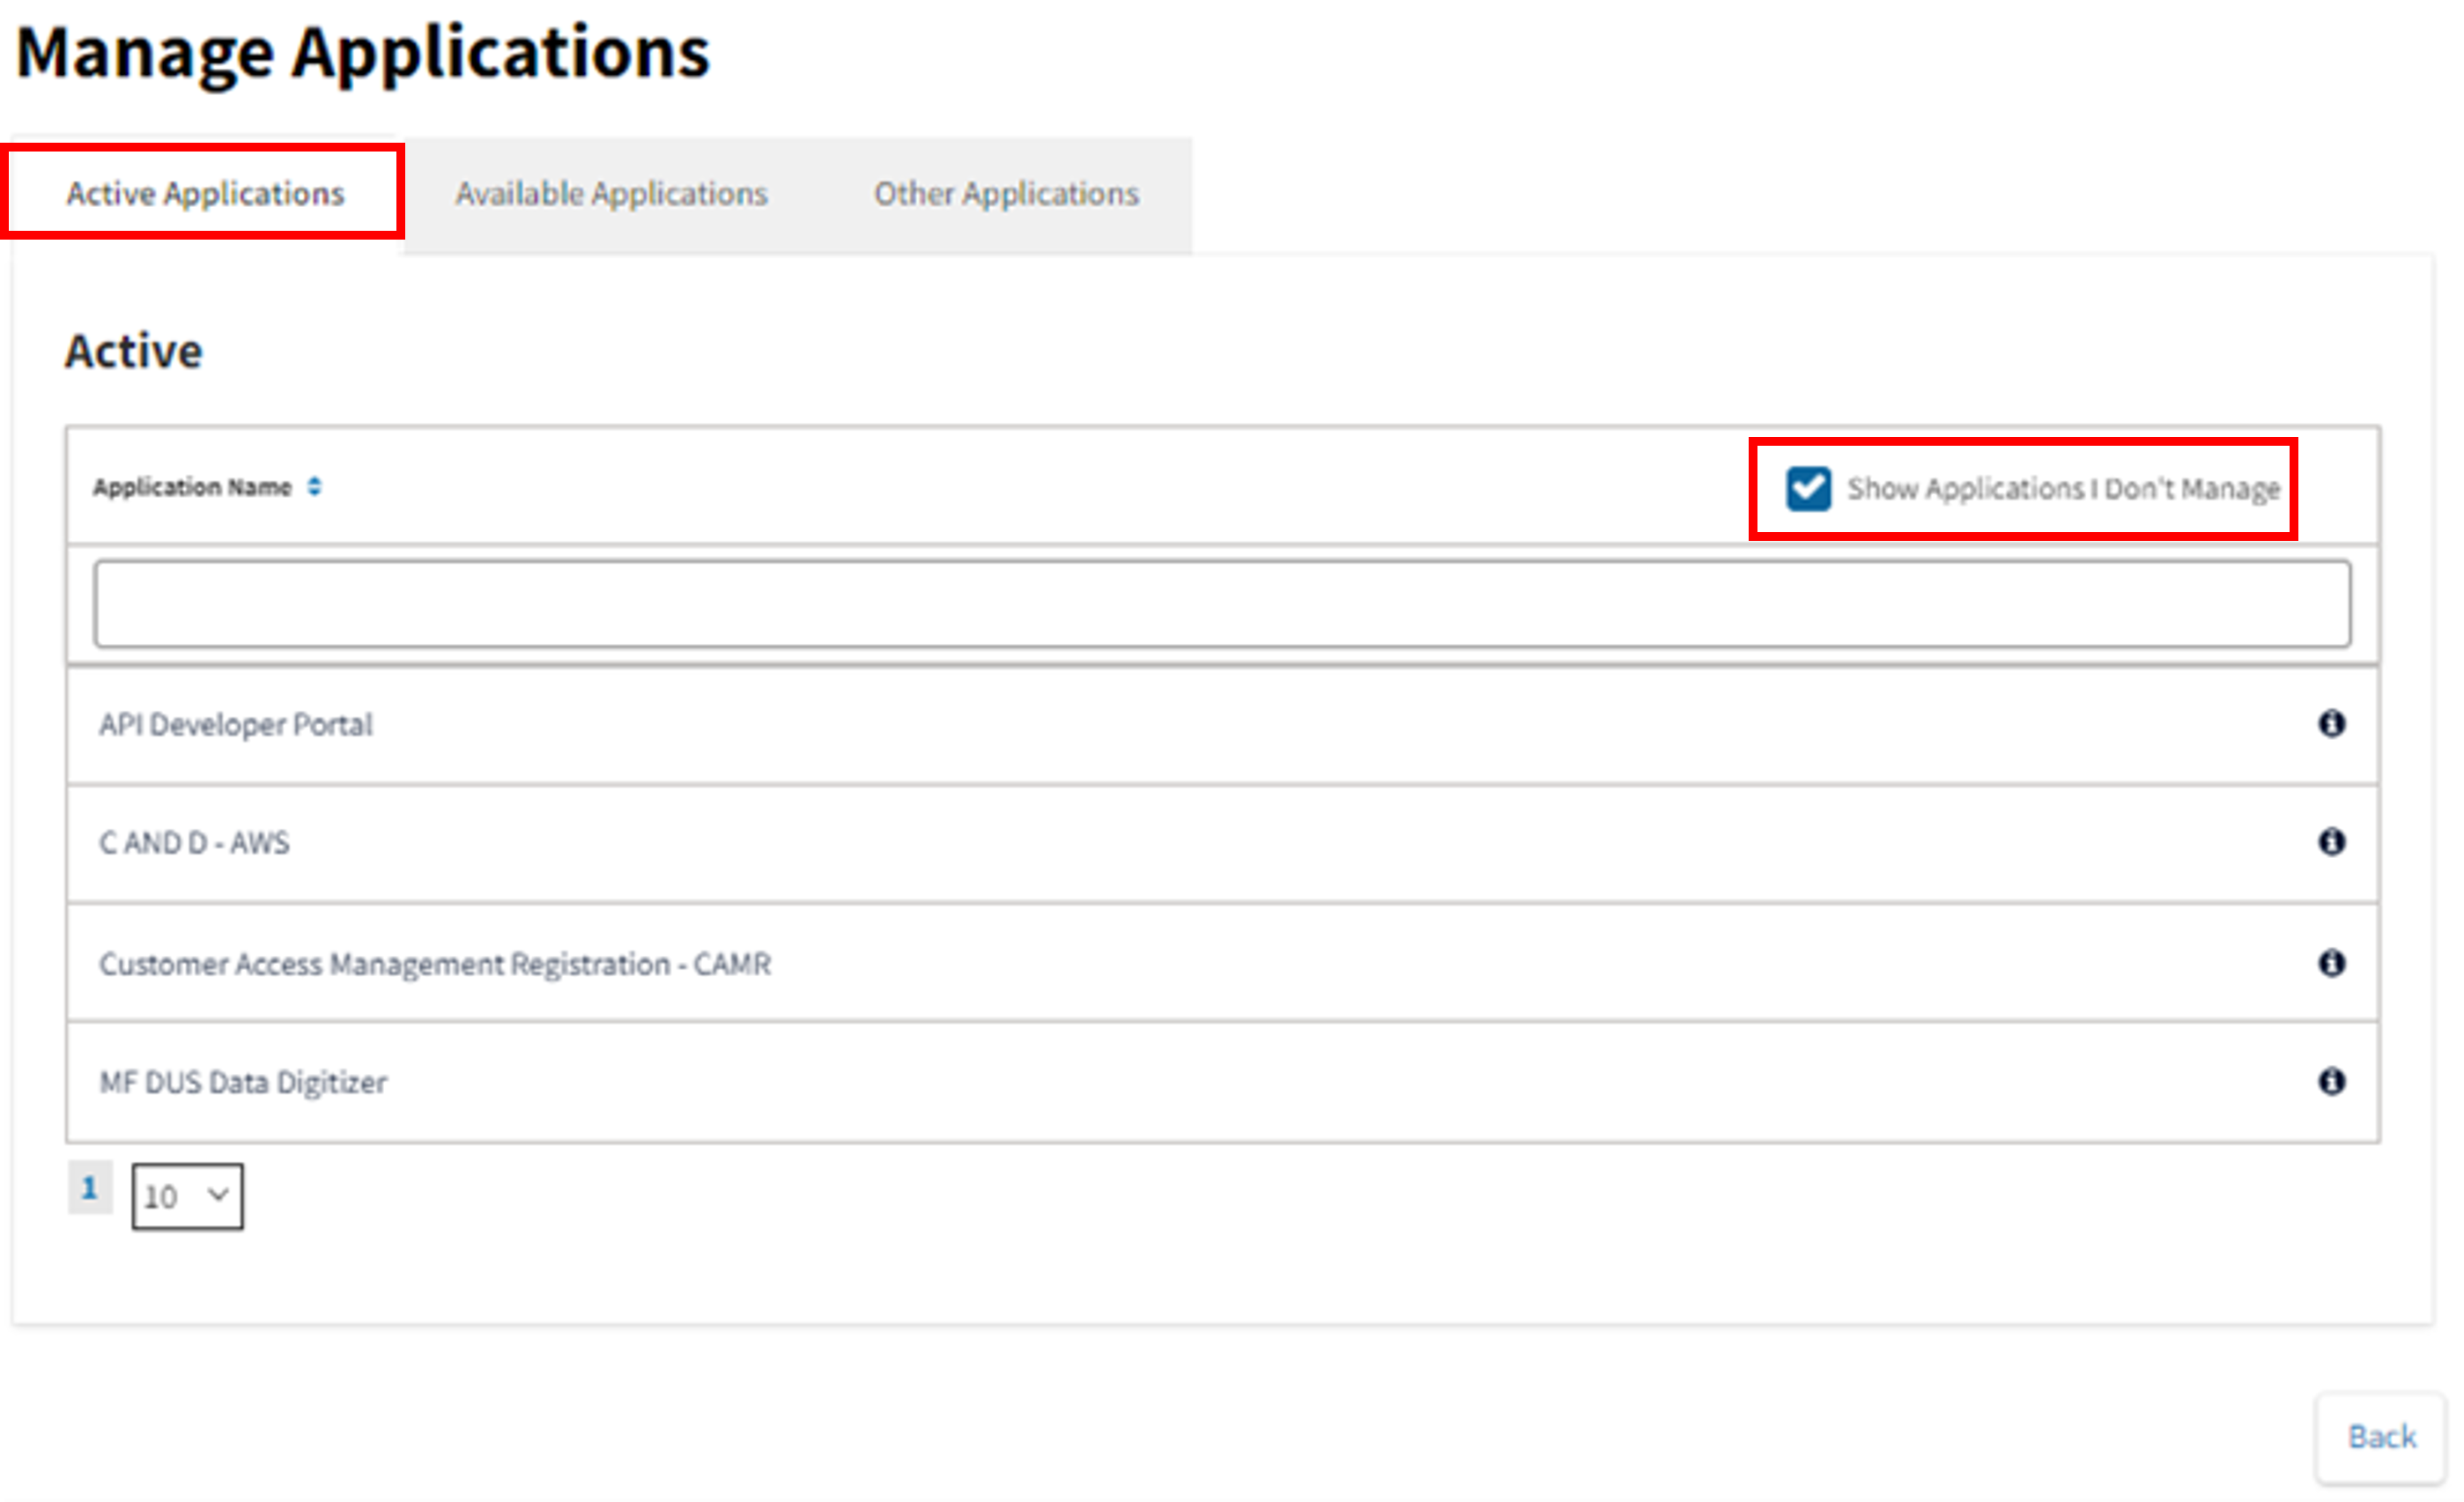
- Manage Applications has three available tabs:
- Active Applications: Already set up for the organization and can be managed in the self-service system. This also includes applications that are not managed by the administrator but are setup and managed by Fannie Mae for your organization in Technology Manager.
- Available Applications: Ready to be set up and added to an organization’s list of active applications, but need to be first set up for user groups and data folders before they can be further associated to users within the organization. An Available application may require agreement to Terms and Conditions as part of the setup process.
- Other Applications: An organization is eligible to request access, based on the organization’s Technology Profile. There are some steps that the organization and/or Fannie Mae must complete before it can be put into the Available Applications list.

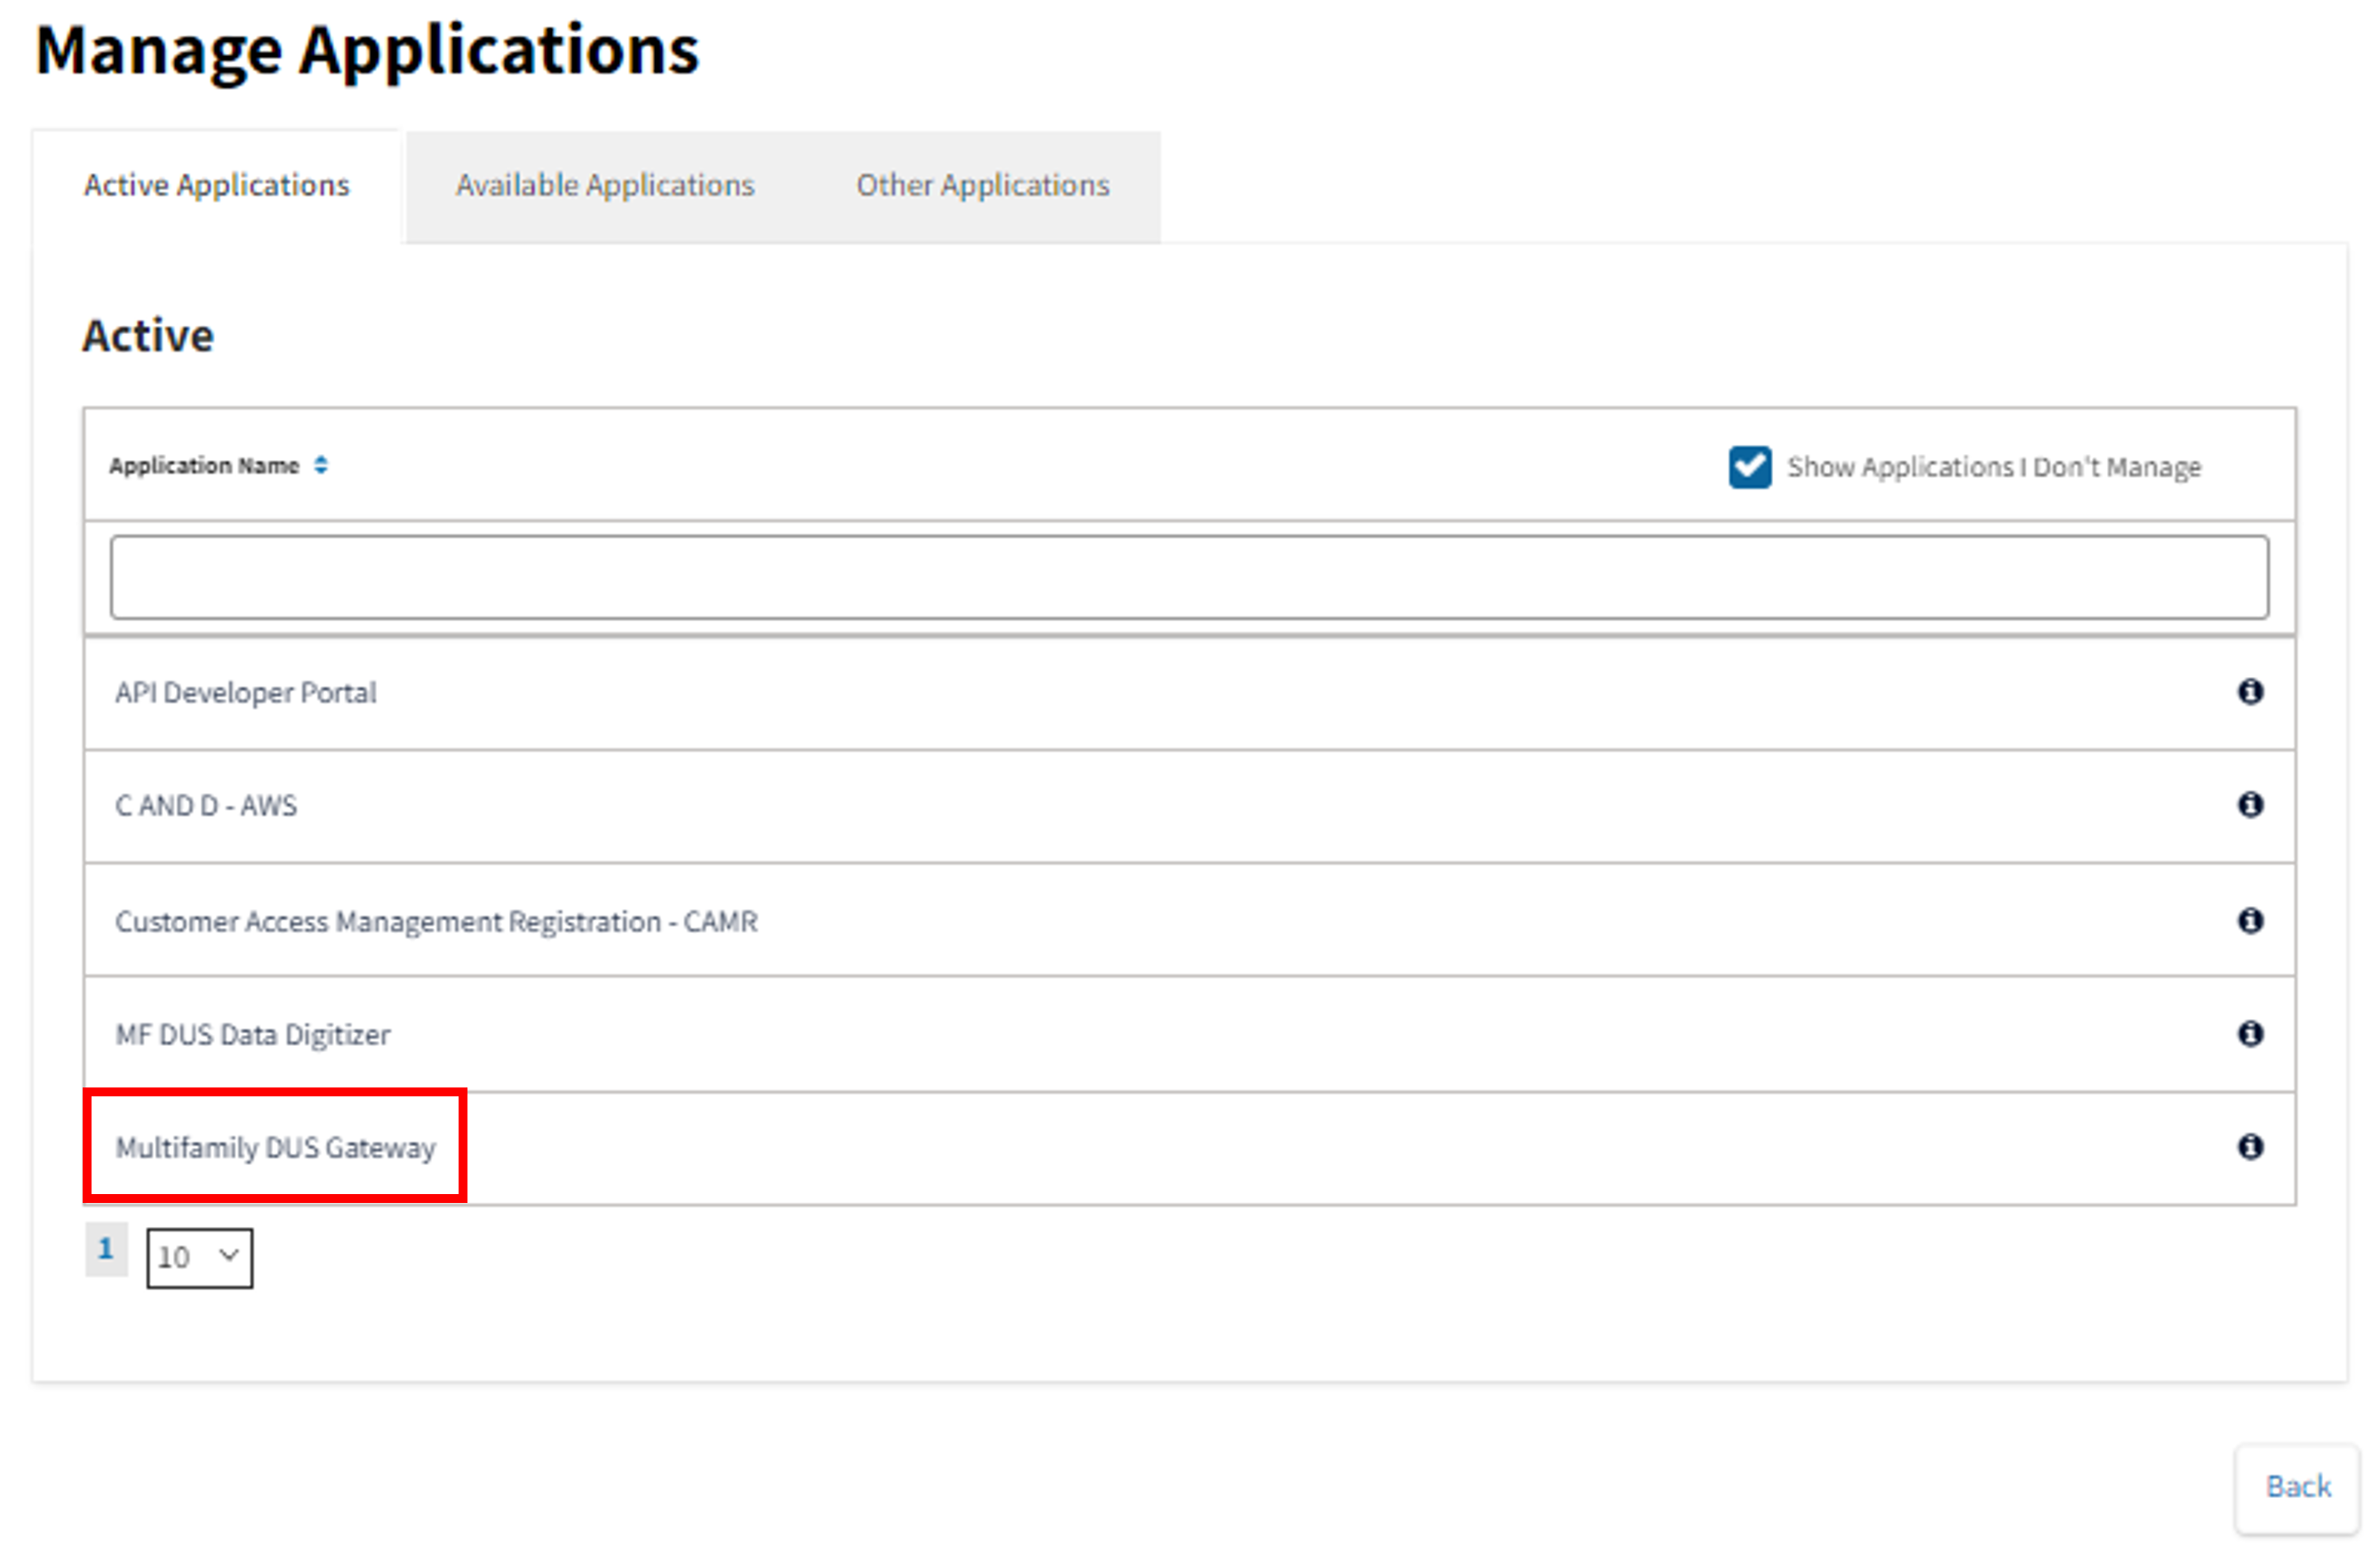
- Select Active Applications to view all applications the MF Non-Seller UA has access to and select check box to view applications that are not managed by UA.
- Select Available Applications tab to view all applications the MF Non-Seller UA may set-up as an Active Application. Click on application to Select applicable application.
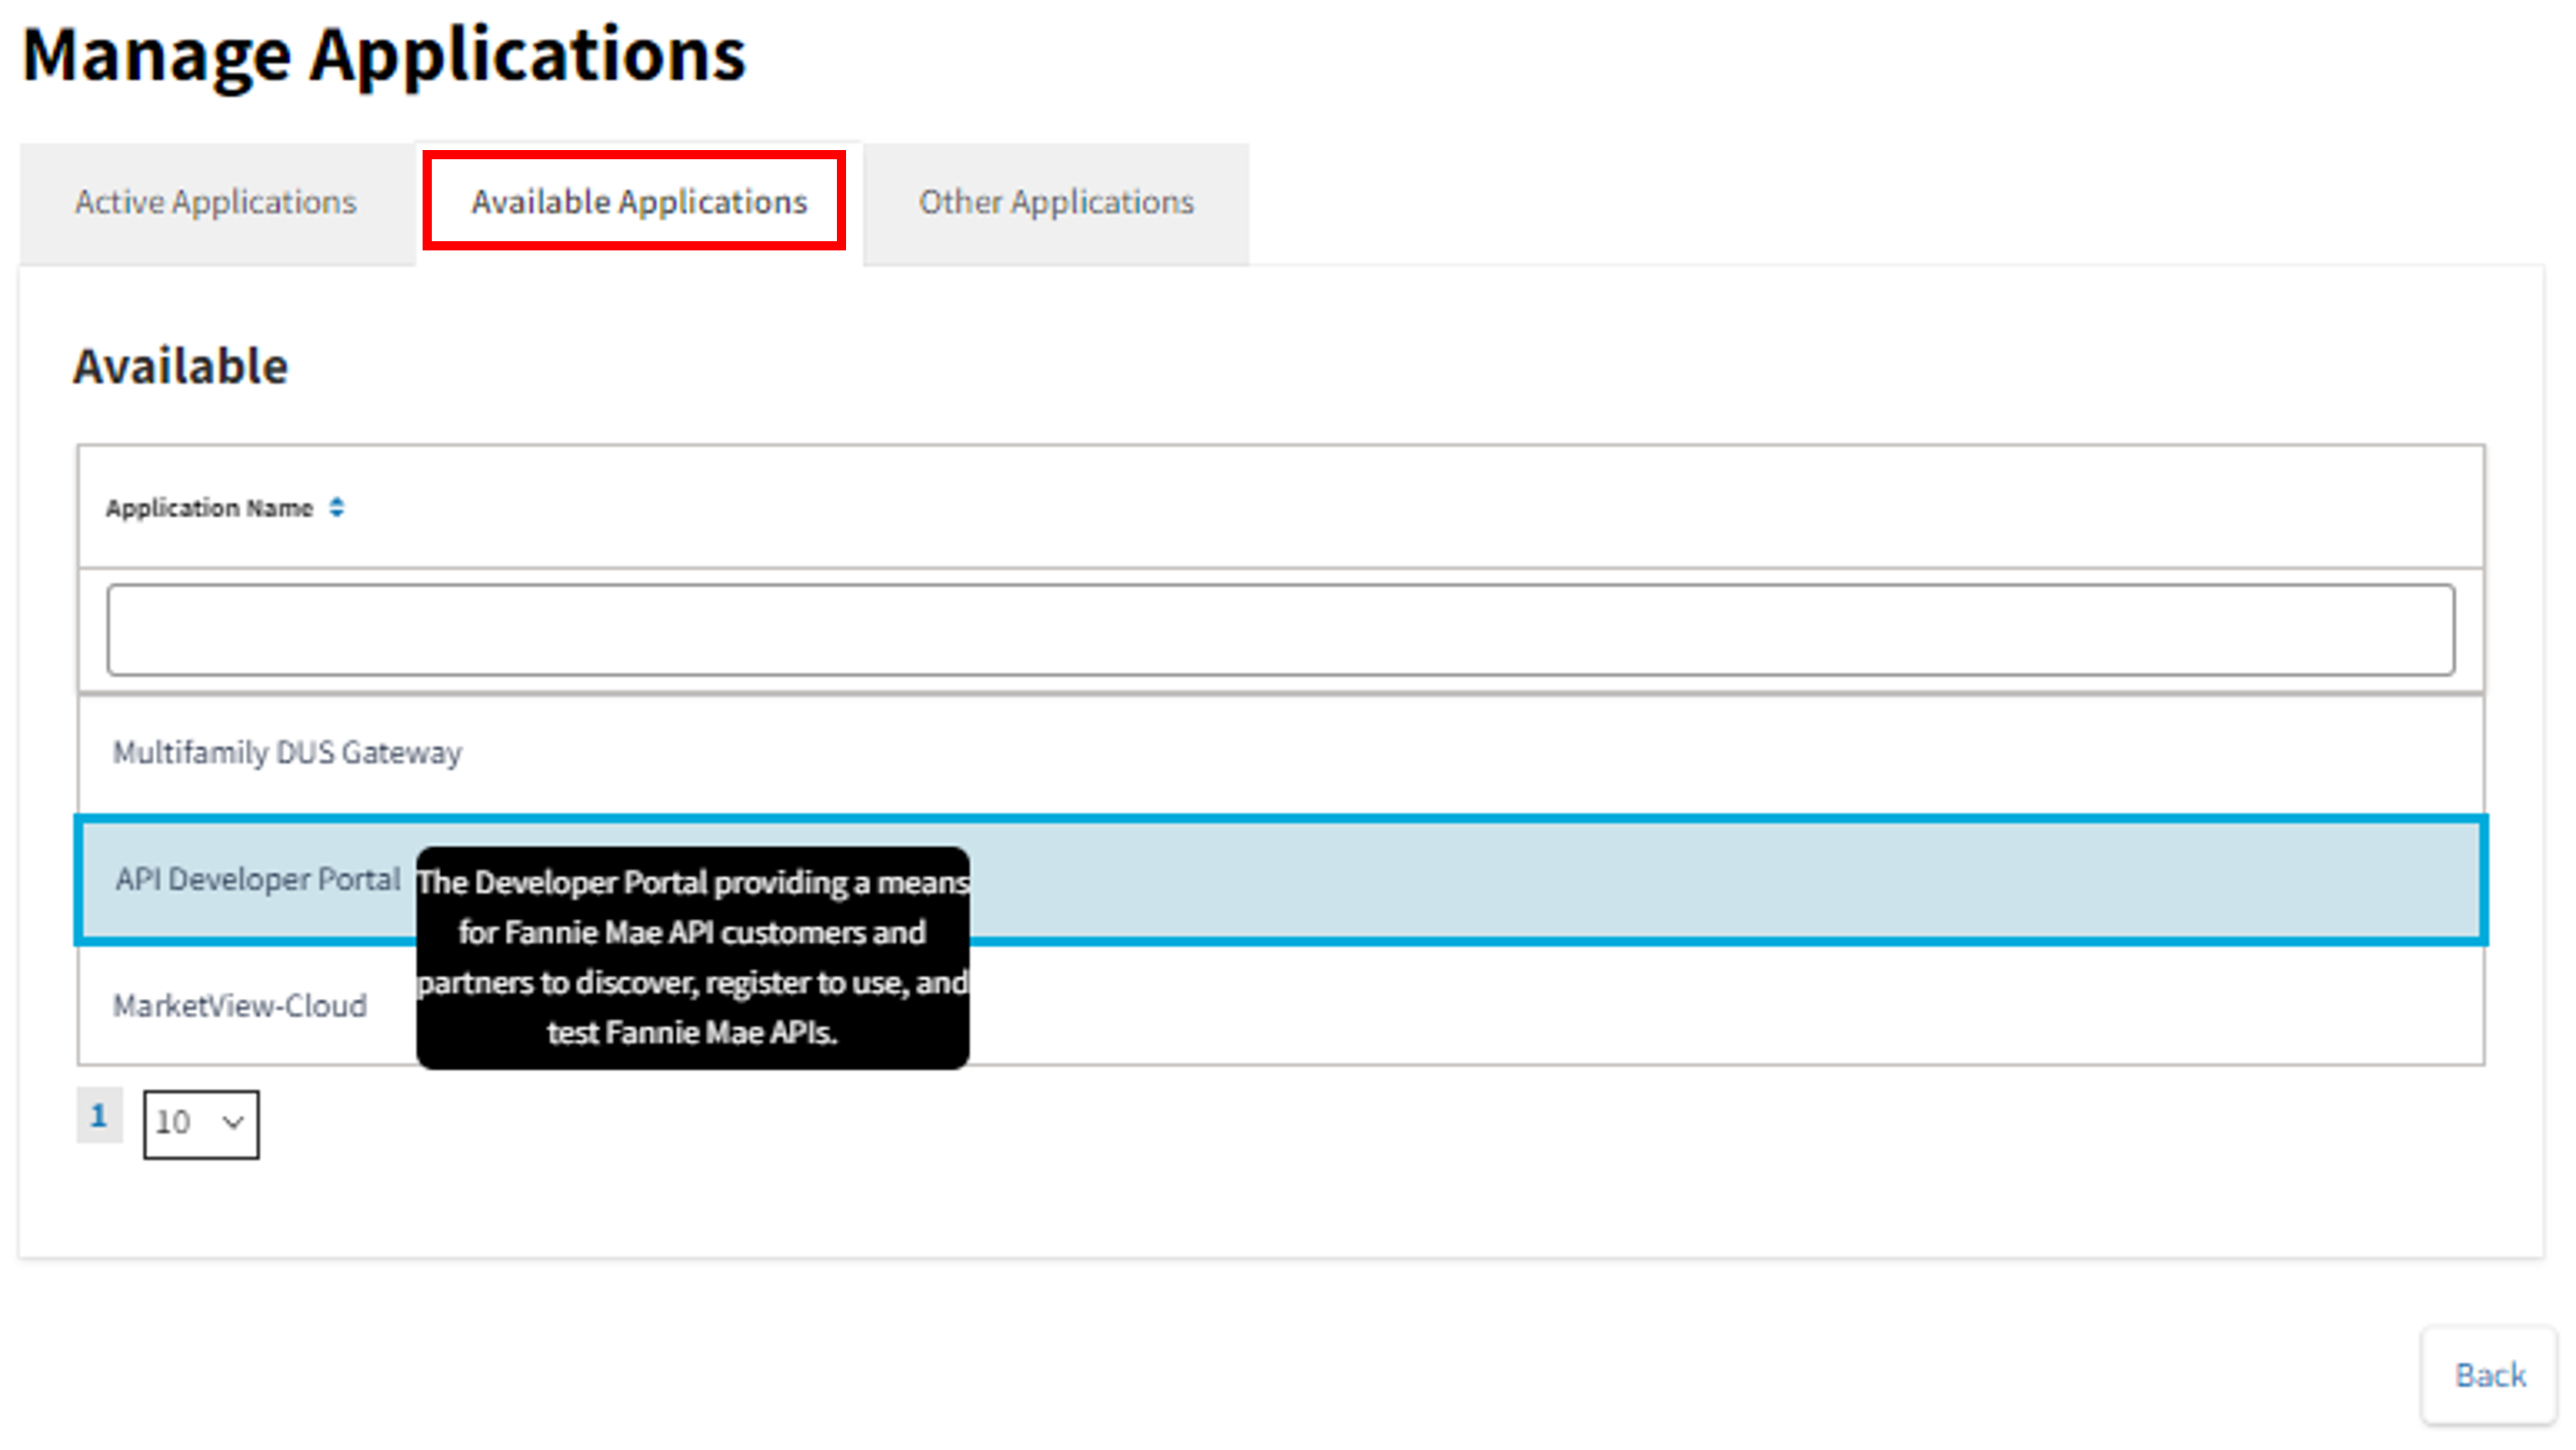
Note: Hover over each application for an application description.
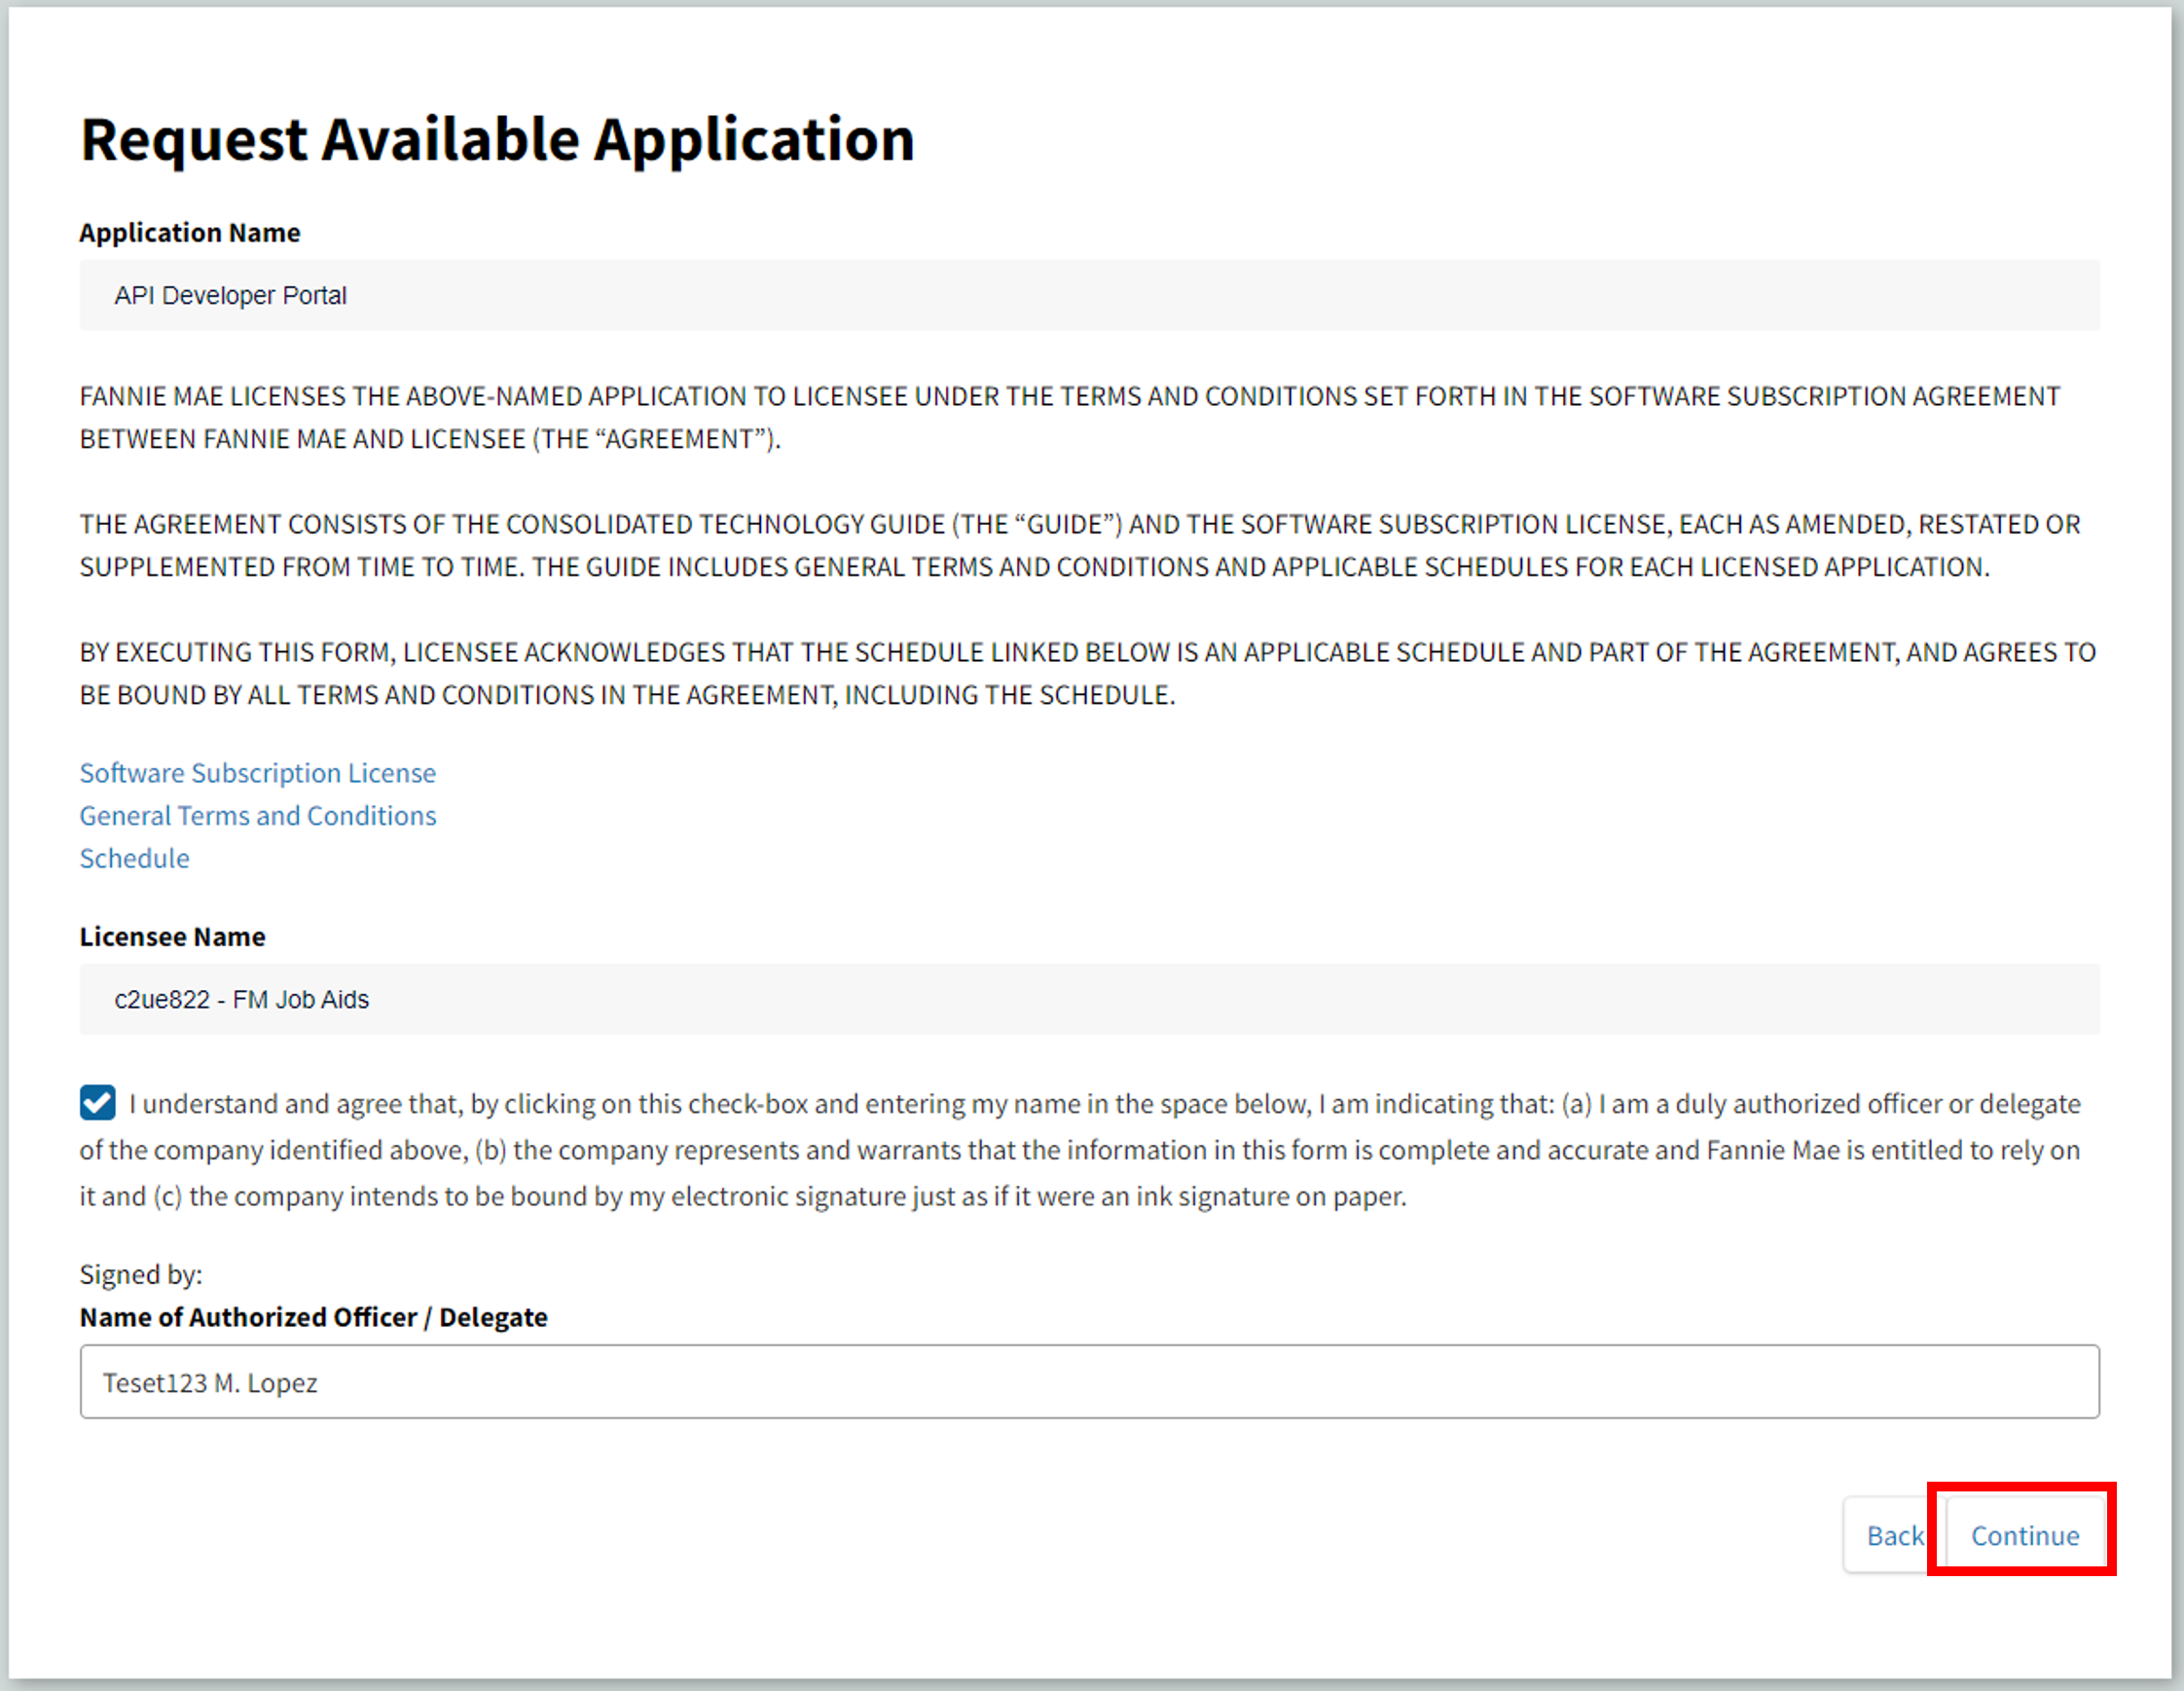
- Once the application is selected, the Request Available Application screen appears, ensure correct application was chosen, then select Continue.
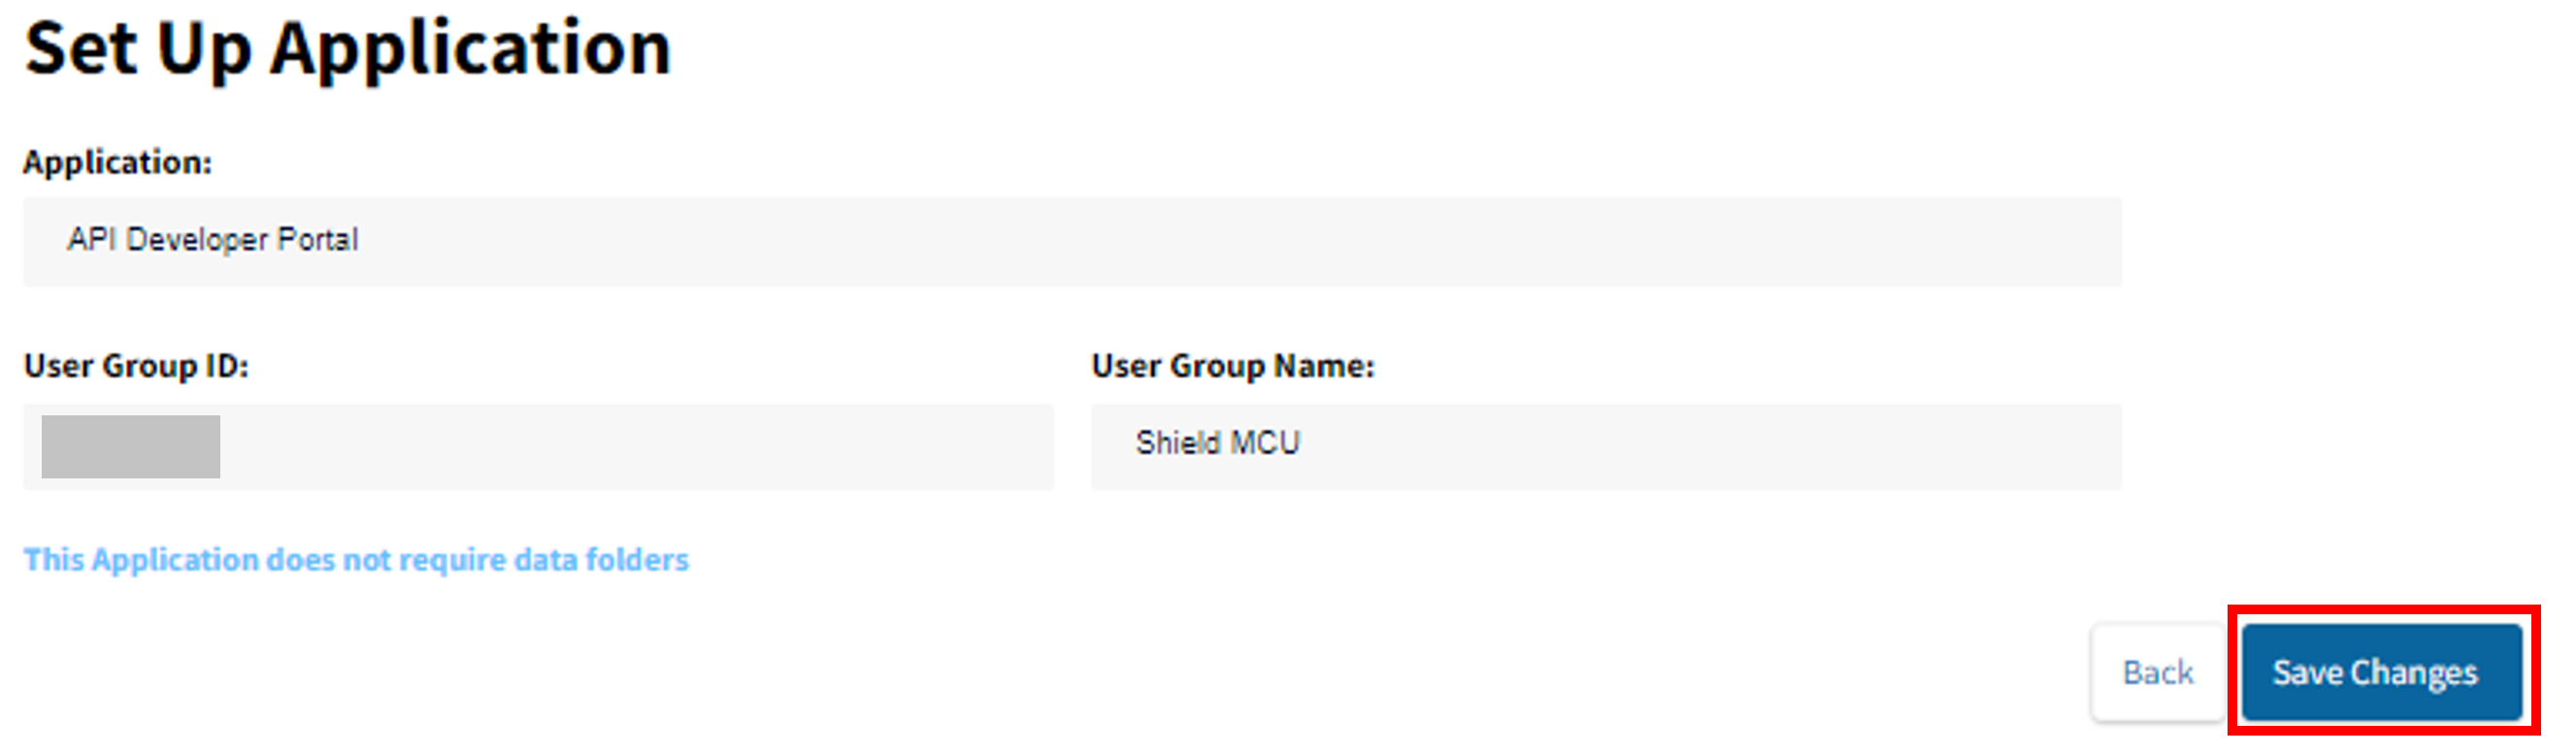
- If the application does not require data folders, the following Set Up Application screen will appear. Select Save Changes.
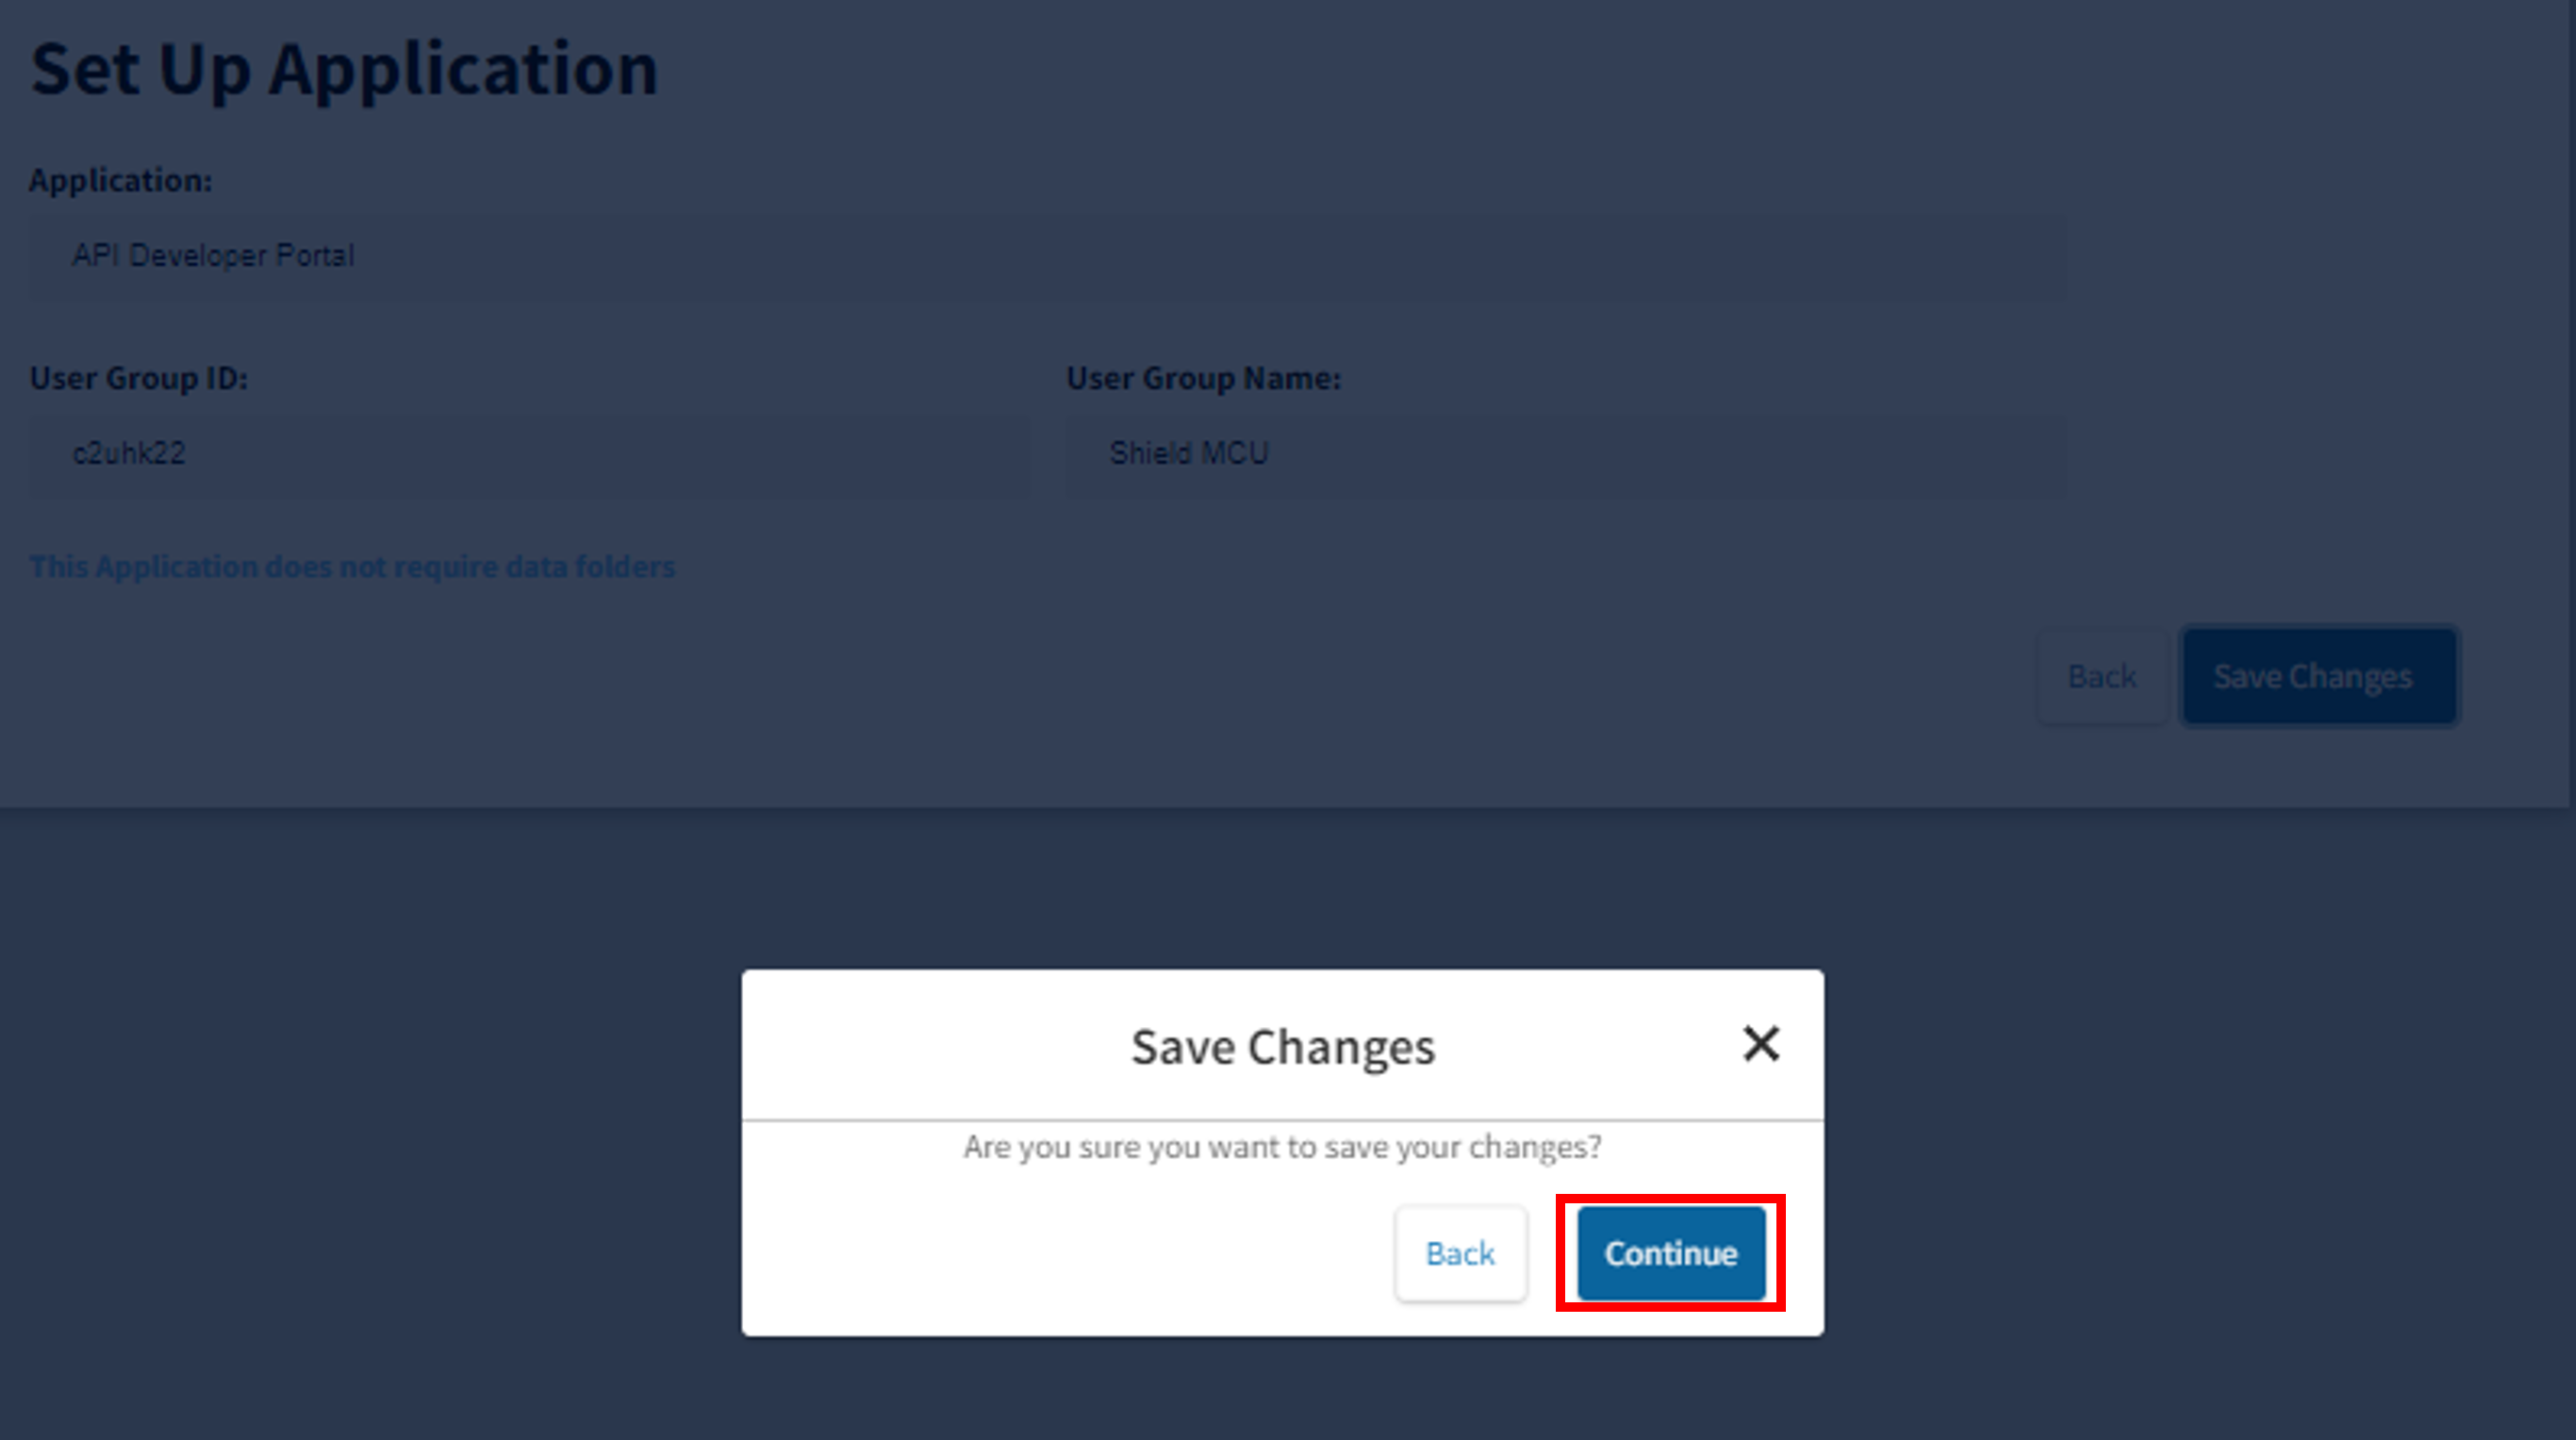
- Select Continue to complete application set up.
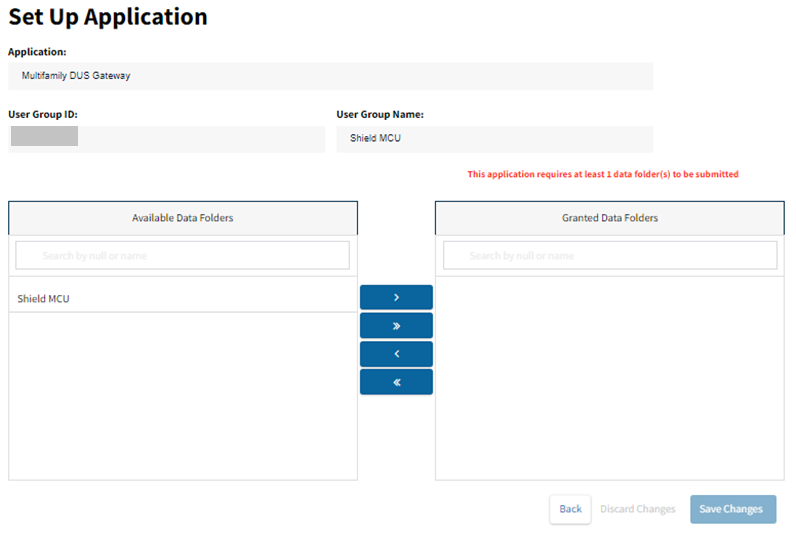
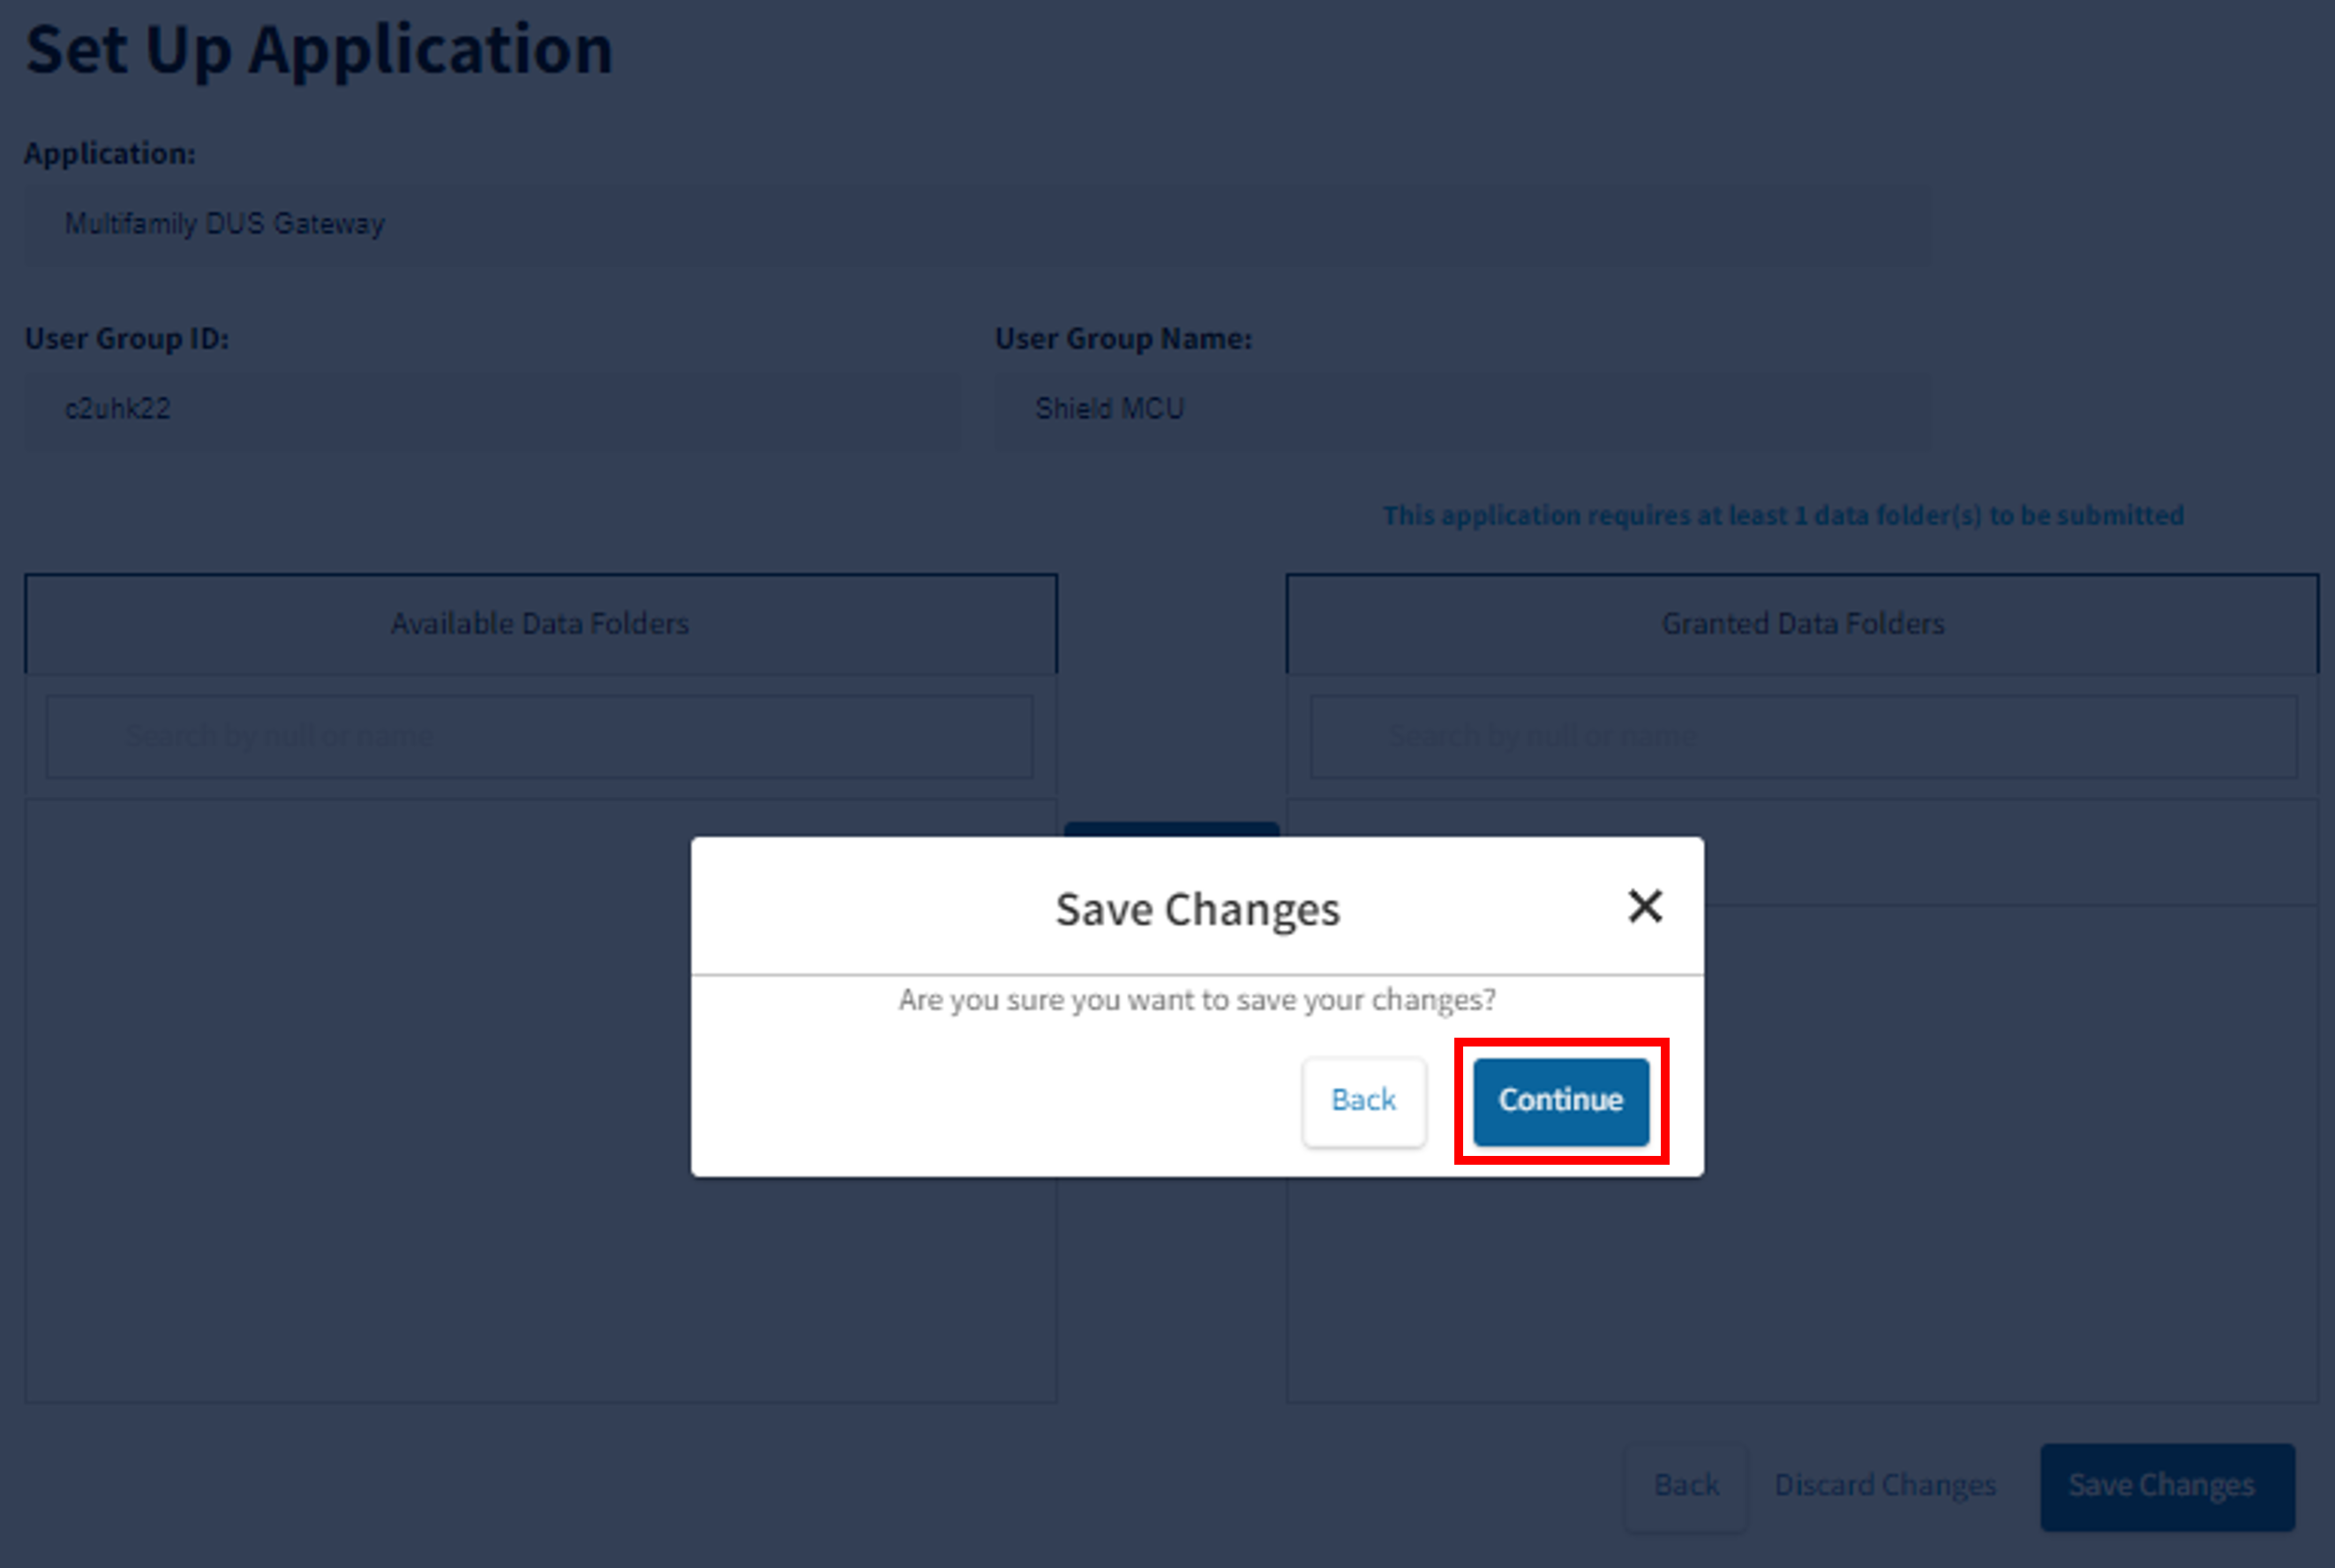
- If the application requires data folders, the following Set Up Application screen appears, view Available Data Folders and move applicable data folders to Granted Data Folders, then select Save Changes. In some cases, Create New Institution is displayed on this screen to prompt user to create a new Data Folder so that it can be assigned to this application.
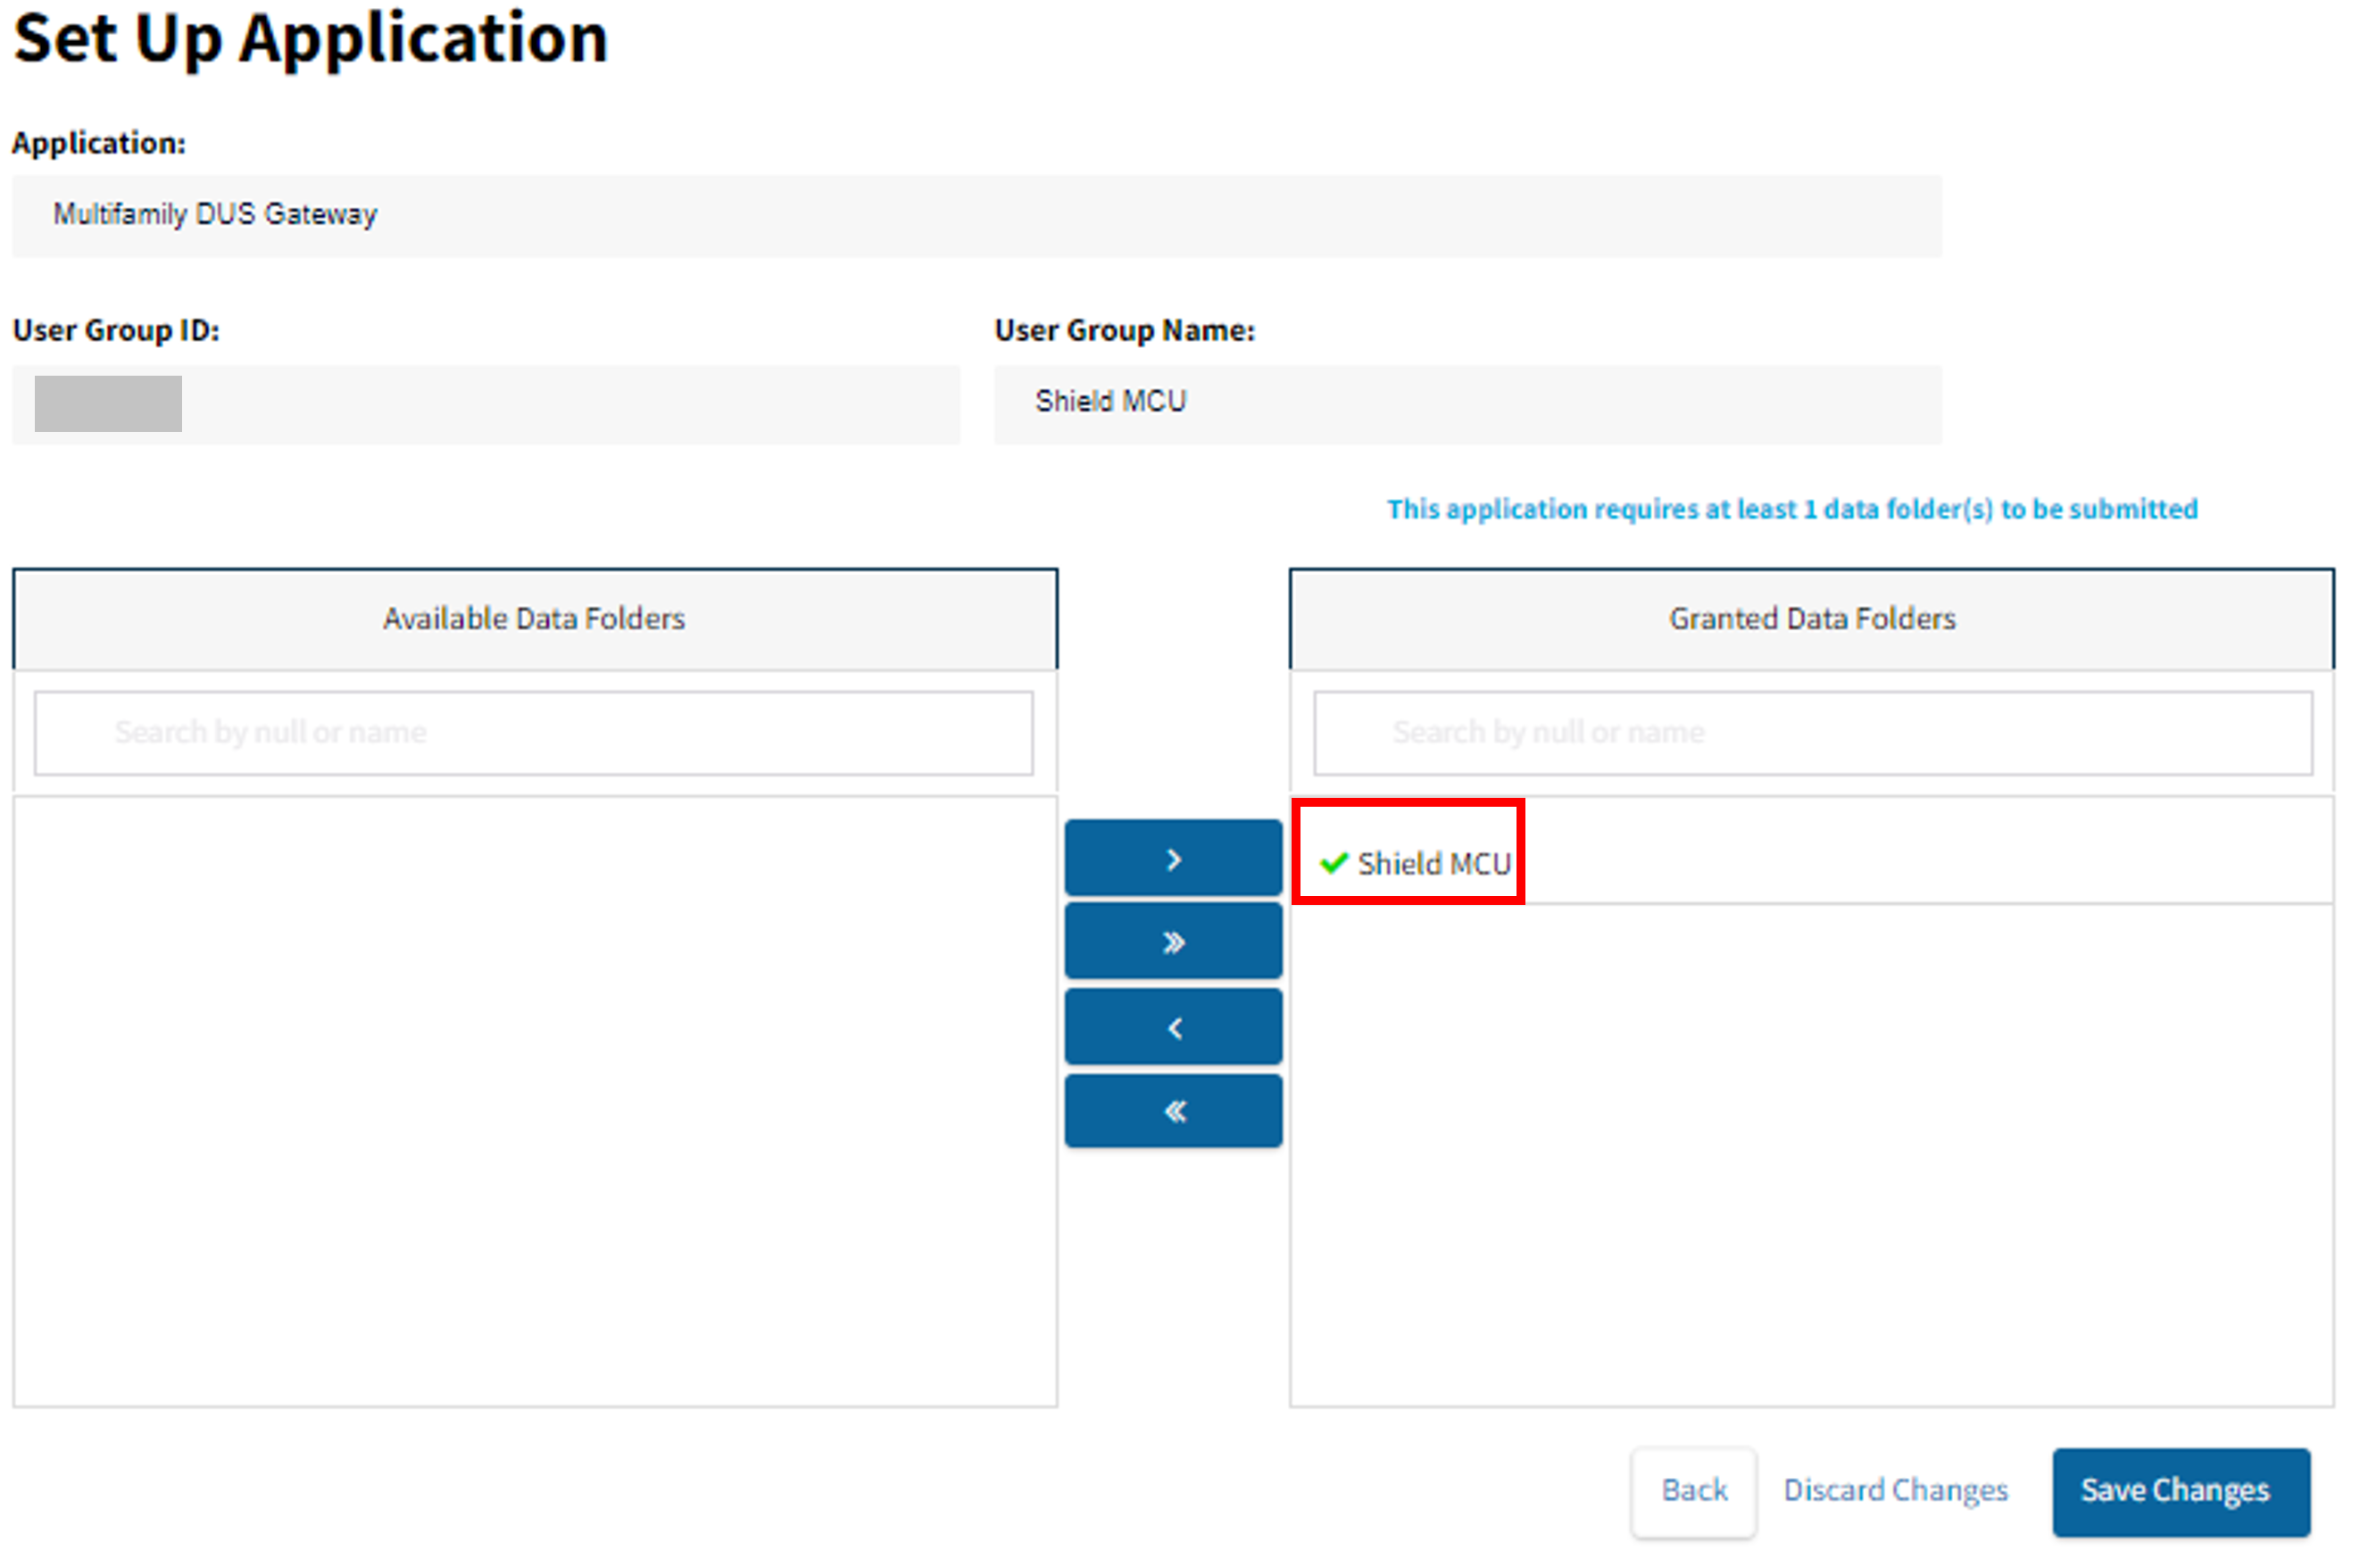
- Review data folder selection, select Continue.
- Submission confirmation will appear in lower right-hand corner of page.
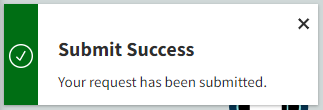
- Once submission is successful, the application will be displayed under the Active Application tab.
- Select Other Applications to view all applications for which the MF Non-Seller UA may submit a request for access.
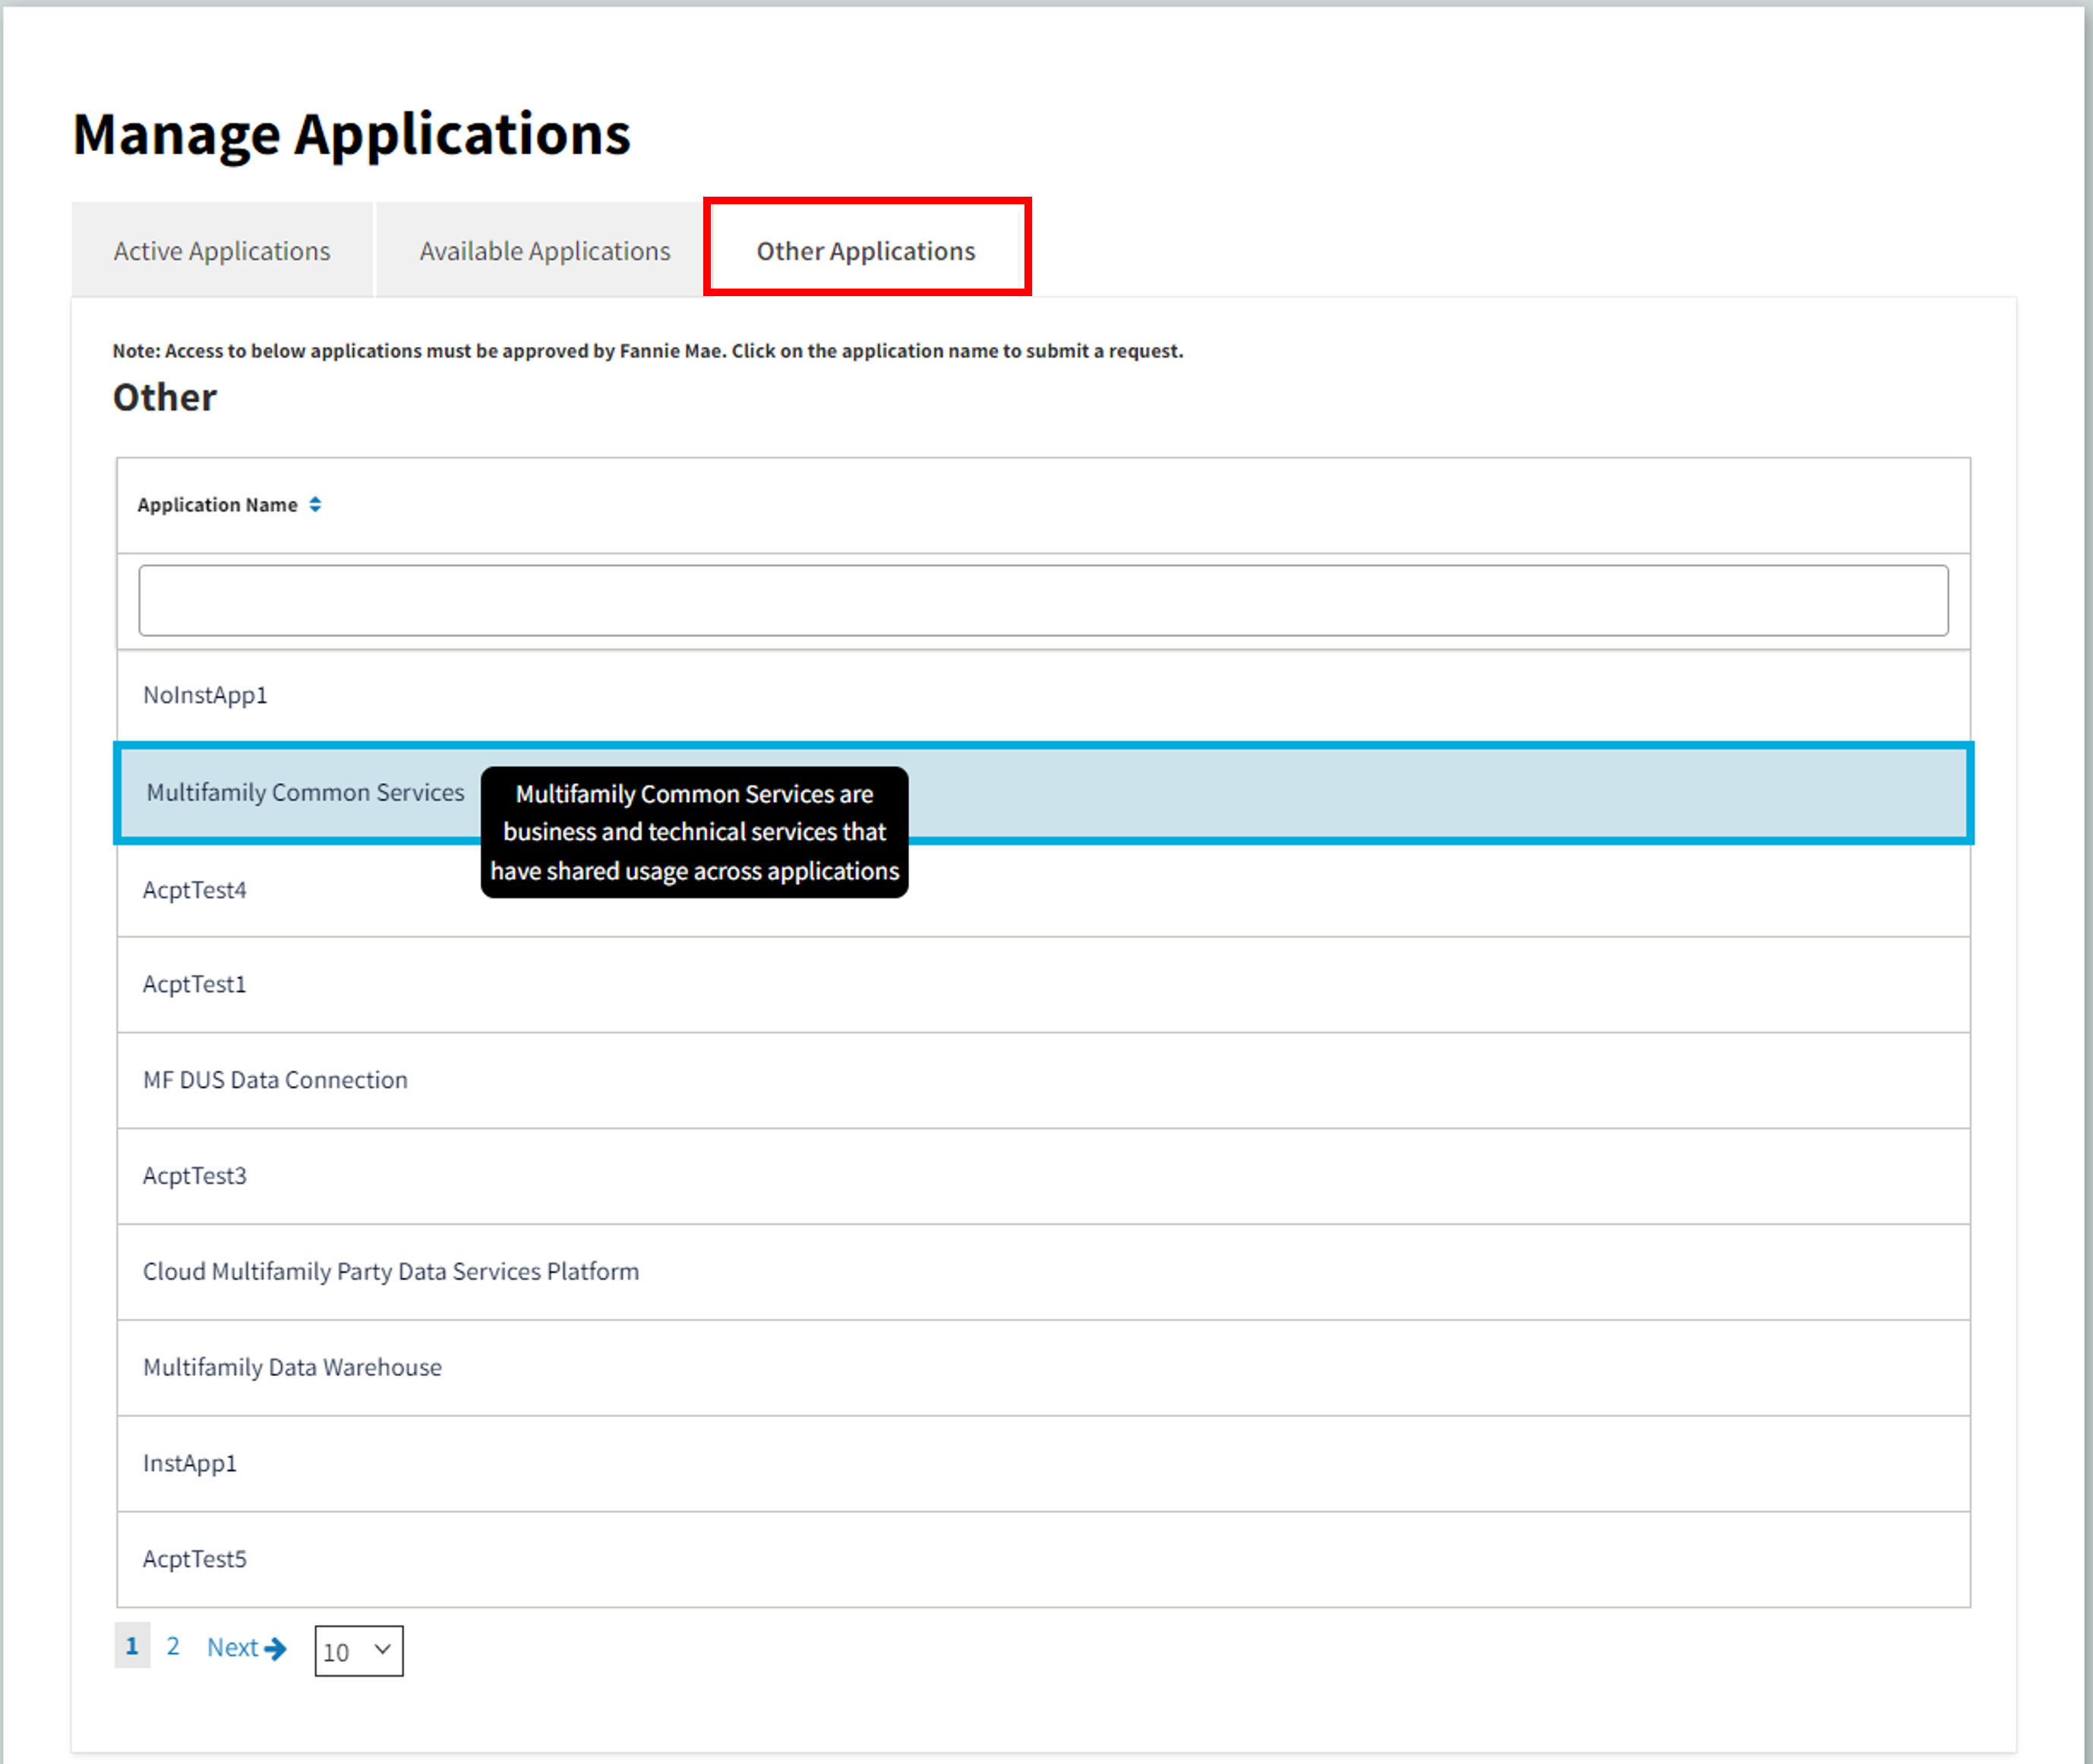
Note: Hover over each application for an application description.
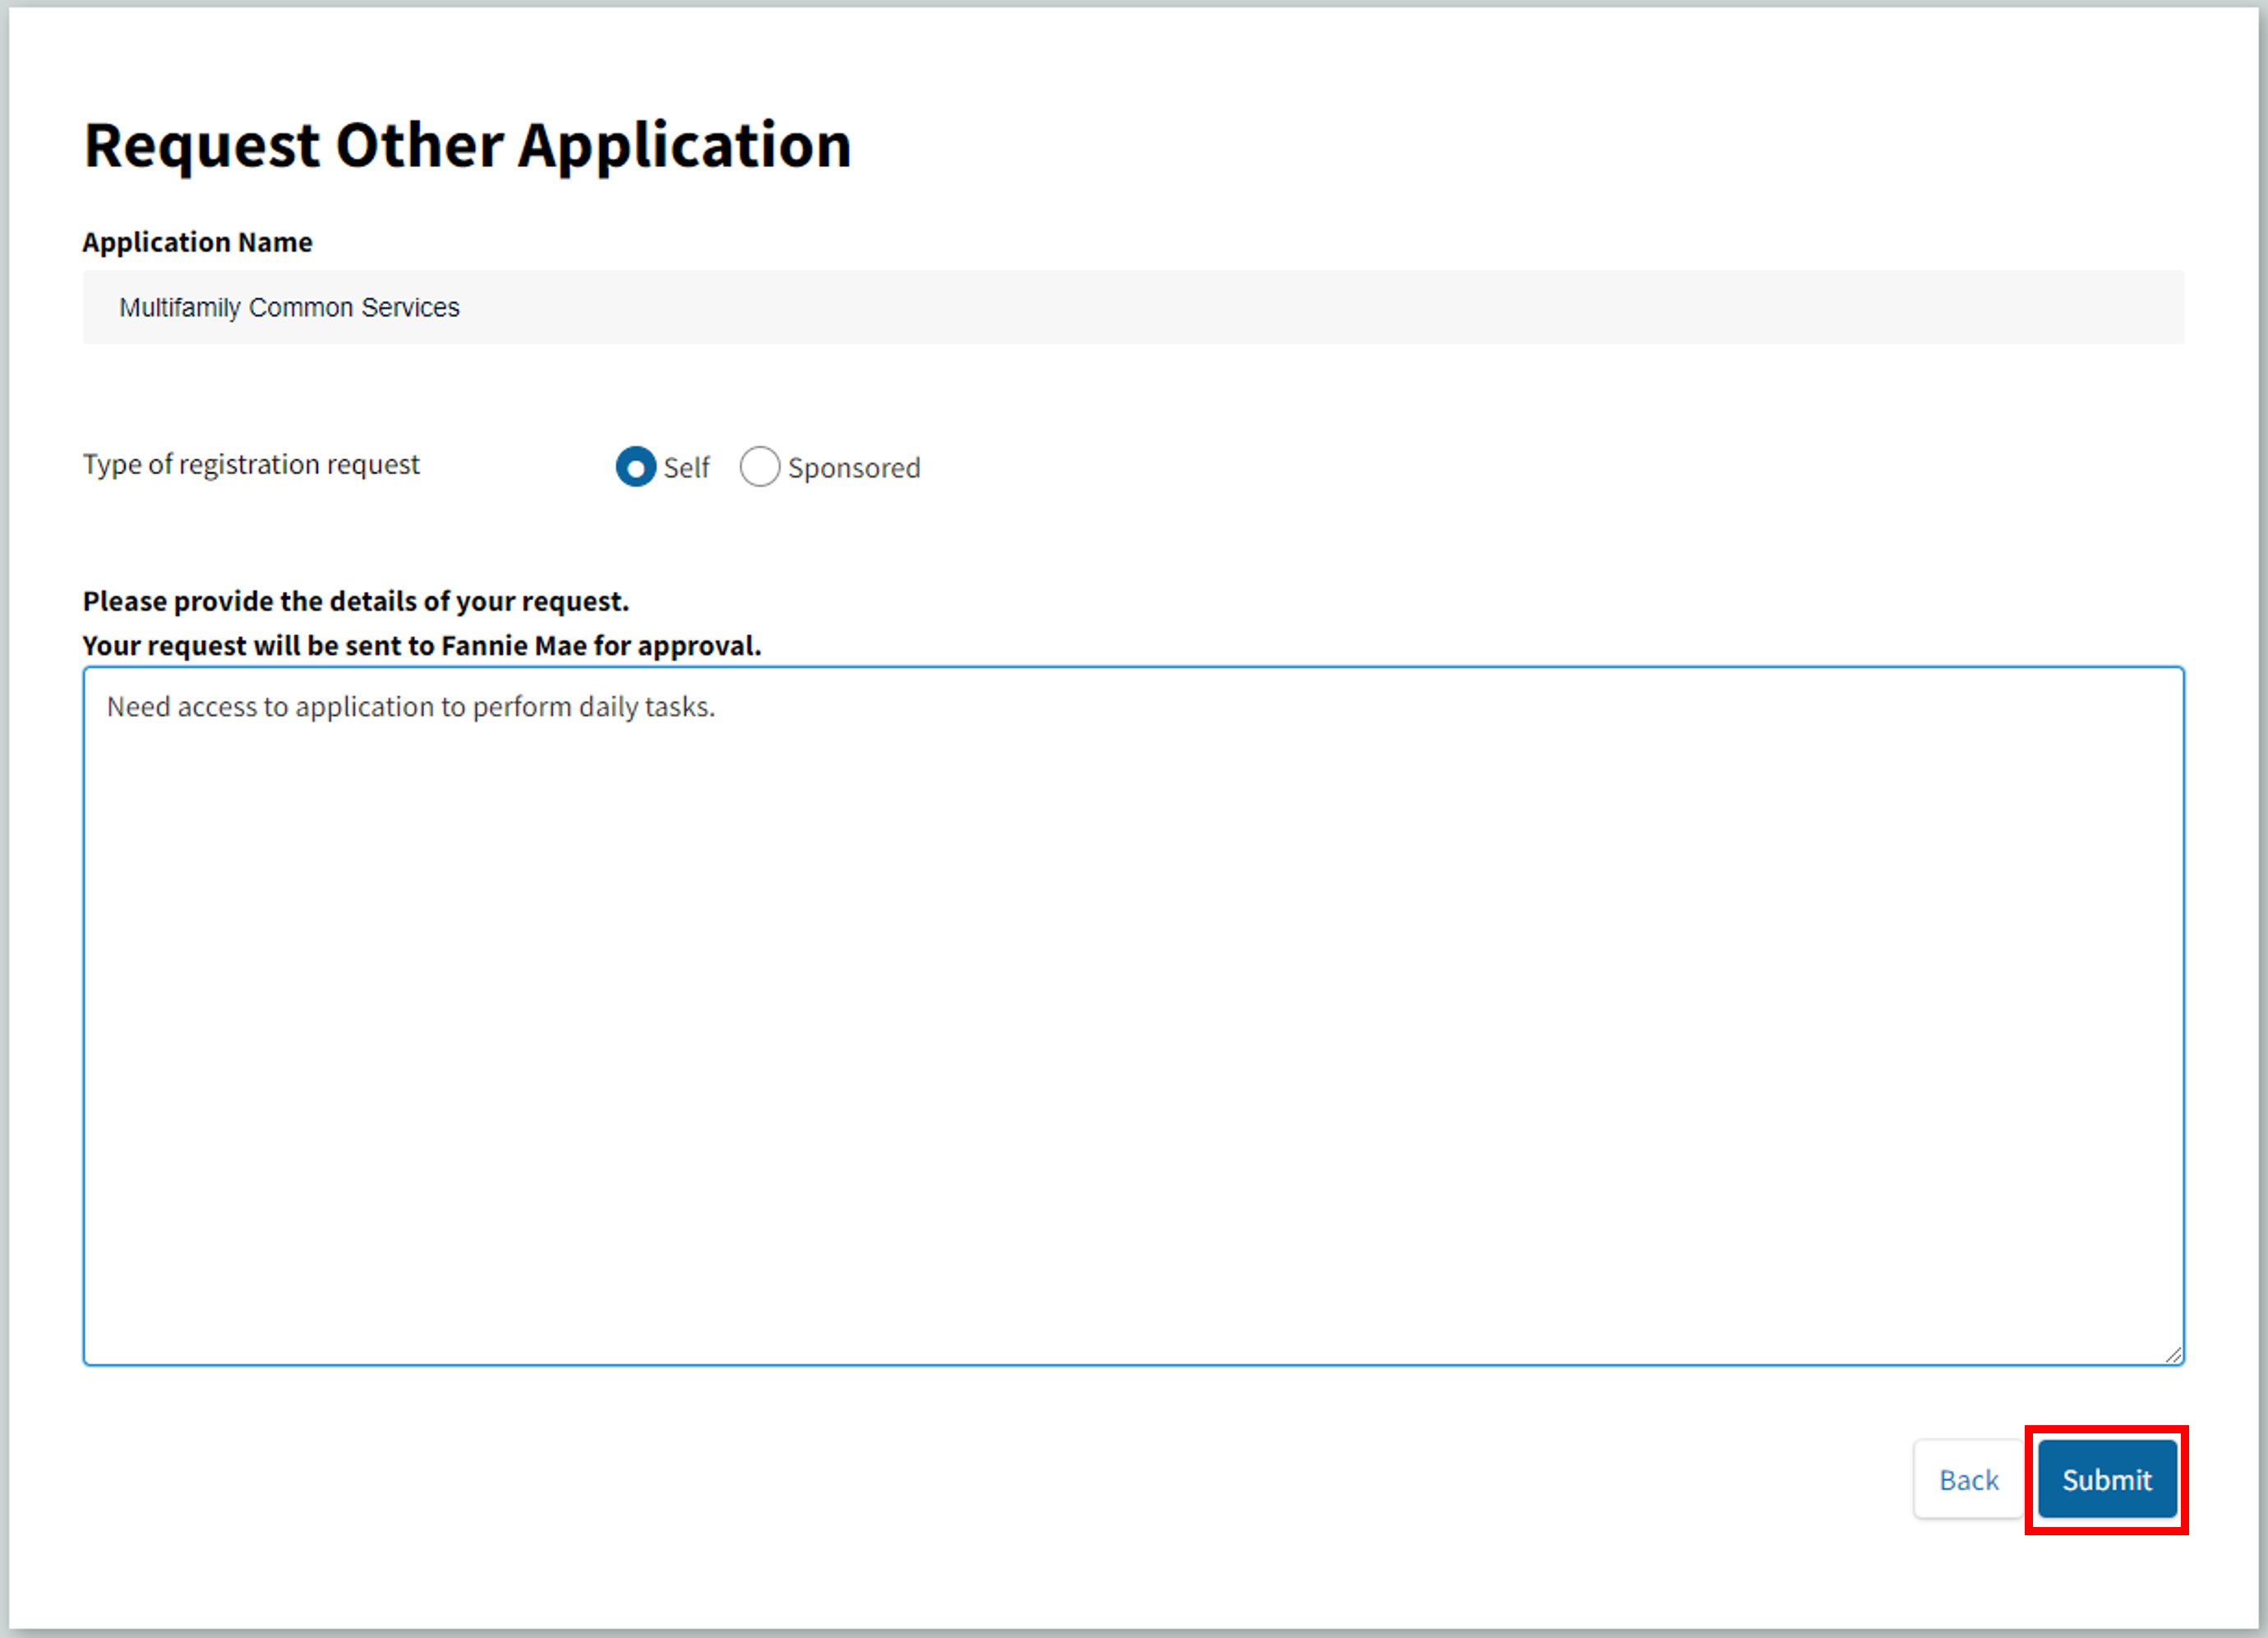
- Request Other Application screen appears, confirm correct application has been selected, choose Registration Request type and provide request details for Fannie Mae approval. Select Submit.
The two types of requests are:
Self: The MF Non-Seller User Administrator is requesting access to an application on behalf of their own organization. These requests must complete Fannie Mae approval process.
Sponsored: The MF Non-Seller User Administrator is requesting access to an application that requires sponsorship by another MF organization. These requests must complete the Fannie Mae approval process and also require approval by the User Administrator for the sponsoring MF organization.
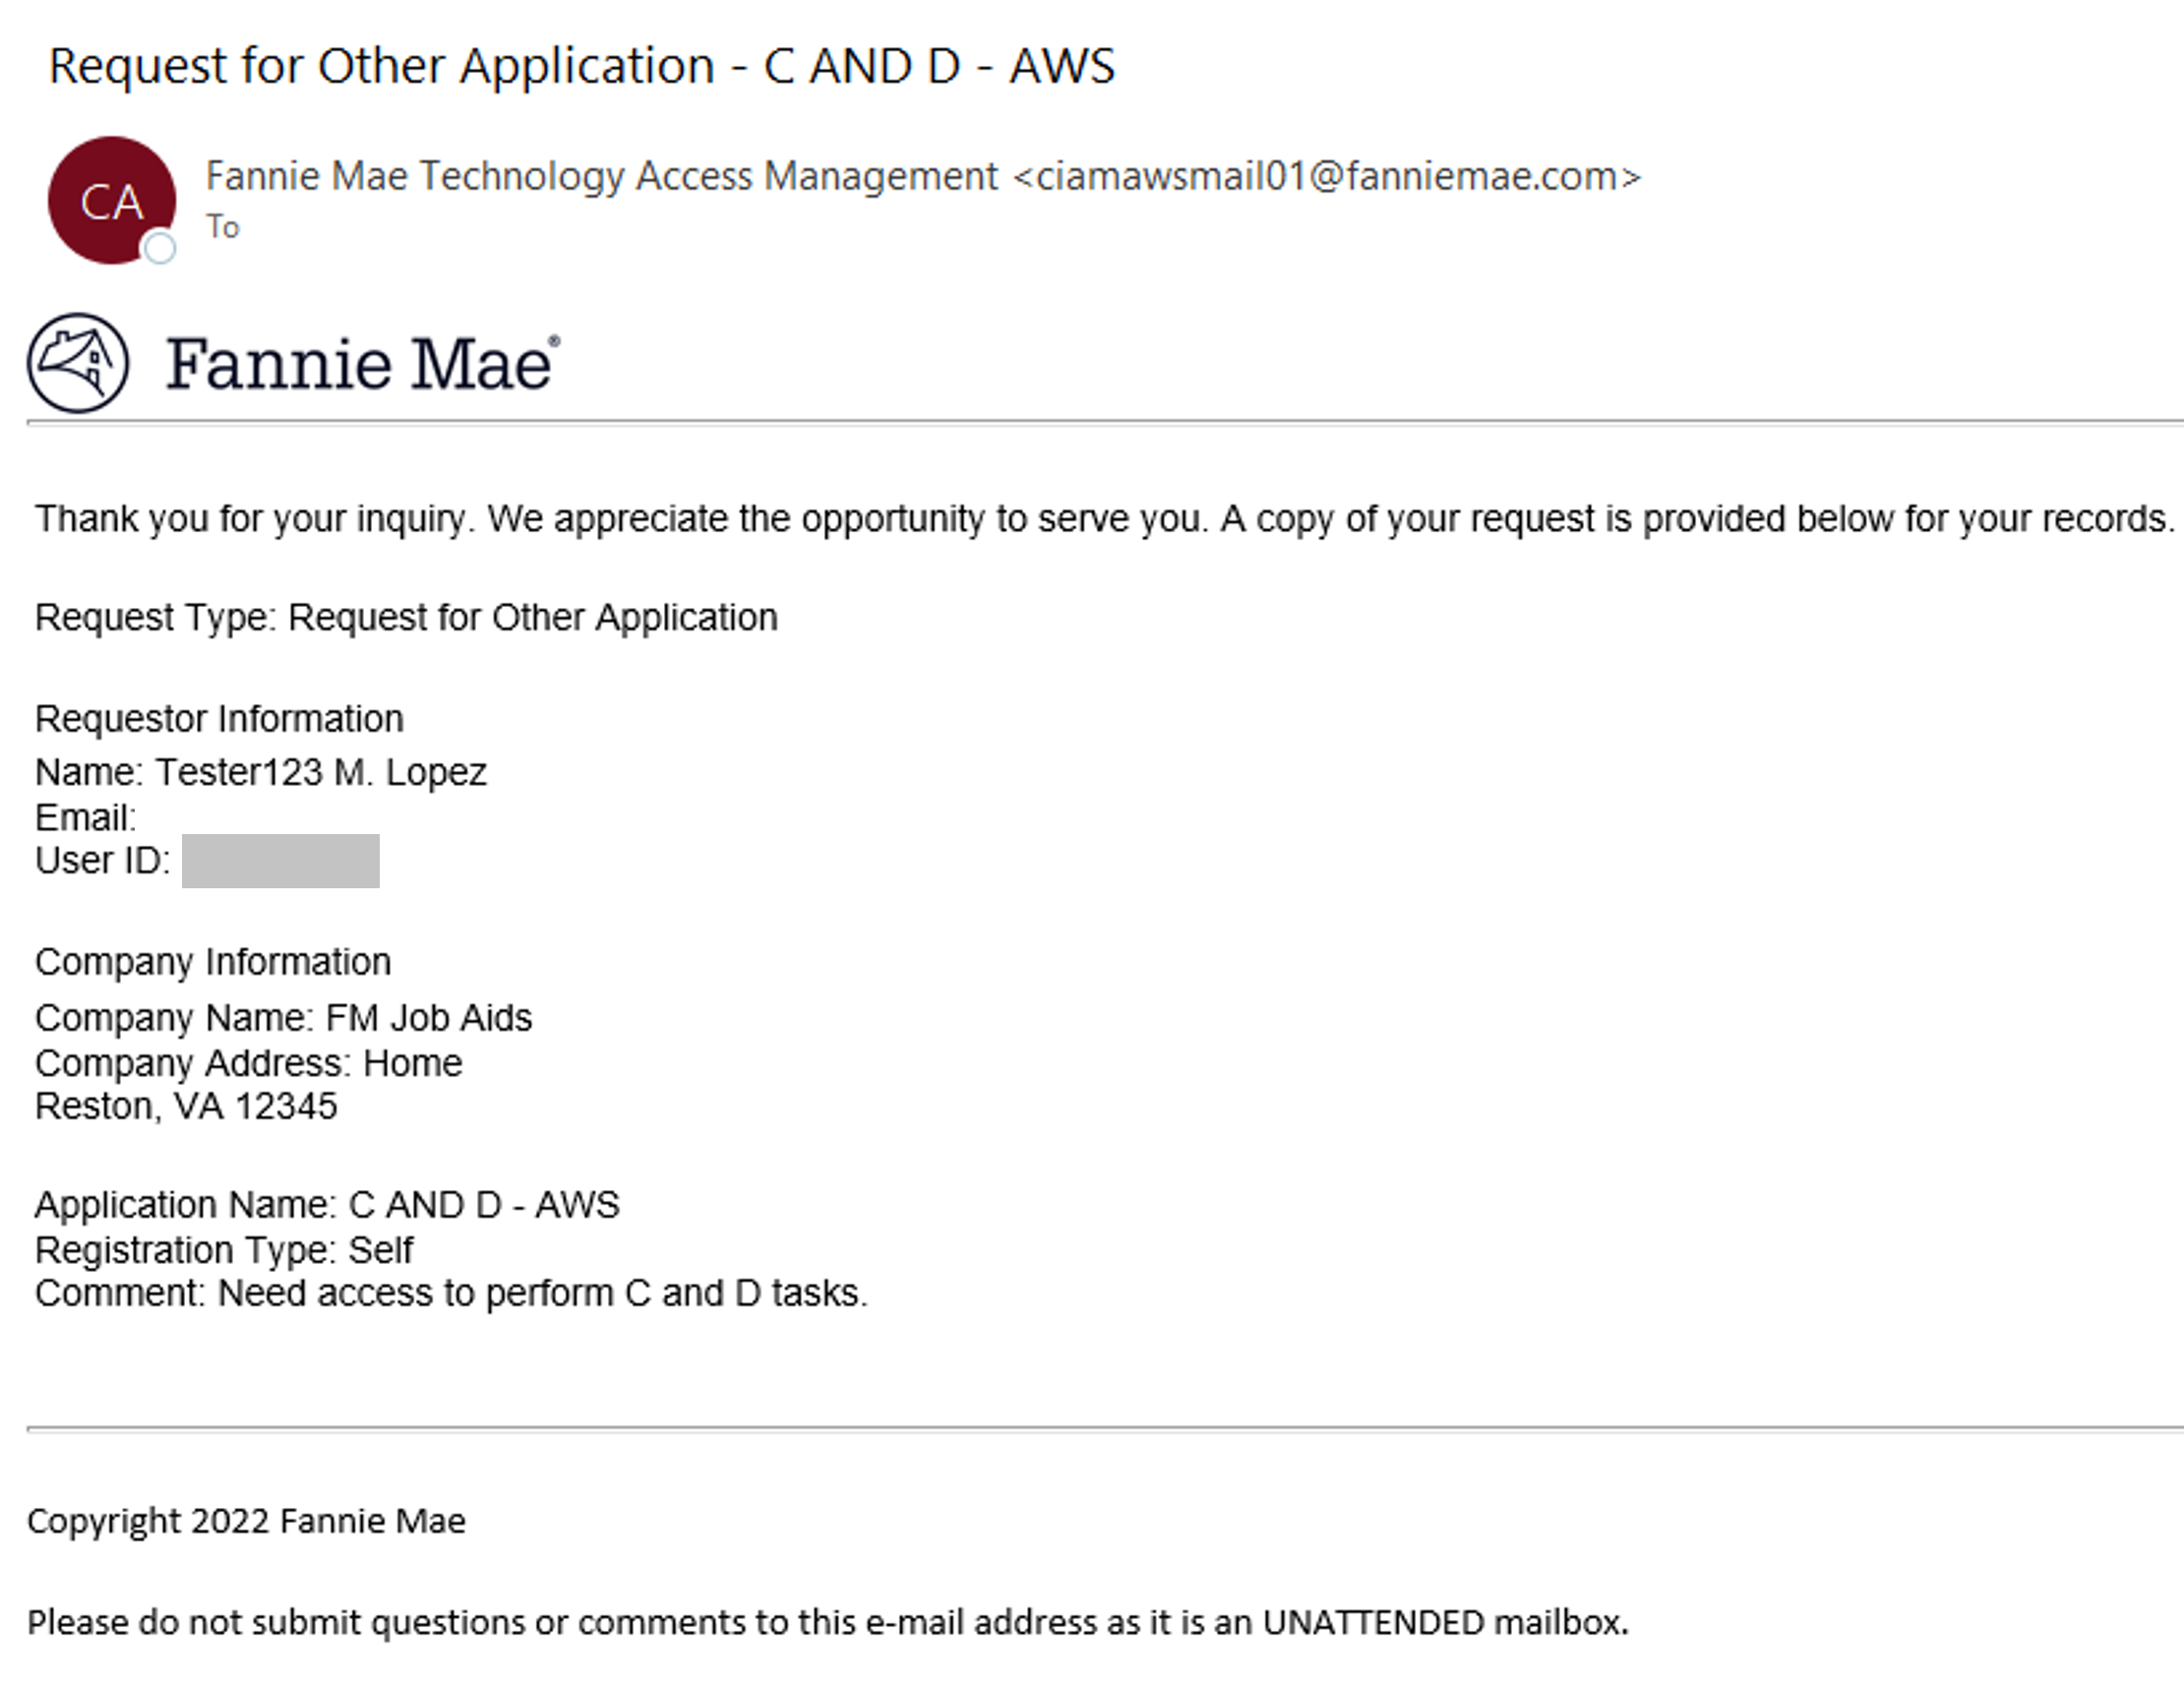
- Submission confirmation will appear and MF Non-Seller UA will receive a confirmation email from Fannie Mae Technology Access Management.
- Once submission has been successfully submitted, go to the TM dashboard. Select Manage Applications and the selected application should be displayed under Available Applications tab. Please follow steps included in Step 4.
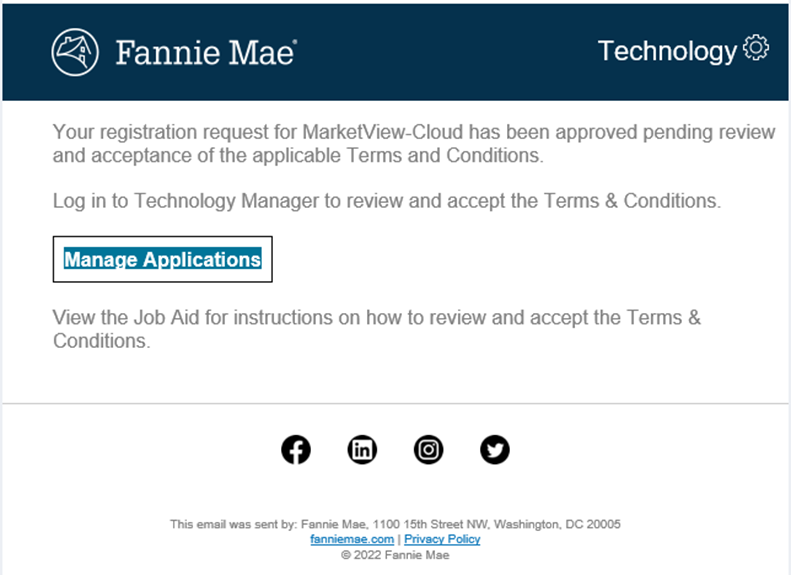
- Sponsored application confirmation email is sent after request is submitted successfully and workflow process is initiated.

- mail sent to the Sponsoring MF User Administrator, requesting they log in to TM to review the application request and accept the applicable terms and conditions.
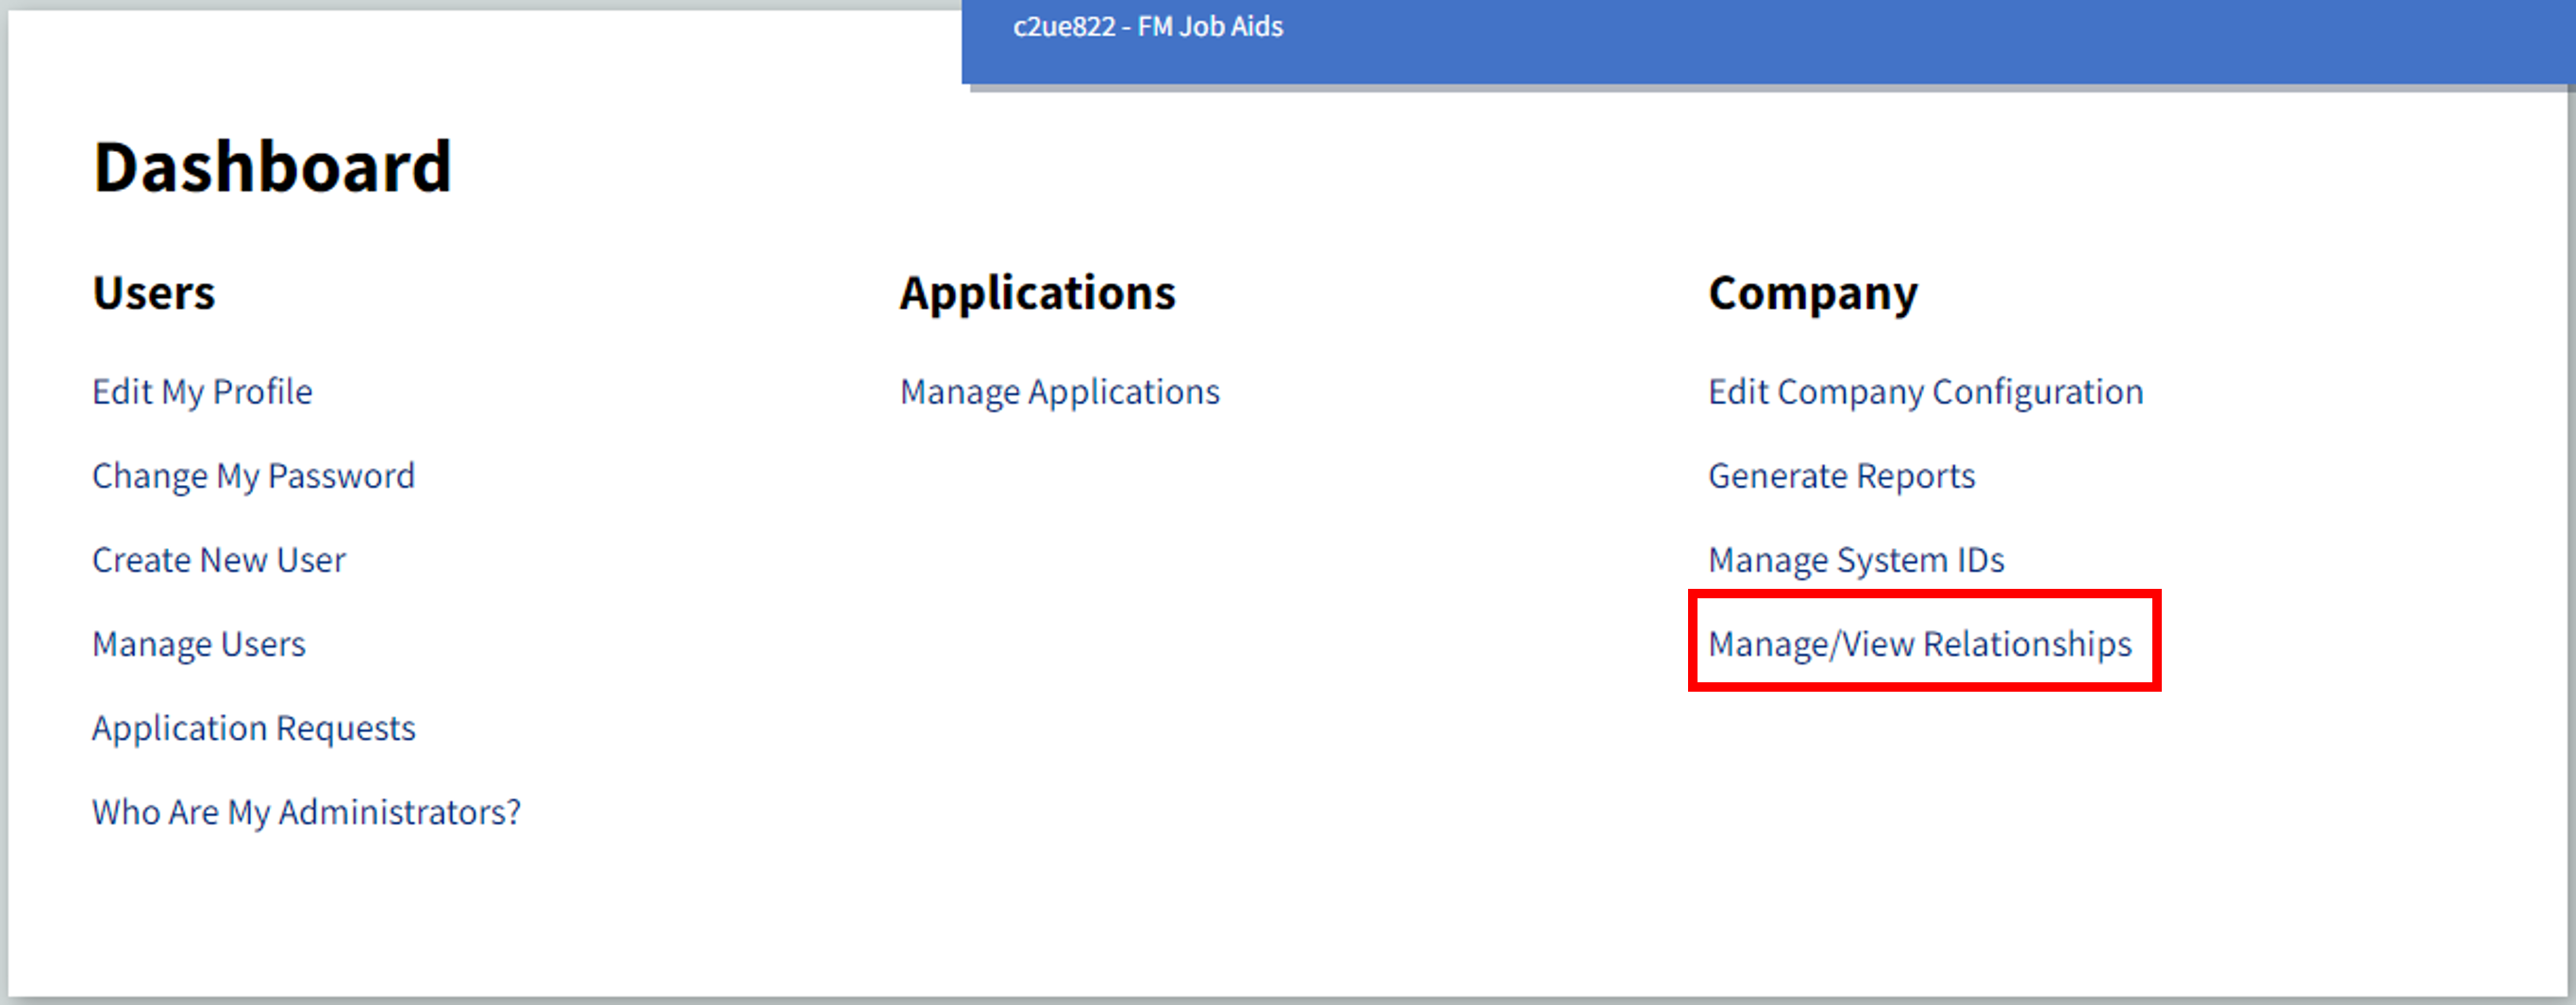
- Sponsoring User Administrator selects Manage/View Relationships from the TM Dashboard.
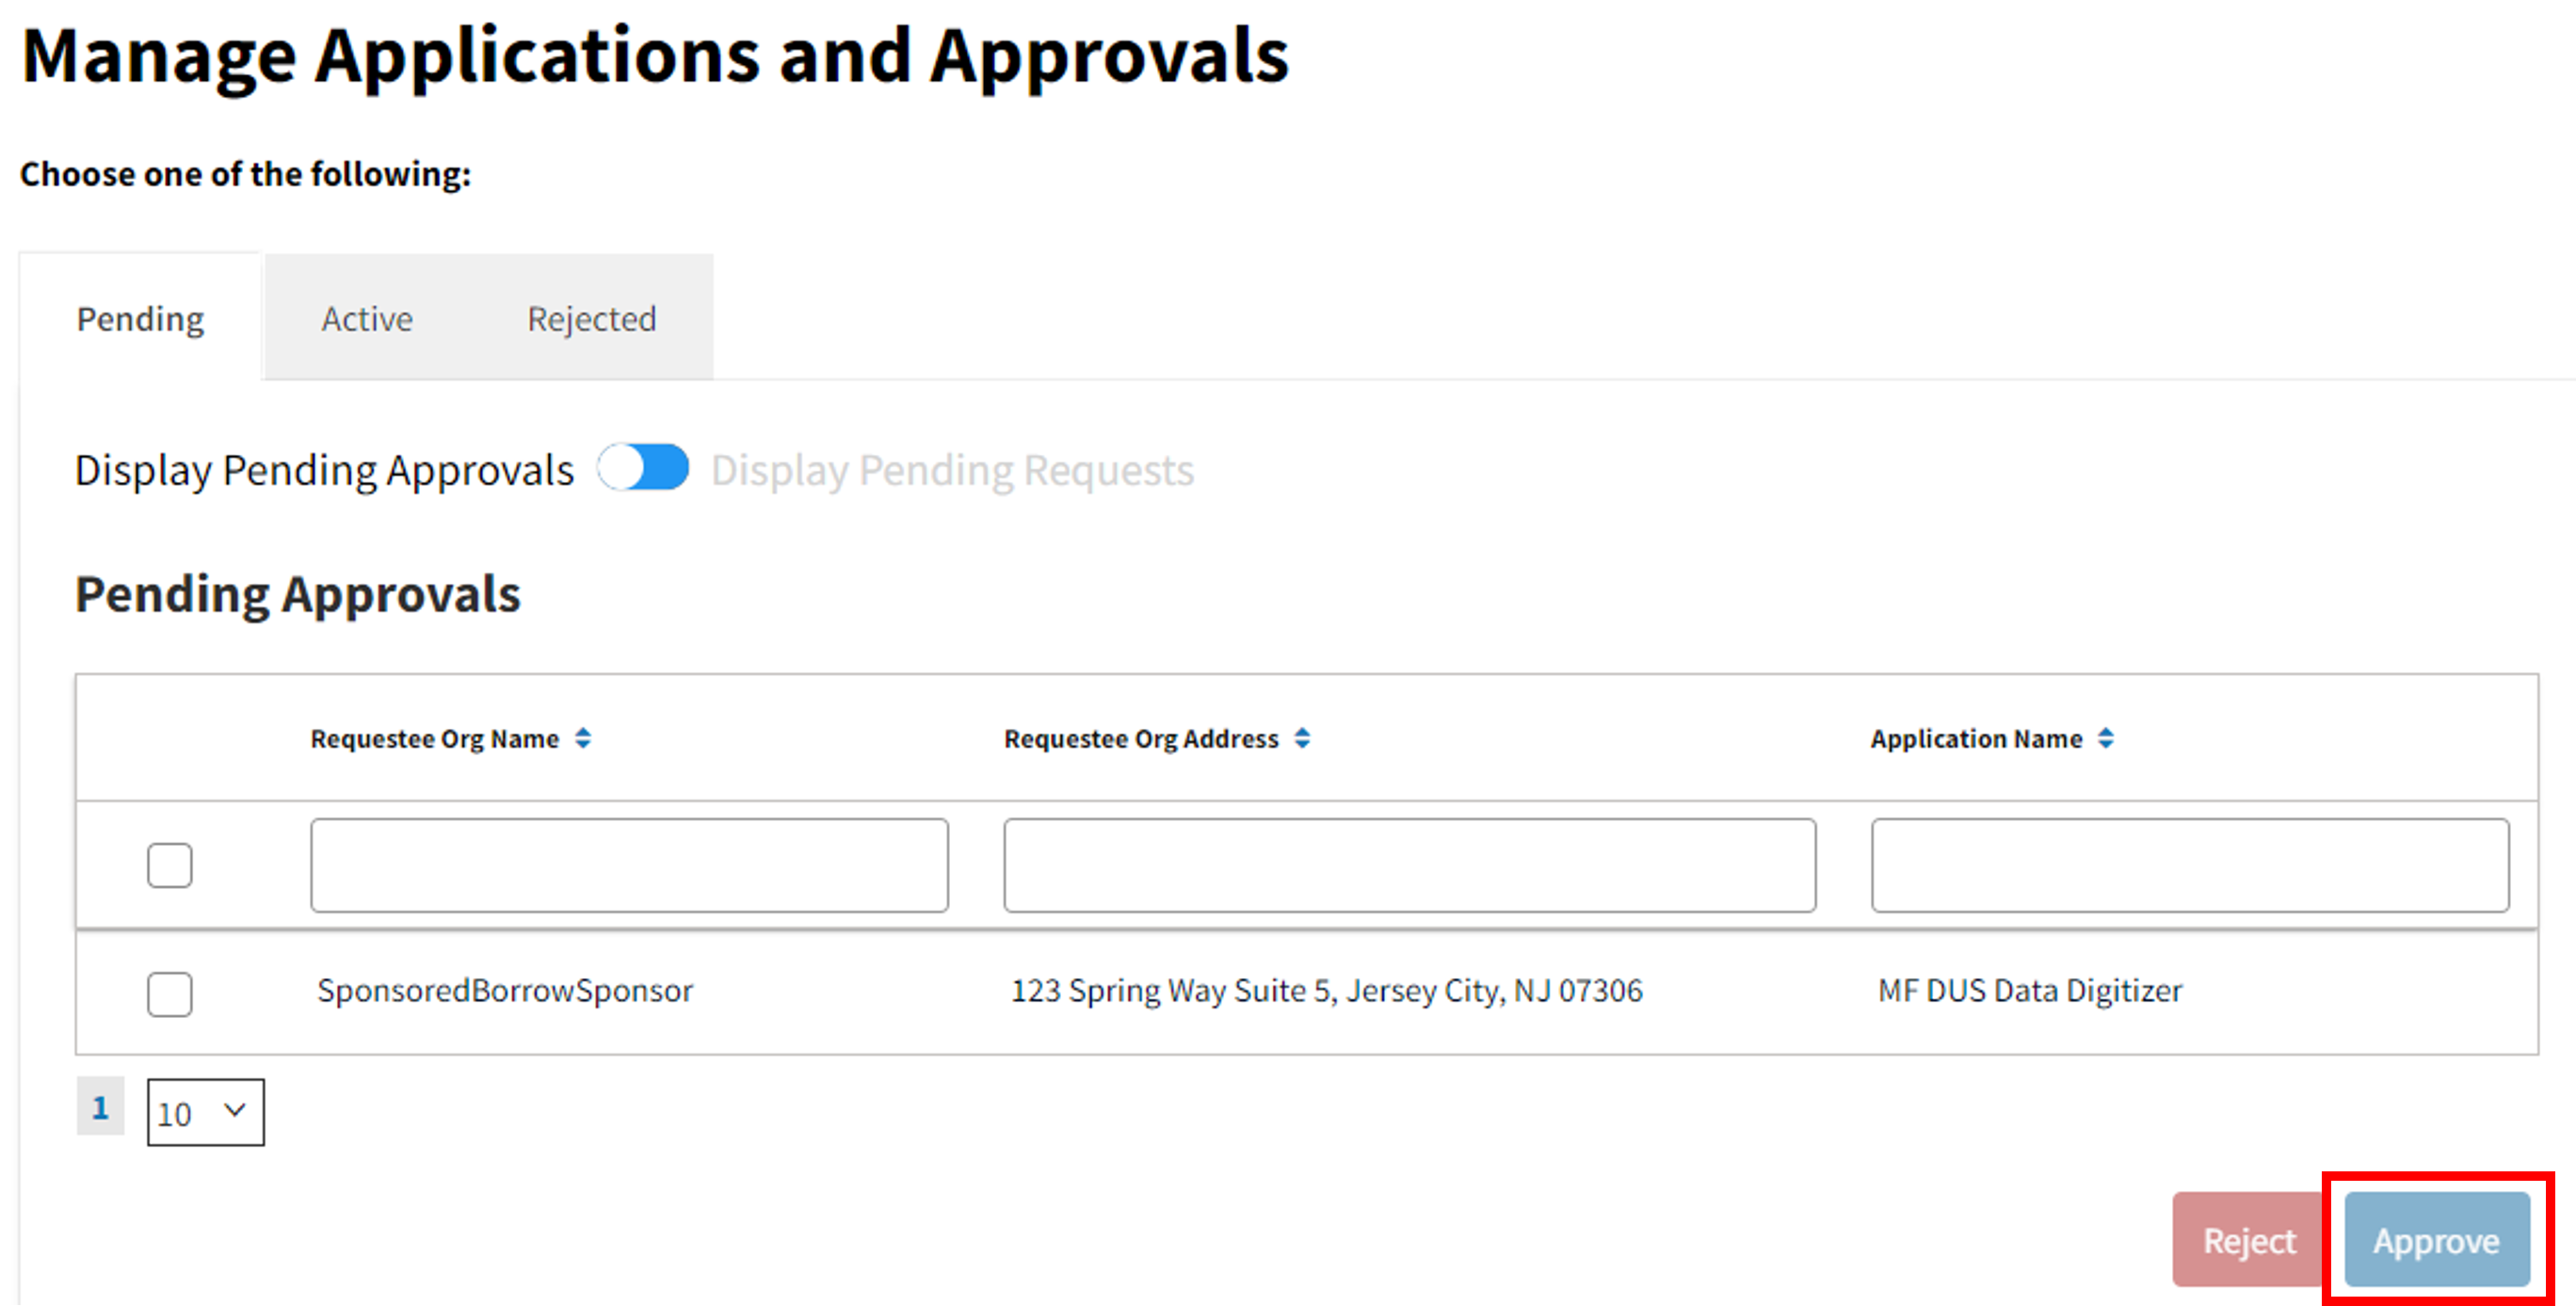
- Manage Applications and Approvals screen will appear and Pending tab will show the requested application in pending status. Select Approve.
Pending displays application request(s) in TM for the categories below:
- Display Pending Approvals by toggling to the left to see application request(s) awaiting review by logged in MF User Administrator.
- Display Pending Requests by toggling to the right to see application(s) that have been requested by the logged in MF User Administrator.
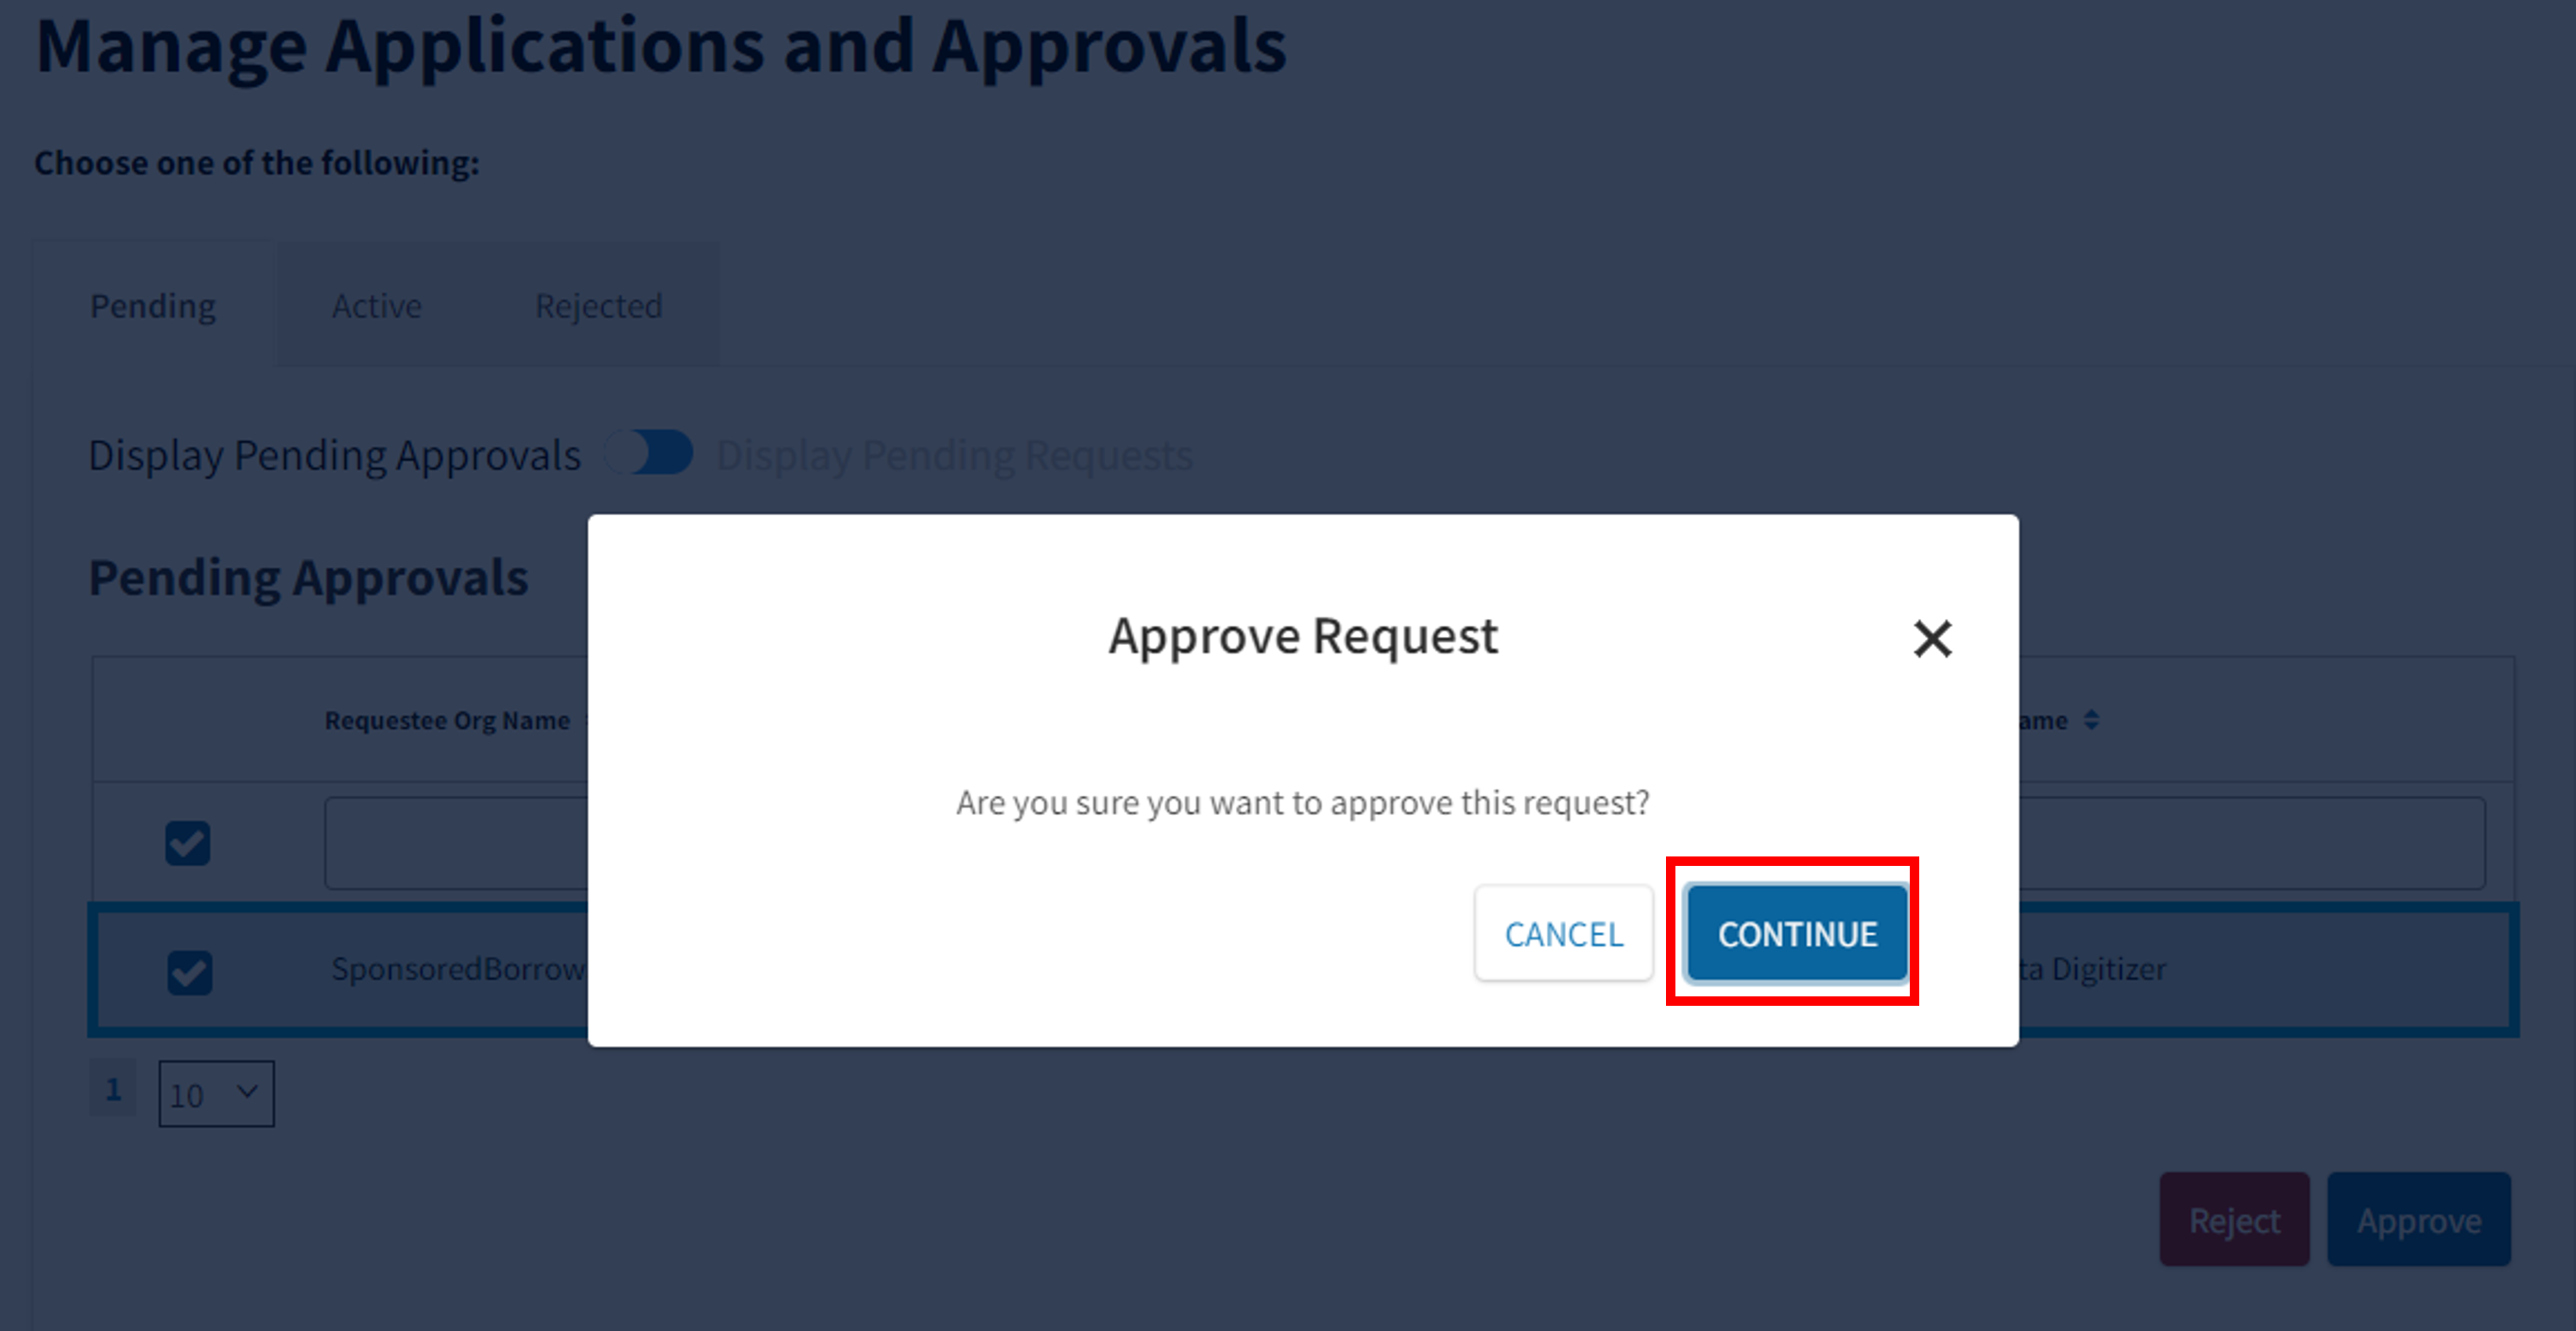
- Approval prompt will appear. Select Continue to approve.
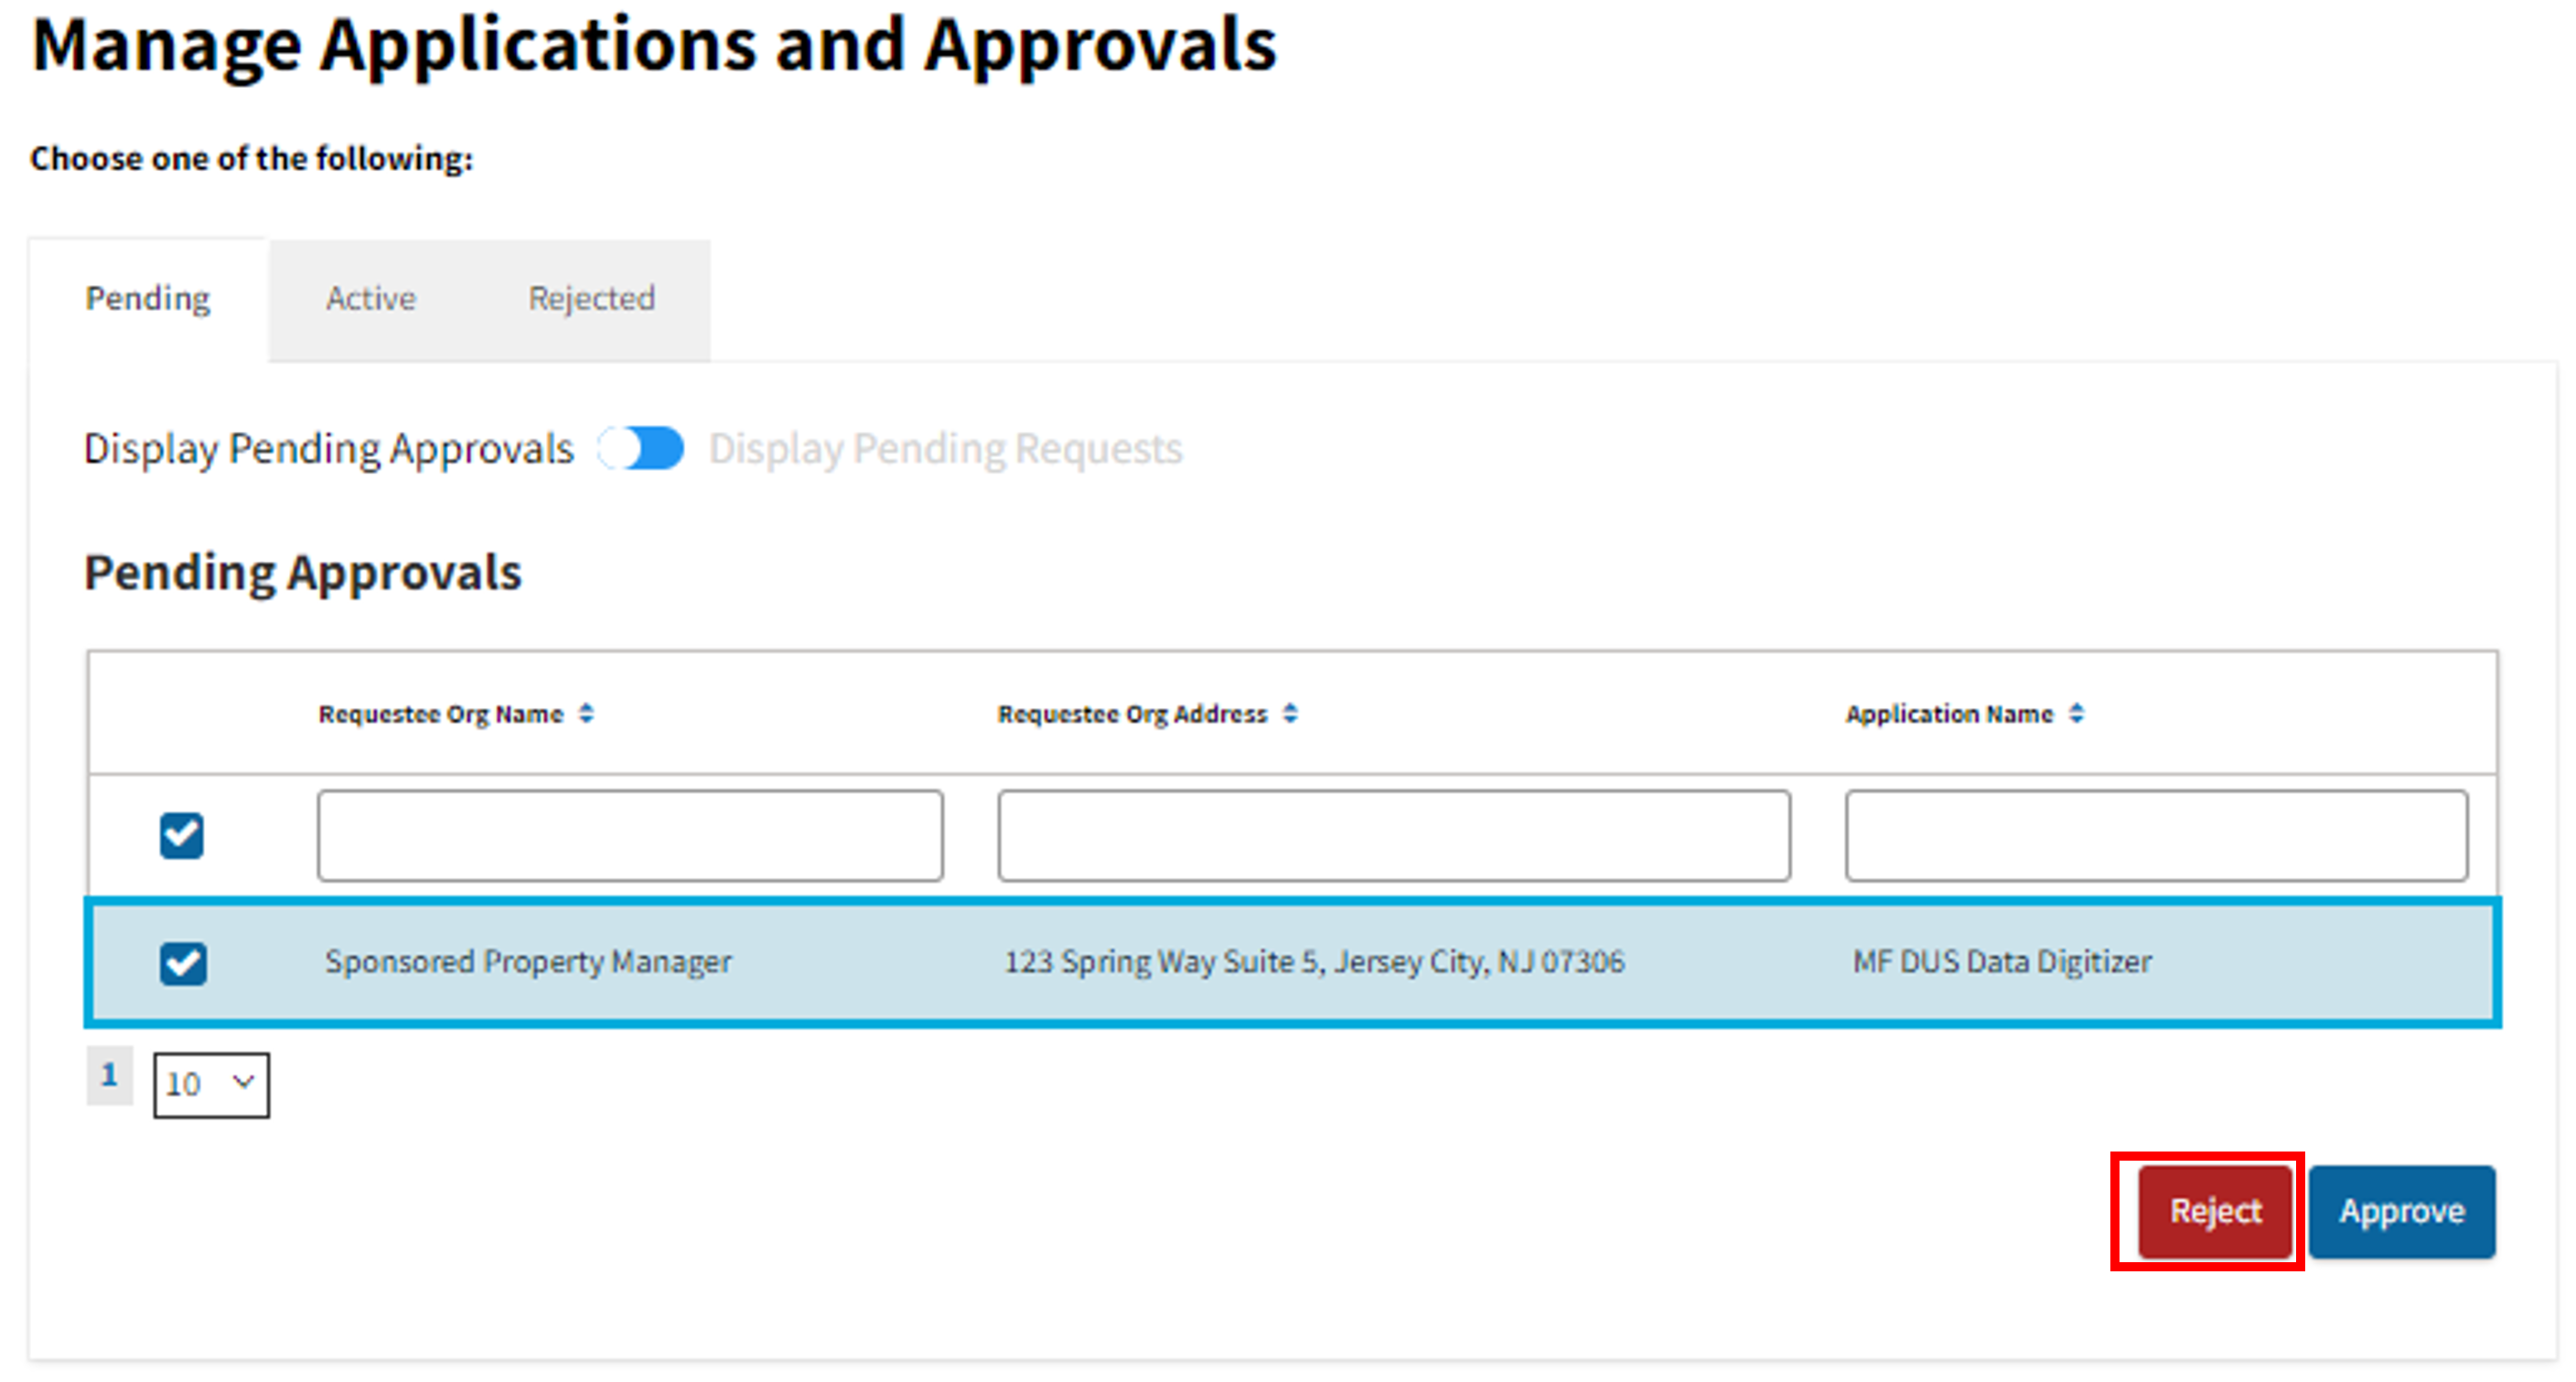
- If pending application approval is no longer required, select Reject.
- Rejection prompt will appear. If you wish, you may provide a reason for rejection (200-character limit) and then select Reject.
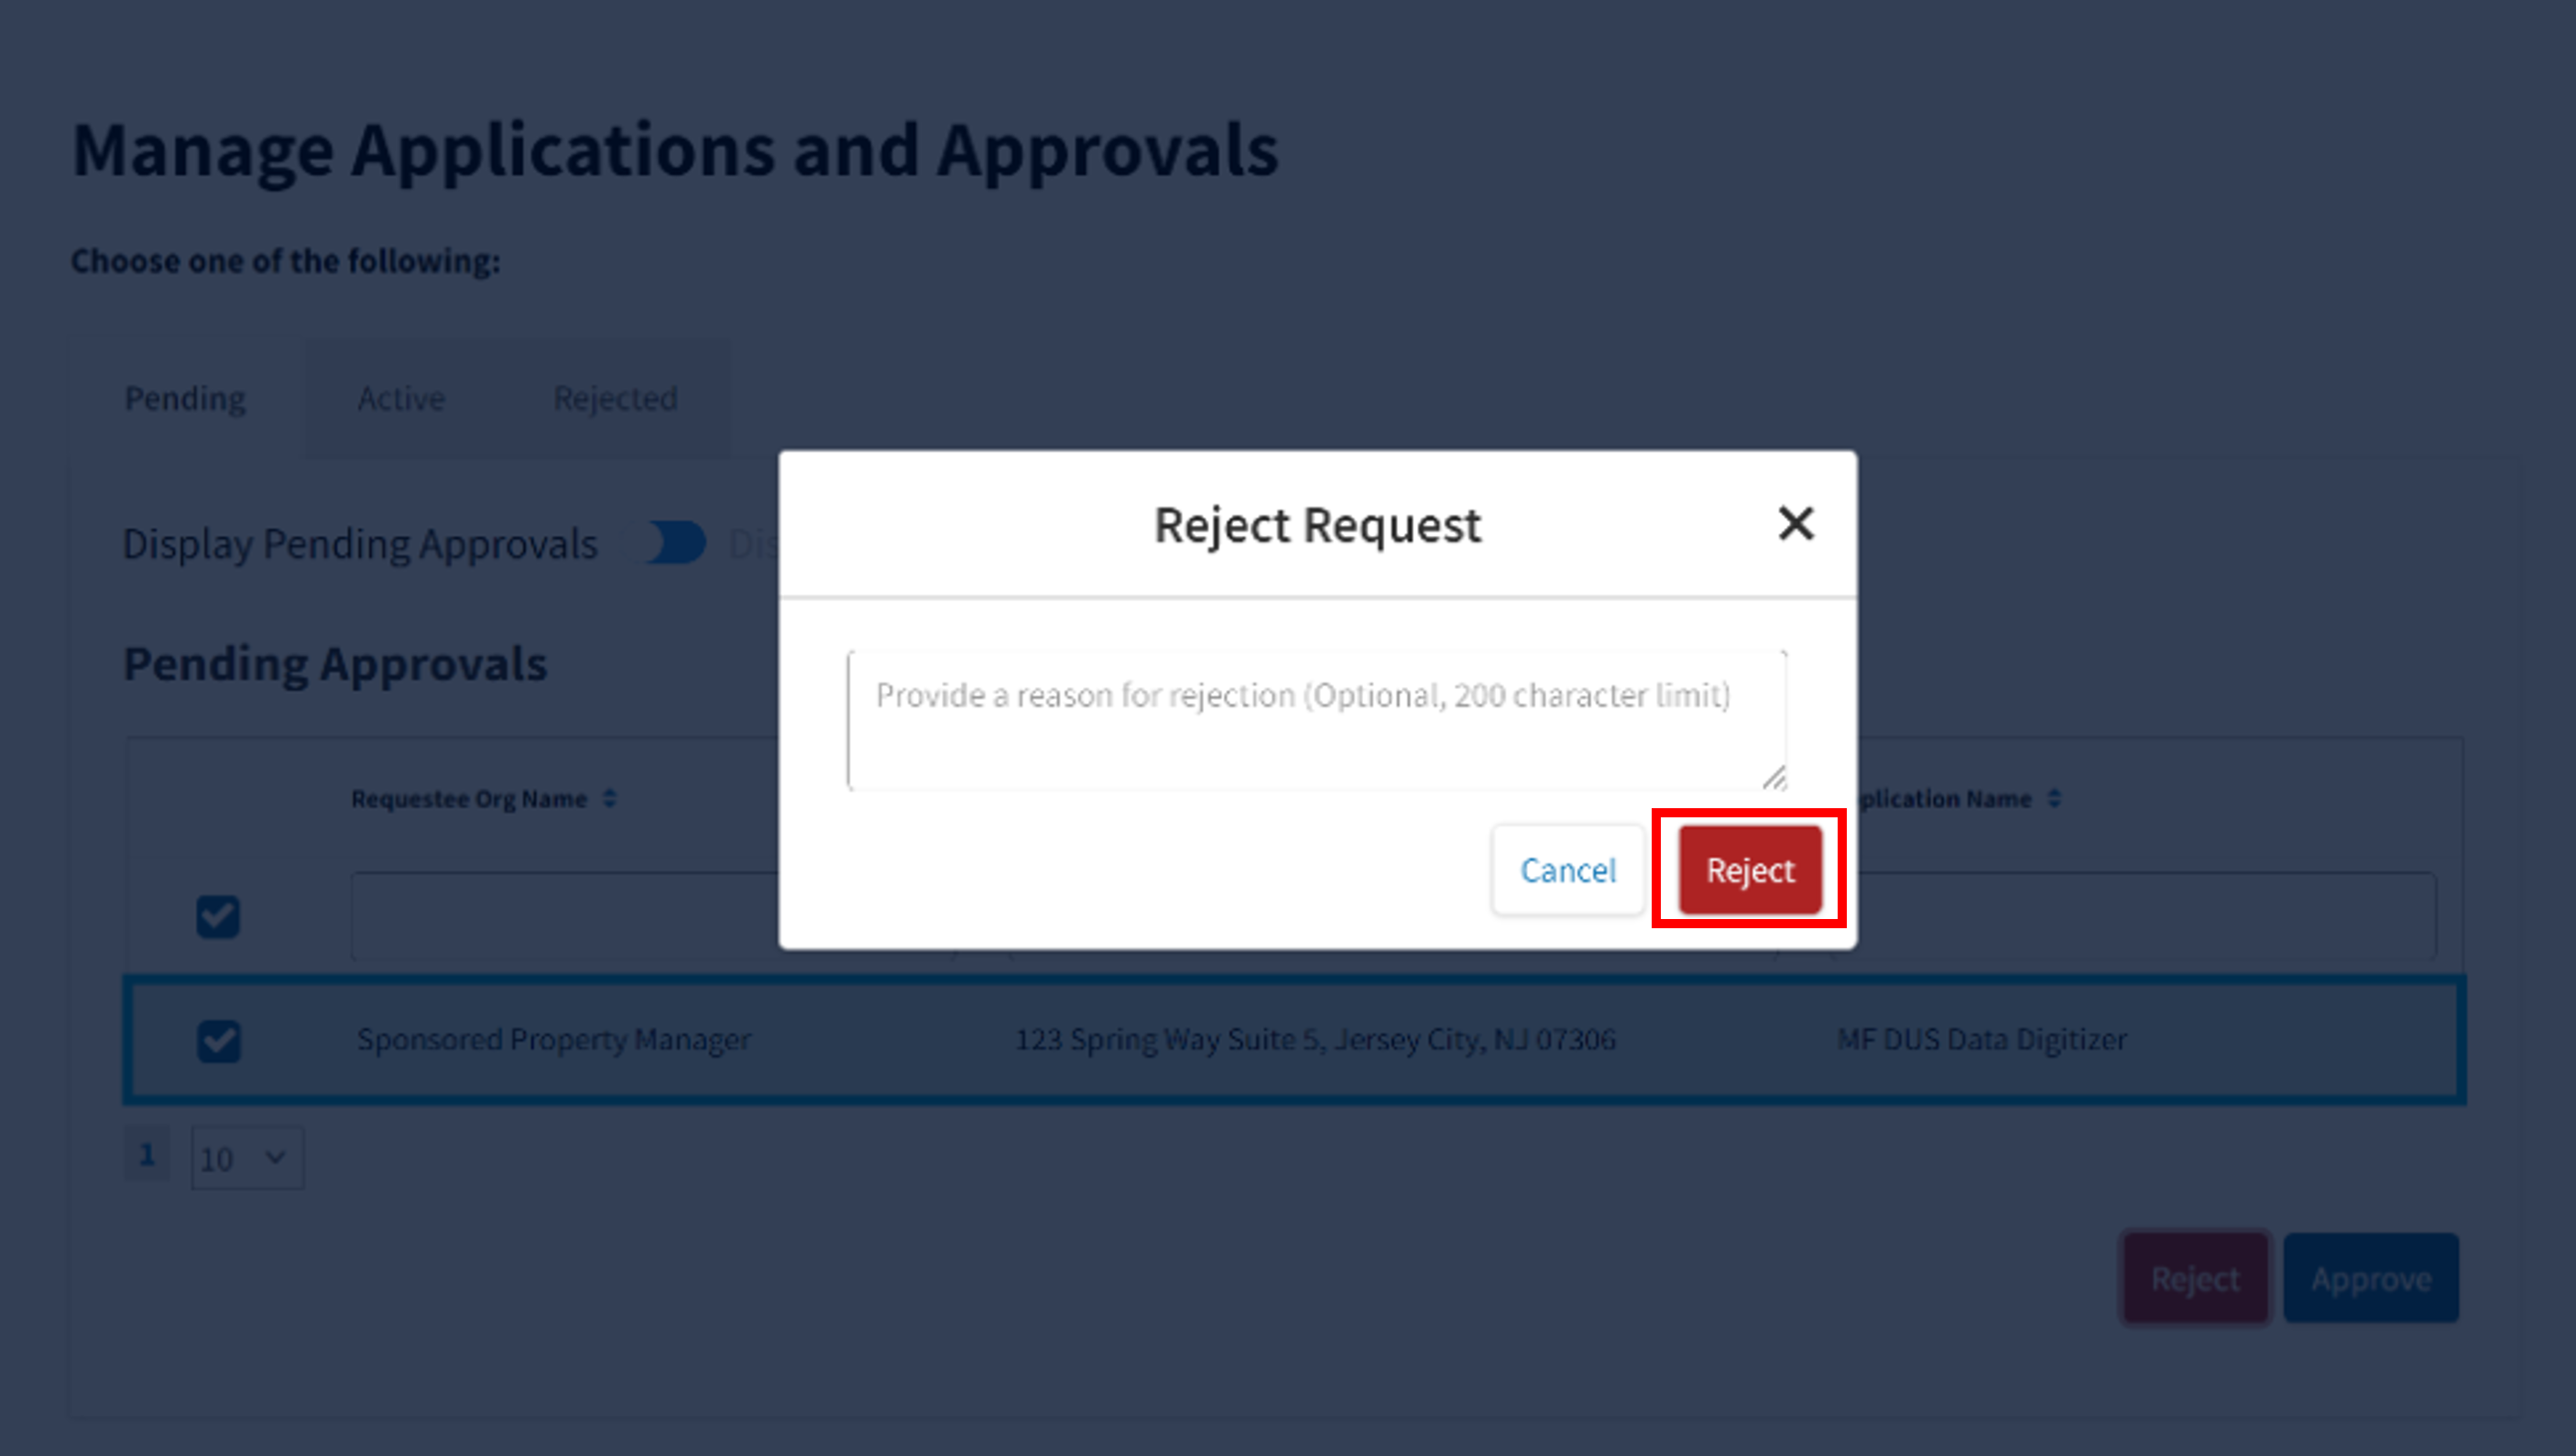
- Once request has been rejected, it will no longer appear under Pending tab.

Note: Once REJECT is selected to reject a pending request, selection cannot be reversed.
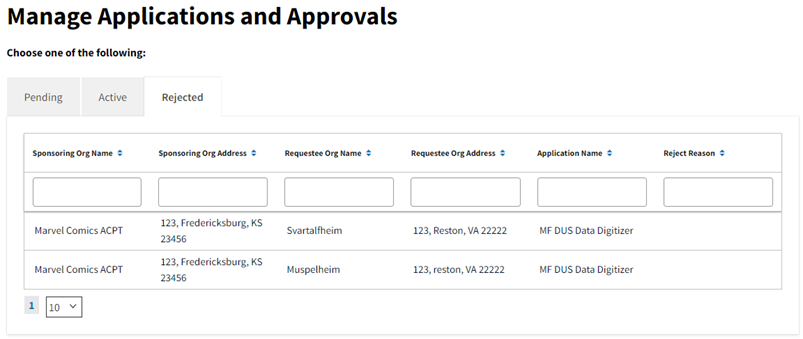
- Rejected request will now appear under Rejected tab.
If an error message is encountered during your attempt to manage any application, please contact the Technology Support Center.