My web
Filter for Edit Resolution
![]()
Step-by-Step Instructions:
-
After loans are imported, to view the Edit Results Page select the Latest Edit Results navigation link from the Import Report.
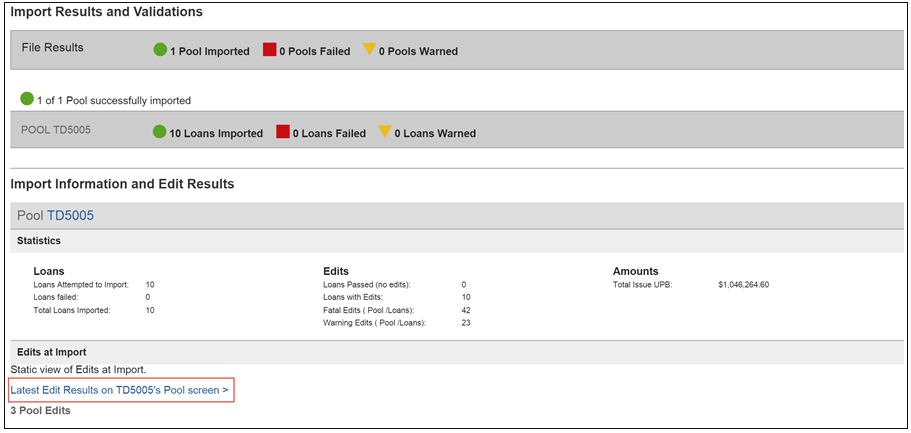
-
This will take you to the list of the Loan Edits:
-
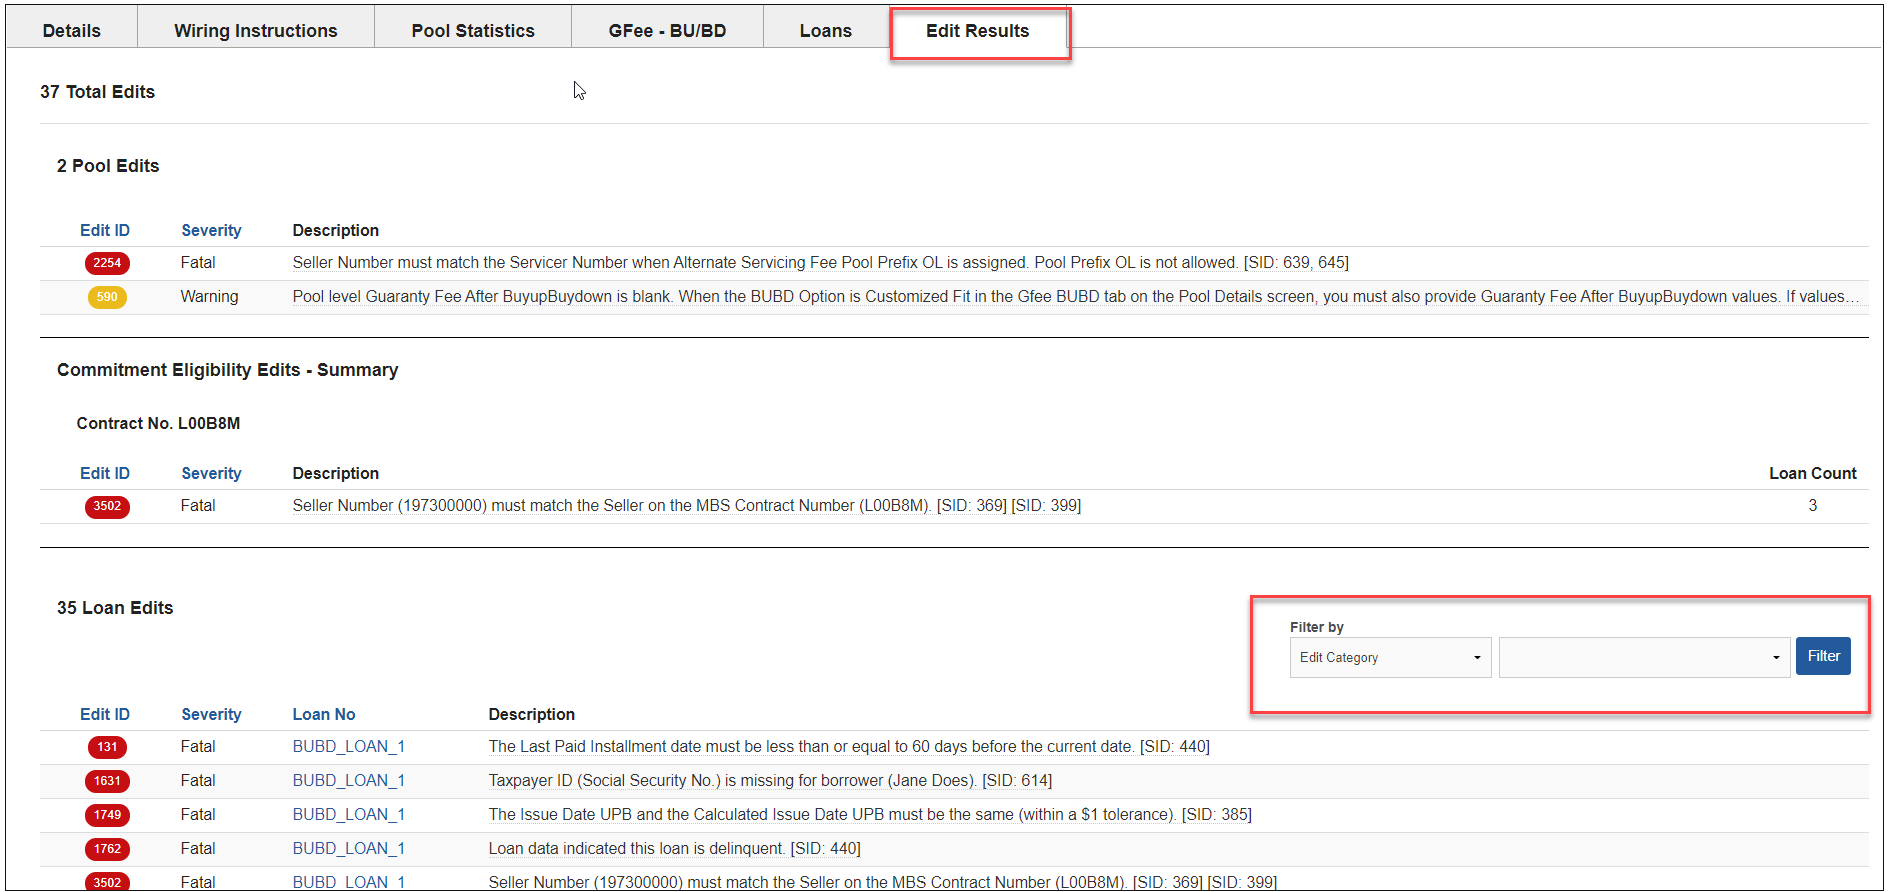
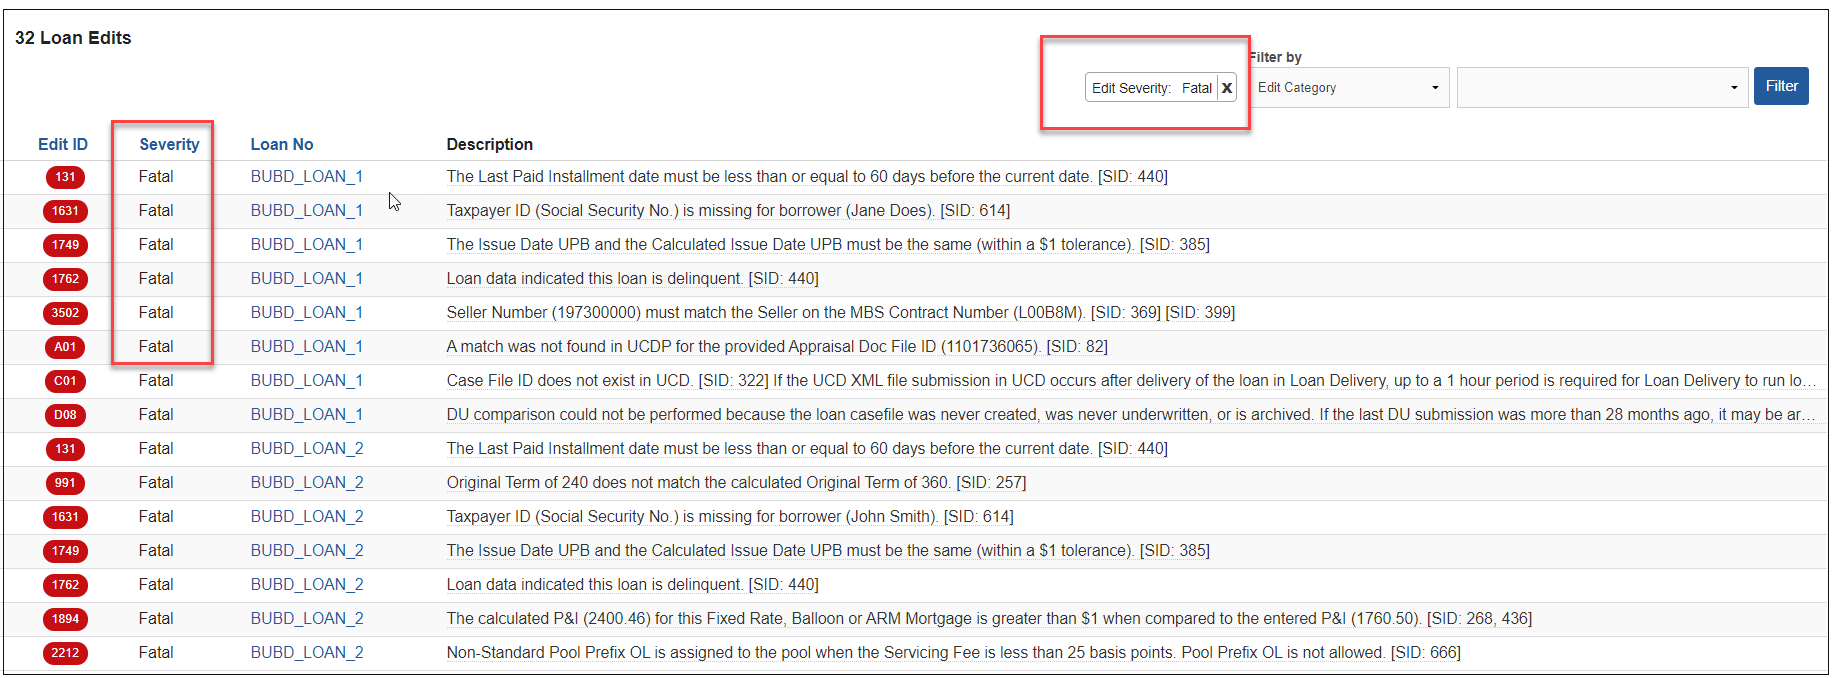
From the Edit Results page, on the Loan Edits, the options are to filter by Edit Category, Edit ID or Edit Severity.

NOTE:
Edit Category: You can select either Commitment Eligibility or Other. Selecting Commitment Eligibility will display only the commitment eligibility related edits (selecting Other will show all non-commitment eligibility related edits.
Edit ID: Filter by a specific Edit ID and only the loans with that Edit ID will display.
Edit Severity: Select either Fatal or Warning.
-
After selecting a filter option, the system will display all loans with filter option you selected by Edit Category, you can select either Commitment Eligibility or Other.
-
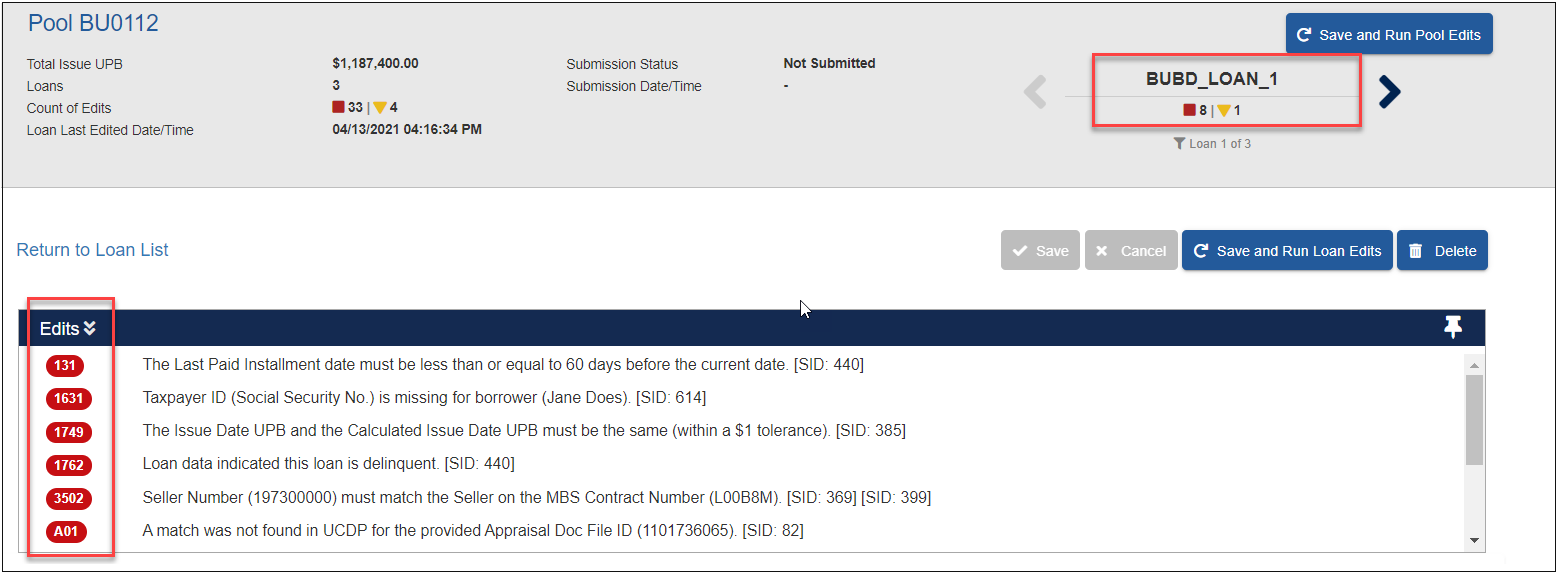
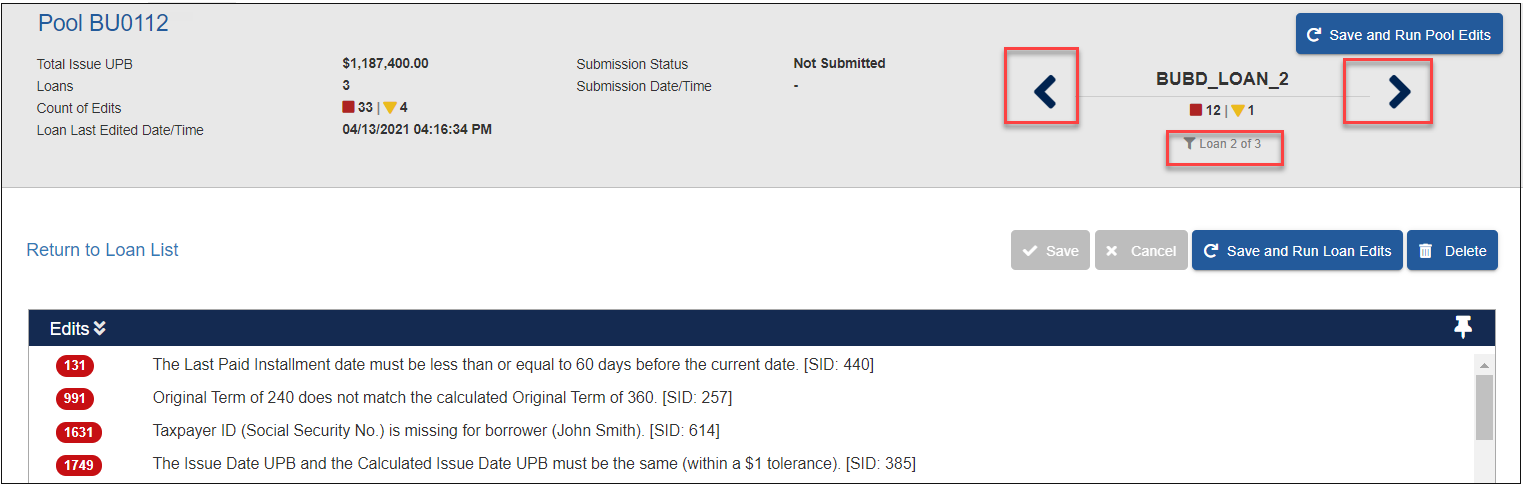
After selecting a loan, you will be directed to that loan in order to address the loan edits.
NOTE: Refer to the Edits CSV Export job aid for details on how to export a list of Loan Delivery edits. This file can be used to share edits with other teams in your organization, perform analysis, and provide information back to your internal applications.
- After addressing the edits, select the right or left navigation arrows to move to the next loan to resolve the edits for that loan.
NOTE: Refer to the Edits CSV Export job aid for details on how to export a list of Loan Delivery edits. This file can be used to share edits with other teams in your organization, perform analysis, and provide information back to your internal application.