My web
Create a New Data Folder
![]()
This job aid explains how to create new data folders, which are data sets within an application.
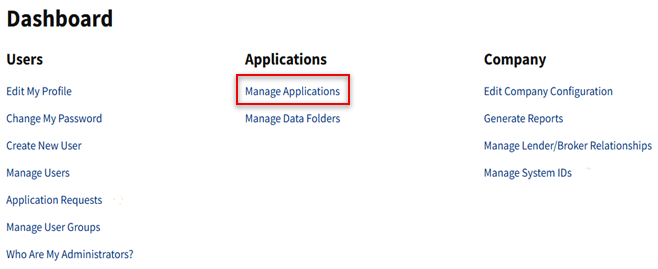
- From the dashboard, select Manage Applications.
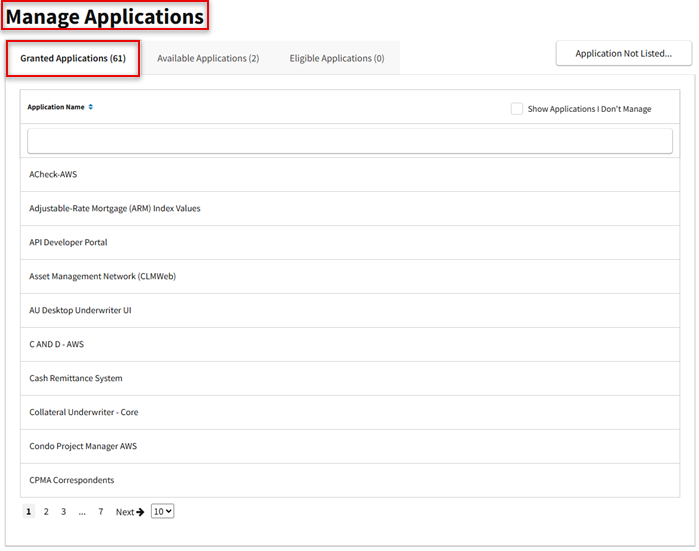
- The Manage Applications screen appears with a list of Granted Applications. Select the application that will receive the new data folder.
Note: If a  icon appears next to an application name, you may place your cursor over the icon and read a message for the application. You may also hover over the application name to view the application description.
- The Granted User Groups appears and it displays a list of user groups that have been granted access to the application. Select the user group you wish to assign the new data folder to. Then, select Manage Access.
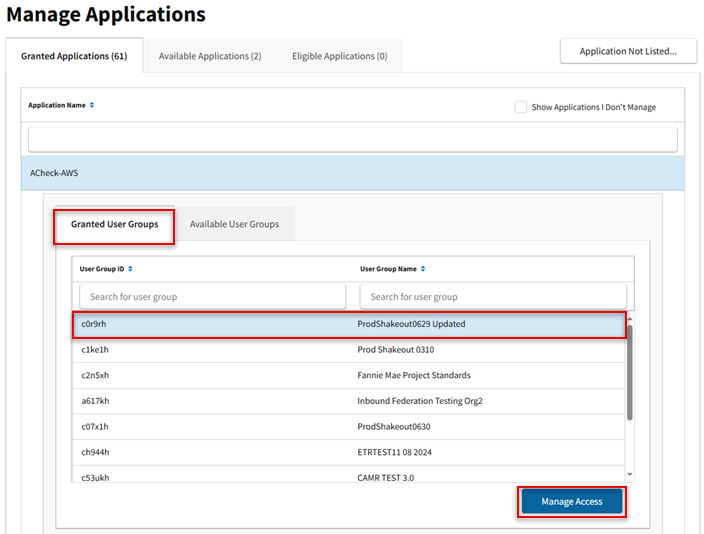
Note: User may select the Available User Groups tab to view all applications currently available to the user.
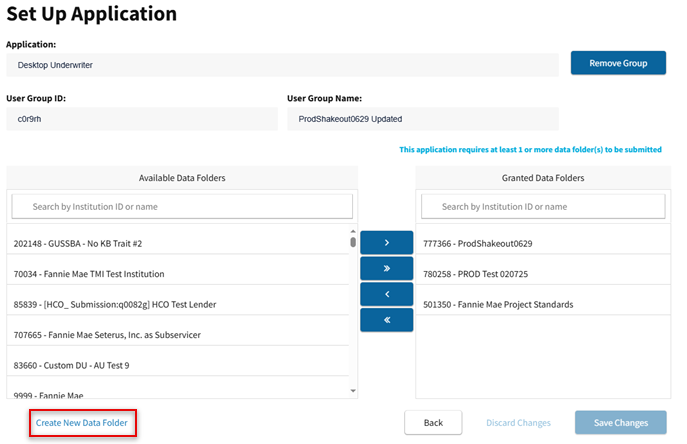
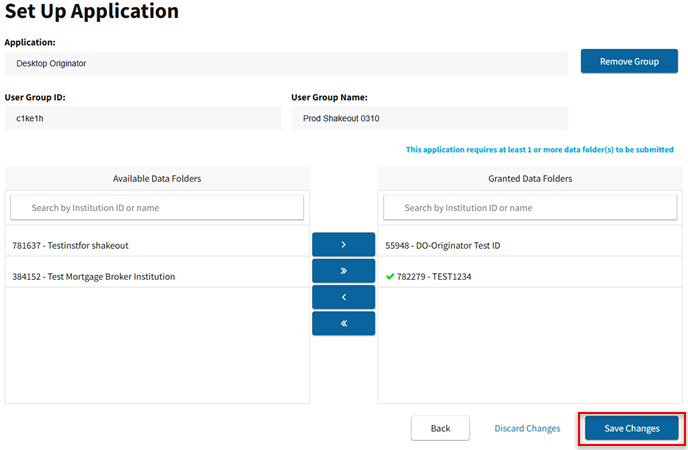
- The Set Up Application screen appears. In the Available Data Folders section, confirm that the desired data folder does not already exist in the Granted Data Folders section.
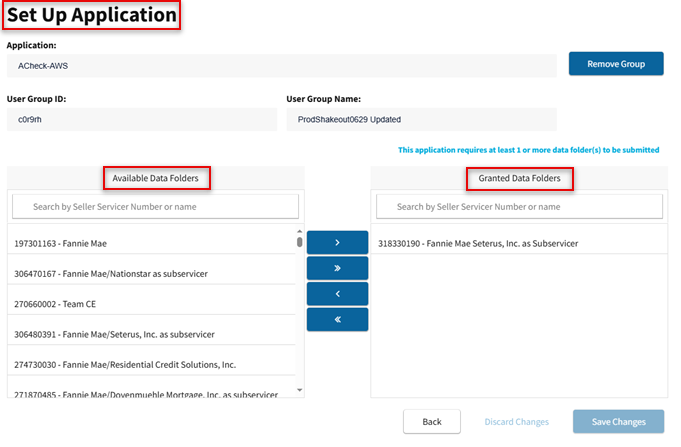
- Select Create New Data Folder in the bottom left corner.
Note: Data folders are not required for all applications.
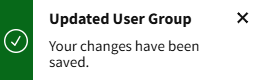
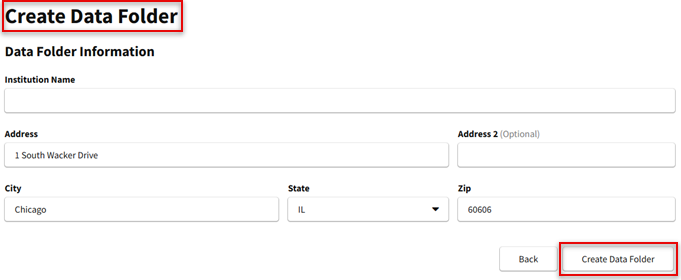
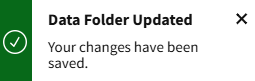
- The Create Data Folder screen appears. Enter the required information, then select Create Data Folder. The Data Folder Updated message will appear in bottom right corner.
- The Set Up Applications screen appears with the new data folder added to the list of Granted Data Folders for the application. Select Save Changes to complete the assignment to the application.
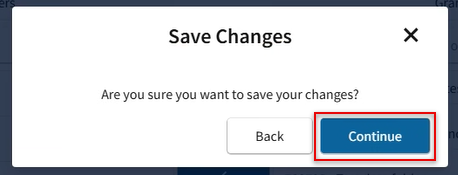
- Confirm your changes by selecting Continue. The success message will appear in bottom right corner.