My web
Registering Users
![]()
This document shows you how to register users for the Desktop Underwriter® (DU®)/Desktop Originator® (DO®) user Interface (UI).
Users must register for both Desktop Underwriter/Desktop Originator/Desktop Underwriter (Wholesale) and AU Desktop Underwriter UI applications in Technology Manager to use the full functionality of the DU/DO UI.
If the user is only registered for AU Desktop Underwriter UI, the user will not have access to DU.
Follow the guidelines below, to register a user for the DU UI to utilize Desktop Underwriter/Desktop Originator/Desktop Underwriter (Wholesale).
Notes: An individual user ID cannot be provisioned with both Underwriter and Originator role. If both roles are provisioned, the application will display a message instructing the user to provision either the Underwriter or Originator role, but not both. The user will not be able to proceed in the application until they have done so. If both roles are required, they must be provisioned using separate user IDs.
System IDs cannot be used as User IDs. System IDs should only be used for system-to-system access.
If the administrator is registering a user for Desktop Underwriter, the following application and role names are required:
|
Application Name |
Role Name |
|
Desktop Underwriter |
Refer to the Applications and Roles page to provision the user with the appropriate role in your organization. |
|
AU Desktop Underwriter UI |
Underwriter* |
If the administrator is registering a user for Desktop Originator, the following application and role names are required:
|
Application Name |
Role Name |
|
Desktop Originator |
Refer to the Applications and Roles page to provision the user with the appropriate role in your organization. |
|
AU Desktop Underwriter UI |
Originator* |
If the administrator is registering a user for Desktop Underwriter (Wholesale), the following application and role names are required:
|
Application Name |
Role Name |
|
Desktop Underwriter (Wholesale) |
Refer to the Applications and Roles page to provision the user with the appropriate role in your organization. |
|
AU Desktop Underwriter UI |
DO Lender |
Each individual user must have their own individual user ID.
As a reminder, per the Selling Guide E-2-04, Software Subscription Agreement Master Terms and Conditions, authentication credentials (user IDs) may not be transferred among Authorized Users or other individuals or systems.
You may scroll through this document, or click a link to be taken to the information for the specified topic.
Desktop Underwriter (Wholesale)
Desktop Originator
Follow these steps to register additional DO users, which are users that submit loan casefiles to underwriting through a sponsoring lender.
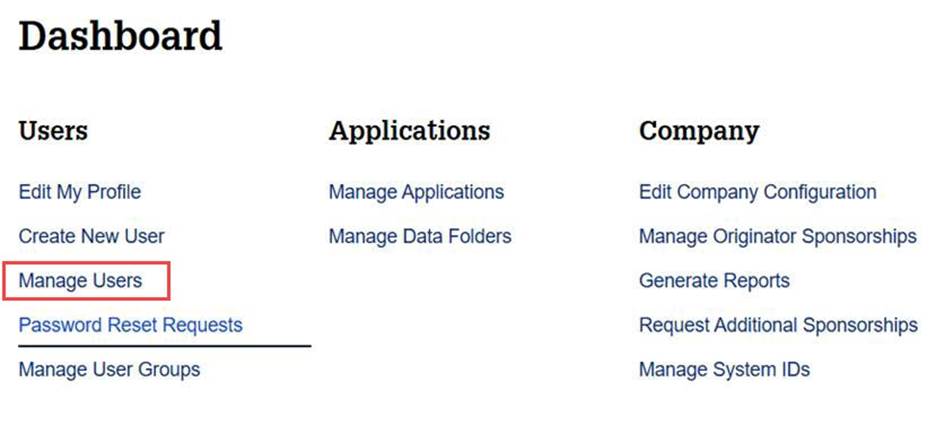
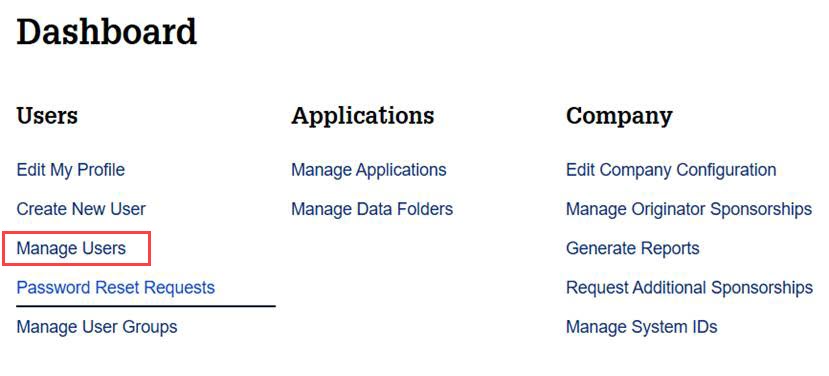
- From the Technology Manager dashboard, clickManageUsers.
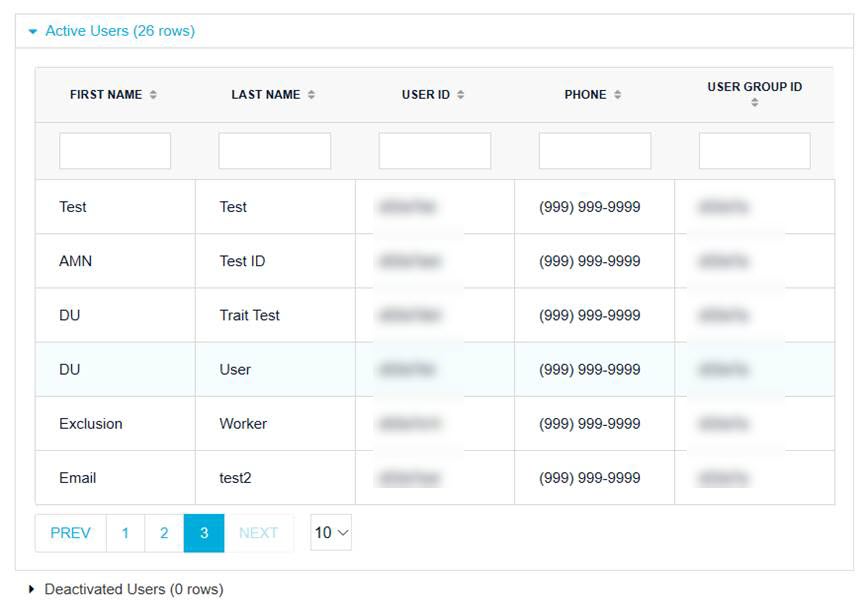
- The ManageUsers screen appears. Enter the desired search criteria and search value, then click SEARCH.

- One or more users may be found depending on the search criteria. The number of records found appears above the list. Select the desired user record.

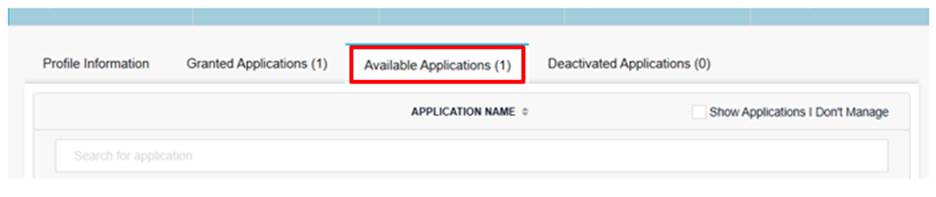
- Profile Information for the selected user appears. Click theAvailableApplications tab.
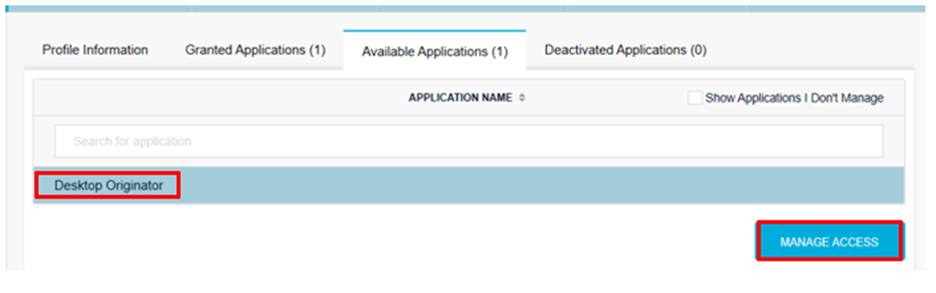
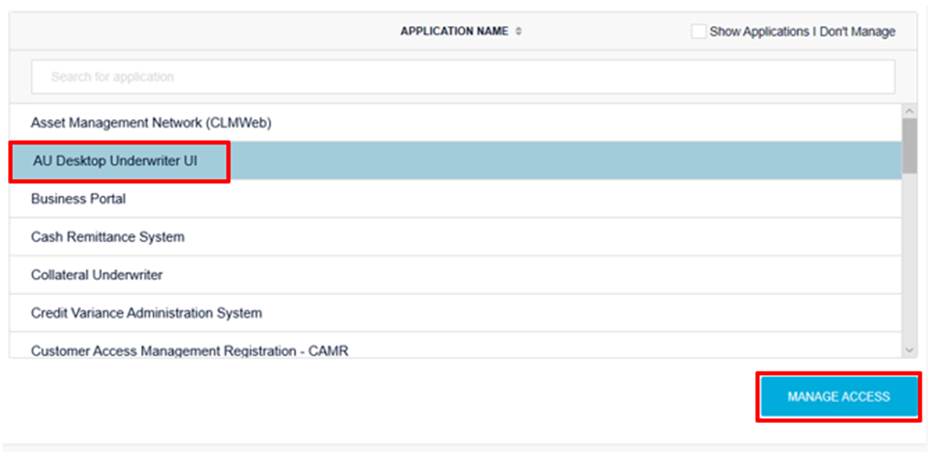
- A list of available applications appears. SelectDesktopOriginator, then click MANAGEACCESS.
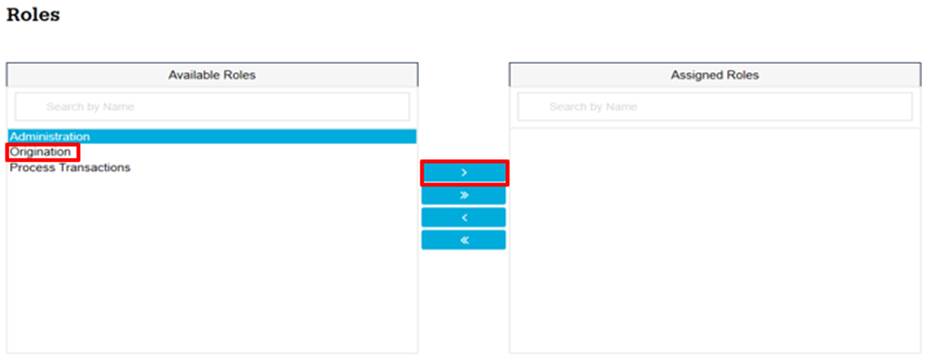
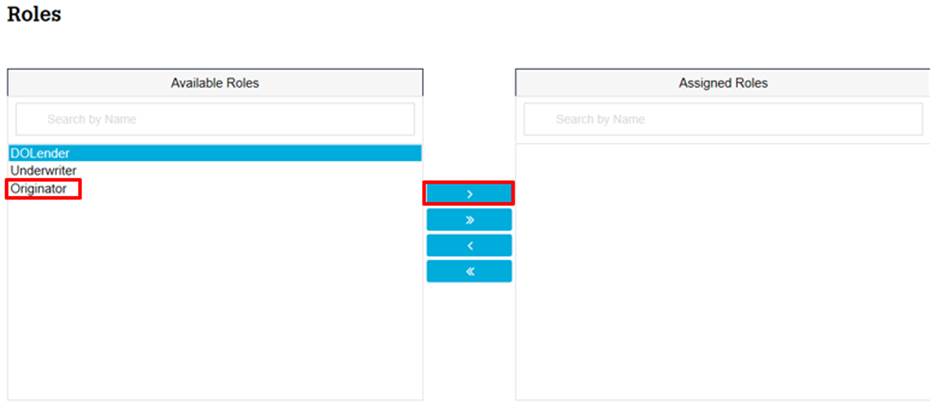
- The Set Up User Access screen appears. In theRoles section, selectOrigination, then click the > arrow to add the role.
- Scroll down to theDataFolder section, select which data folder(s) the user will be able to access, then click the > arrow to add the data folder.
- ClickSUBMIT.
- A confirmation window appears. ClickCONTINUE to save your changes.
- To add the second application, repeat steps 1 through 4.
- Select AU Desktop Underwriter UI, then click MANAGE ACCESS.
- The Set Up User Access screen appears. In the Roles section, selectOriginator, then click the > arrow to add the role.
- In the Data Folder section, select which data folder(s) the user will be able to access, then click the > arrow to add the data folder.
- ClickSUBMIT.
- A confirmation window appears. ClickCONTINUE to save your changes.
Desktop Underwriter
Follow these steps to register additional DU users, which are users that submit loan casefiles directly to underwriting (not through a sponsoring lender).
-
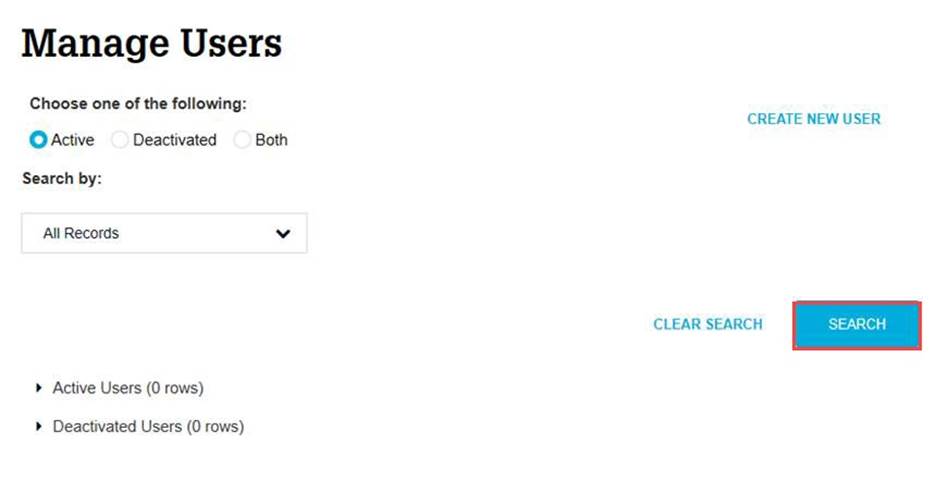
From the Technology Manager dashboard, click Manage Users.
-
The Manage Users screen appears. Enter the desired search criteria and search value, then click SEARCH.

-
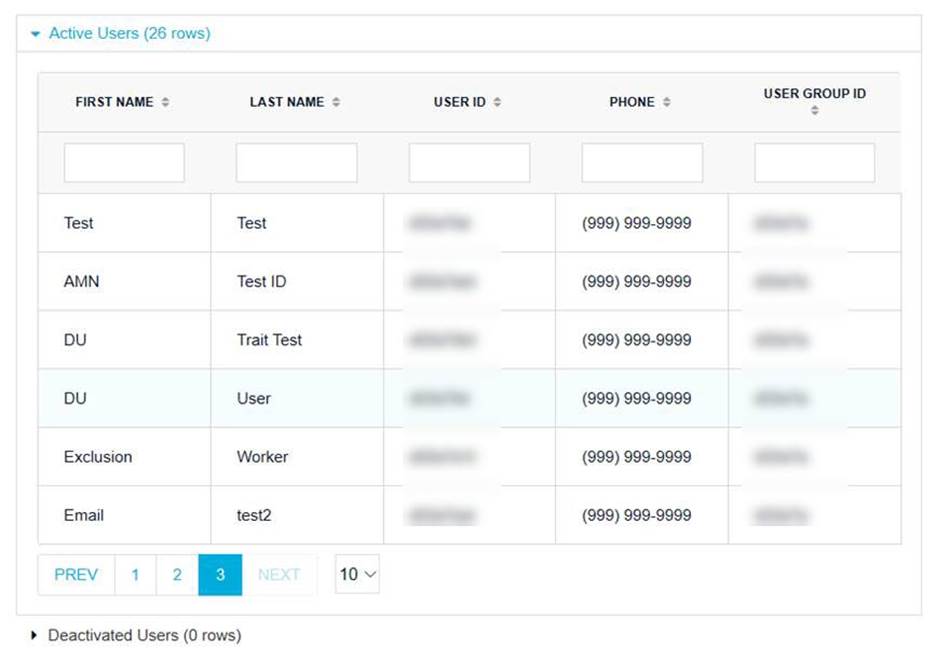
One or more users may be found depending on the search criteria. The number of records found appears above the list. Select the desired user record.
-
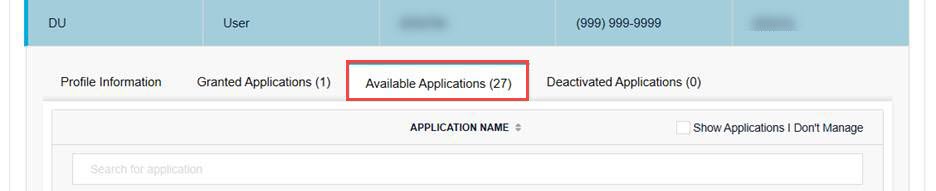
Profile Information for the selected user appears. Click the Available Applications tab.
-
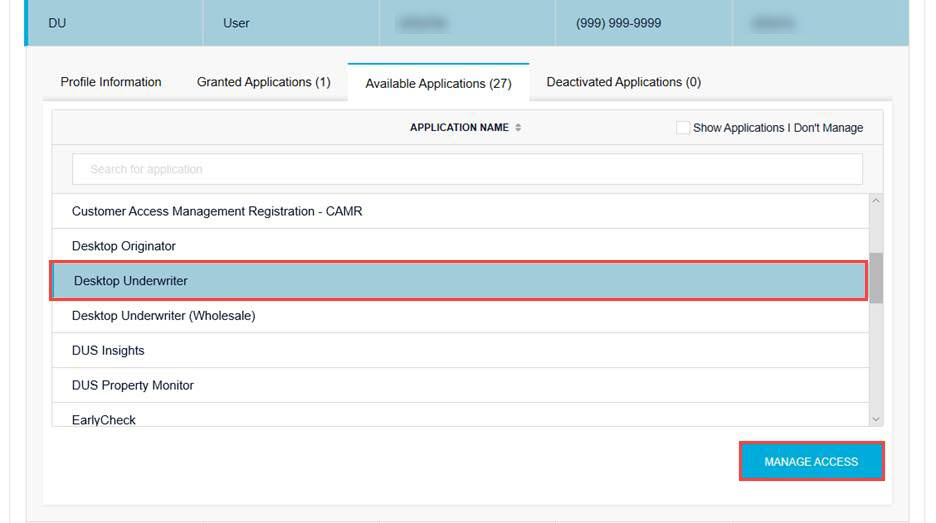
A list of available applications appears. Select Desktop Underwriter, then click MANAGE ACCESS.
-
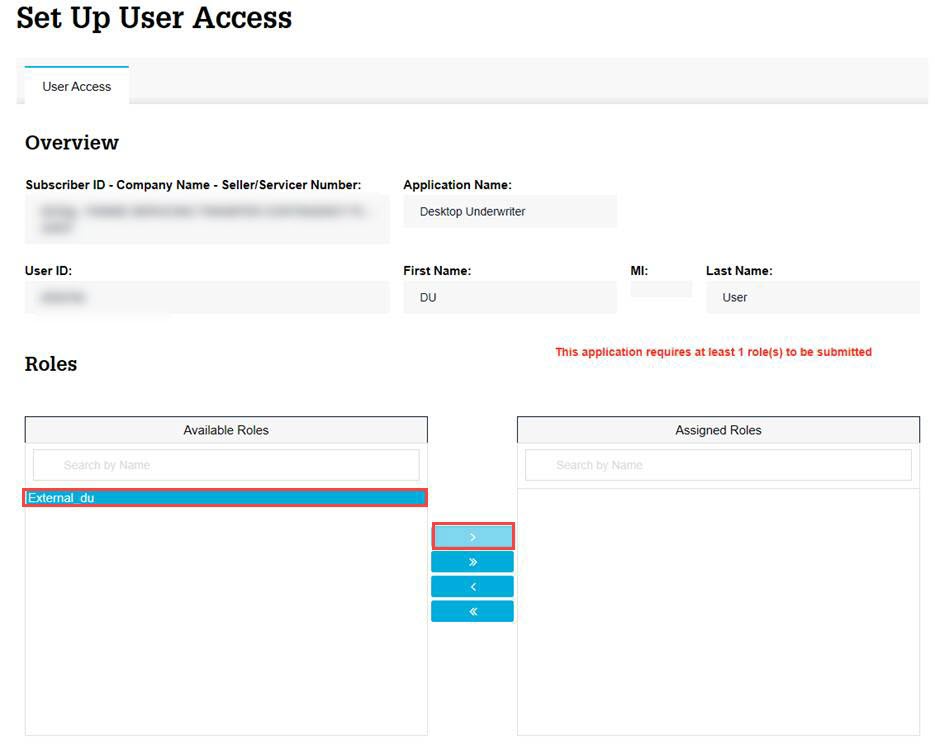
The Set Up User Access screen appears. In the Roles section, select External_du, then click the > arrow to add the role.
-
Scroll down to the Data Folder section, select which data folder(s) the user will be able to access, then click the > arrow to add the data folder.
-
Click SUBMIT.
-
A confirmation window appears. Click CONTINUE to save your changes.
-
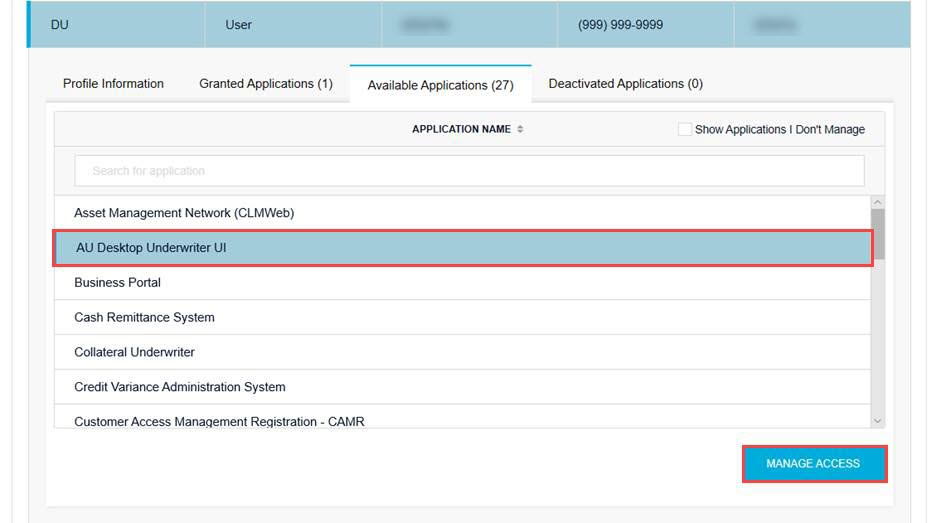
To add the second application, repeat steps 1 through 4.
-
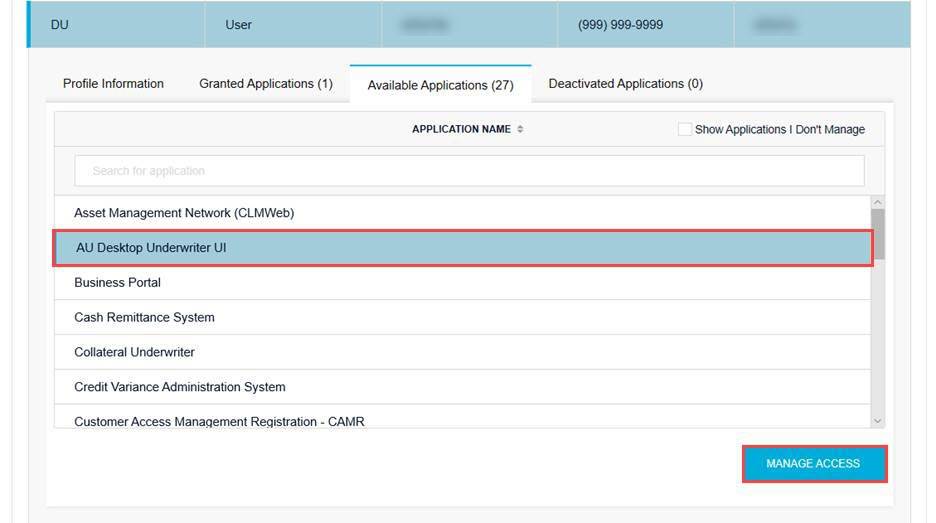
Select AU Desktop Underwriter UI, then click MANAGE ACCESS.
-
The Set Up User Access screen appears. In the Roles section, select Underwriter, then click the > arrow to add the role.
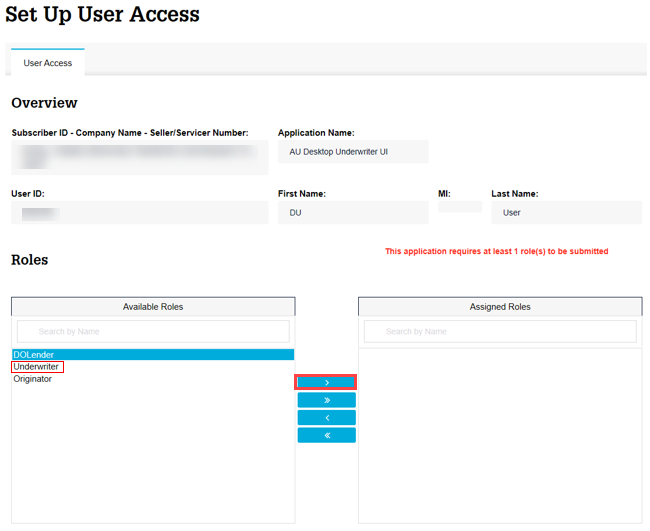
-
In the Data Folder section, select which data folder(s) the user will be able to access, then click the > arrow to add the data folder.
-
Click SUBMIT.
-
A confirmation window appears. Click CONTINUE to save your changes.
Desktop Underwriter (Wholesale)
Follow these steps to register additional DU wholesale users, which are users that manage loan casefiles submitted to underwriting by a sponsored originator.
- From the Technology Manager dashboard, click Manage Users.

- The Manage Users screen appears. Enter the desired search criteria and search value, then click SEARCH.
- One or more users may be found depending on the search criteria. The number of records found appears above the list. Select the desired user record.
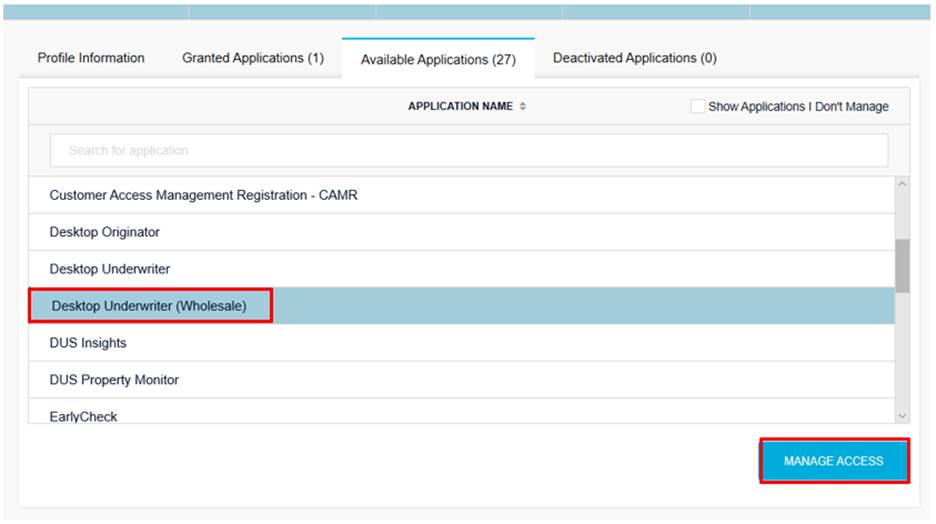
- Profile Information for the selected user appears. Click the Available Applications tab.

- A list of available applications appears. Select Desktop Underwriter (Wholesale), then click MANAGE ACCESS.
- The Set Up User Access screen appears. In the Roles section, select Underwriting, then click the > arrow to add the role.
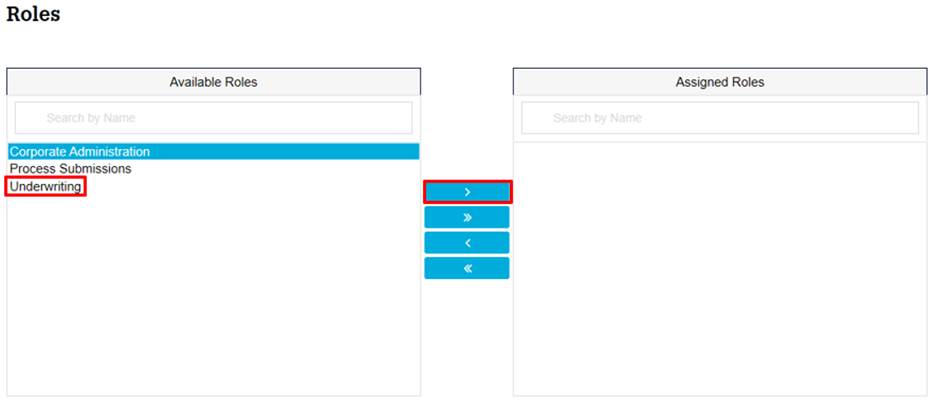
- Scroll down to the Data Folder section, select which data folder(s) the user will be able to access, then click the > arrow to add the data folder.
- Click SUBMIT.
- A confirmation window appears. Click CONTINUE to save your changes.
- To add the second application, repeat steps 1 through 4.
- Select AU Desktop Underwriter UI, then click MANAGE ACCESS.
- The Set Up User Access screen appears. In the Roles section, select DOLender, then click the > arrow to add the role.
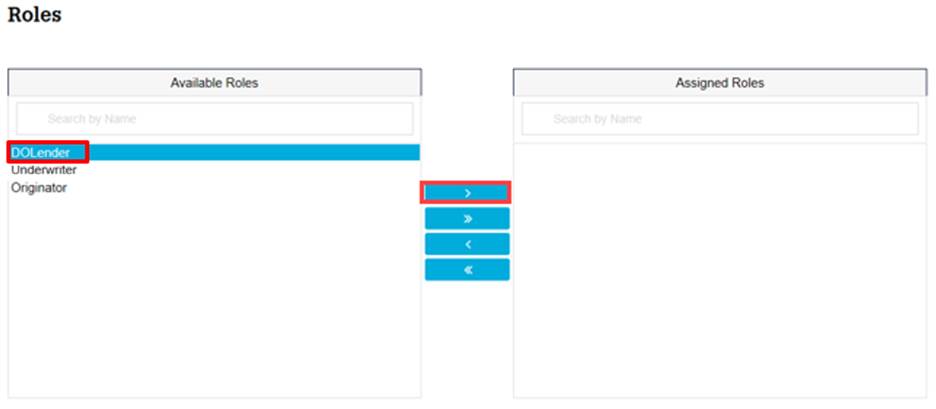
- In the Data Folder section, select which data folder(s) the user will be able to access, then click the > arrow to add the data folder.
- Click SUBMIT.
- A confirmation window appears. Click CONTINUE to save your changes.