My web
QC Calibration Queue QC Results
![]()
The QC calibration process requires the lender to provide the QC results data for all loans in the sample that were selected for QC calibration. The QC results data is the outcome from the lender’s internal post-close QC review and is needed for Fannie Mae to perform the calibration assessment. Once the QC results data is provided, the user must also submit the data for the QC calibration workflow to continue.
The QC Calibration Queue allows for the manual entry of each loan or a bulk import of the QC results data via the buttons below the BI cards.

If one or more quality control issues are identified for a loan, all quality control issues must be provided.
After the QC results are added for each loan (i.e., imported and/or manually entered), the calibration sample grid's Total QC Issues Entered is populated with the count of quality control issues entered.

Bulk Import

Import Bulk QC Results – The Import Bulk QC Results button allows the user to upload QC results for multiple loans within a QC calibration sample at the same time when the loan's Calibration Review Status is "QC Results Requested" or "QC Results in Progress." When the button is selected, the Import Bulk QC Results window is displayed. The user can either utilize the Import Bulk QC Results Template Excel spreadsheet or create an Excel spreadsheet. If a user creates their own Excel spreadsheet, they must ensure that the file format and the column headers are in the following order:
- Column A: Seller Loan #.
- Column B: Fannie Mae Loan #.
- Column C: QC Reporting Period.
- Column D: Final Quality Control Issue Severity.
- Column E: Lender Quality Control Issue Category.
- Column F: Lender Quality Control Issue Sub Category.
- Column G: Lender Quality Control Issue Name.
- Column H: Lender Quality Control Issue Description.
- Column I: Fannie Mae Defect Category.
- Column J: Fannie Mae Defect Sub Category.
- Column K: Fannie Mae Defect Name.
- Column L: Initial Audit Comments.
- Column M: Final Audit Comments.
Example of the import spreadsheet:

Notes:
* The QC results data must be the first tab of the Excel spreadsheet. If not, the bulk import fails. The user receives an informational pop-up as notification of the failed import.
* The QC results data must be in the above file format and follow the above column header order. The user receives an information pop-up as notification of the file format error.
* The QC results data must include at least one QC results record (or row of data); otherwise, the user receives an informational pop-up window as notification of the file format error.
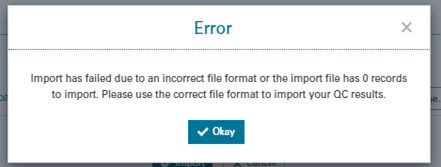
More than one quality control issue can be populated on the import spreadsheet for each loan when applicable. When a loan has more than one quality control issue, an additional row must be added to account for it. The corresponding Seller Loan # and Fannie Mae Loan # is repeated for each additional quality control issue. The system validates that each Fannie Mae loan number matches the loan number in the calibration sample.
Each quality control issue must be converted to the most suitable Fannie Mae loan defect using the Fannie Mae Loan Defect Taxonomy enumerations (Fannie Mae Defect Category, Fannie Mae Defect Sub-Category, and Fannie Mae Defect Name). The Import Bulk QC Results Template Excel spreadsheet includes a dynamic list of the Fannie Mae defect enumeration values for these required fields.
Note: The ‘Legal / Regulatory / Compliance’ Defect Category is not available because compliance-related issues are NOT in scope for the calibration exercise.
The Import Bulk QC Results Template Excel spreadsheet contains required, conditionally required, and optional data fields. Conditional data elements must be provided if the conditional statement is true while optional data elements should be provided if the data element is captured in the QC system of record. Otherwise, the data value can be left blank.
When the Import Bulk QC Results button is selected, the Import Bulk QC Results pop-up window opens. The user has an option to 'Import' or 'Cancel.'

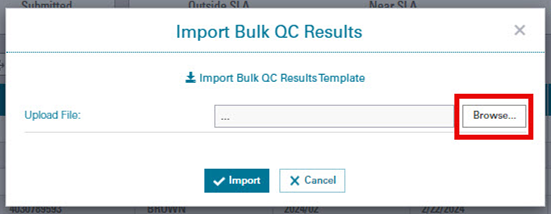
The user selects the formatted file using the browse button to locate it on their system. The option to cancel the import is also displayed.
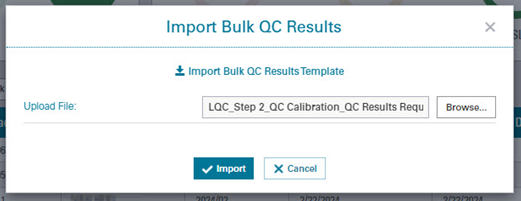
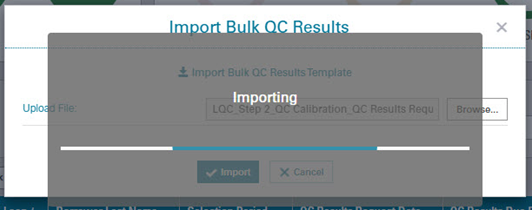
The user clicks ‘Import.' The system opens an ‘importing’ indicator during the processing.
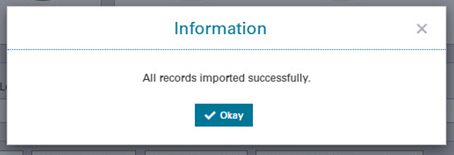
When the import is successful, the system opens an information confirmation window stating all records imported successfully.
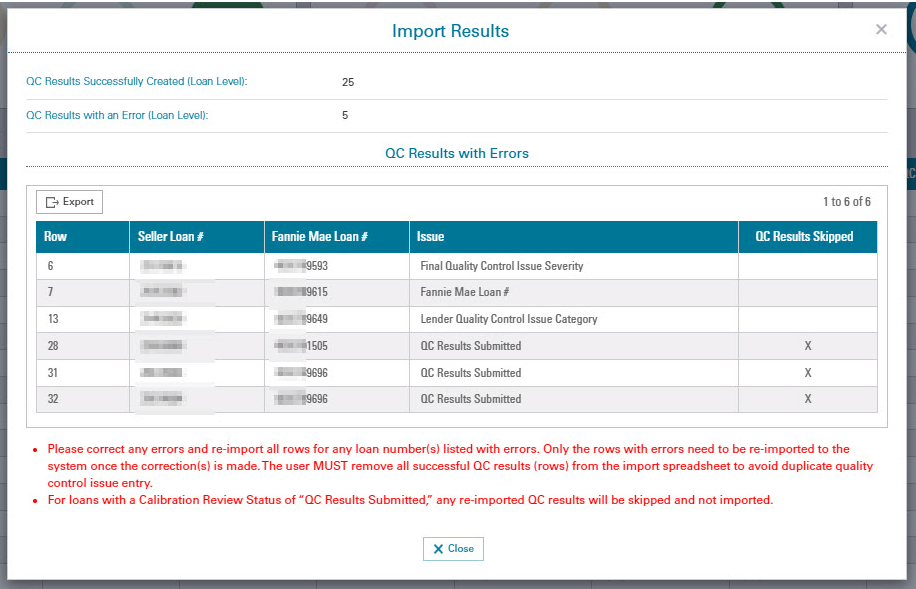
When the user imports the file, and one or more rows fail, the system opens the Import Results pop-up window. Each failed row are displayed with the associated error(s). Only rows WITHOUT an error(s) are uploaded into Loan Quality Connect.
Notes:
* Only the rows with errors need to be imported to the system once the correction(s) is made. The user MUST remove all successful QC results (rows) from the import spreadsheet to avoid DUPLICATE quality control issue entry.
* Once all QC results are successfully imported, the Calibration Review Status within the calibration sample grid is updated to 'QC Results in Progress.'
* Once a loan's QC results have been submitted, any row of data representing a loan where the QC results have been submitted are skipped at import. Therefore, the record is not be imported, and the QC Results with Errors section of the Import Results table are populated for this record (The QC Results Skipped column is with an "X"). If the data needs to be edited, contact the assigned QC Specialist to request the data correction.
Below is an explanation of the Imports Results window.

- The Close button closes the pop-up window, and the import error detail is no longer available to the user.
- A loan count for the loans submitted successfully and the loans submitted with errors. User must refer to the QC results with error grid for additional error details.
Note: In this example, the QC results for 25 loans were imported successfully, or without error. There were five loans where the import failed.
- This is a count of the number of rows with an error(s).
Note: In this example there are six rows with an error in the QC results data.
- The Row column corresponds with the row(s) within your imported Excel spreadsheet that had an import issue.
Note: In this example there are six rows with an error (i.e., rows 6, 7, 13, 28, 31, and 32).
- The Seller Loan # and Fannie Mae Loan # columns identify the loan number(s) with corresponding error(s)
- Multiple rows corresponding to one loan displays if there was an error in each row. This happens when a loan number has more than one quality control issue result provided as a separate row in the imported Excel spreadsheet and each row has an error.
- The Issue column displays the data point(s) that has an issue, or error.
Note: In this example, in row six there is an error in the Final Quality Control Issue Severity that needs to be reviewed to ensure that the data value is not blank/null or invalid.
- The QC Results Skipped column displays an "X" where the loan's QC results data has already been submitted and the Calibration Review Status is "QC Results Submitted" and the Issue column displays "QC Results Submitted."
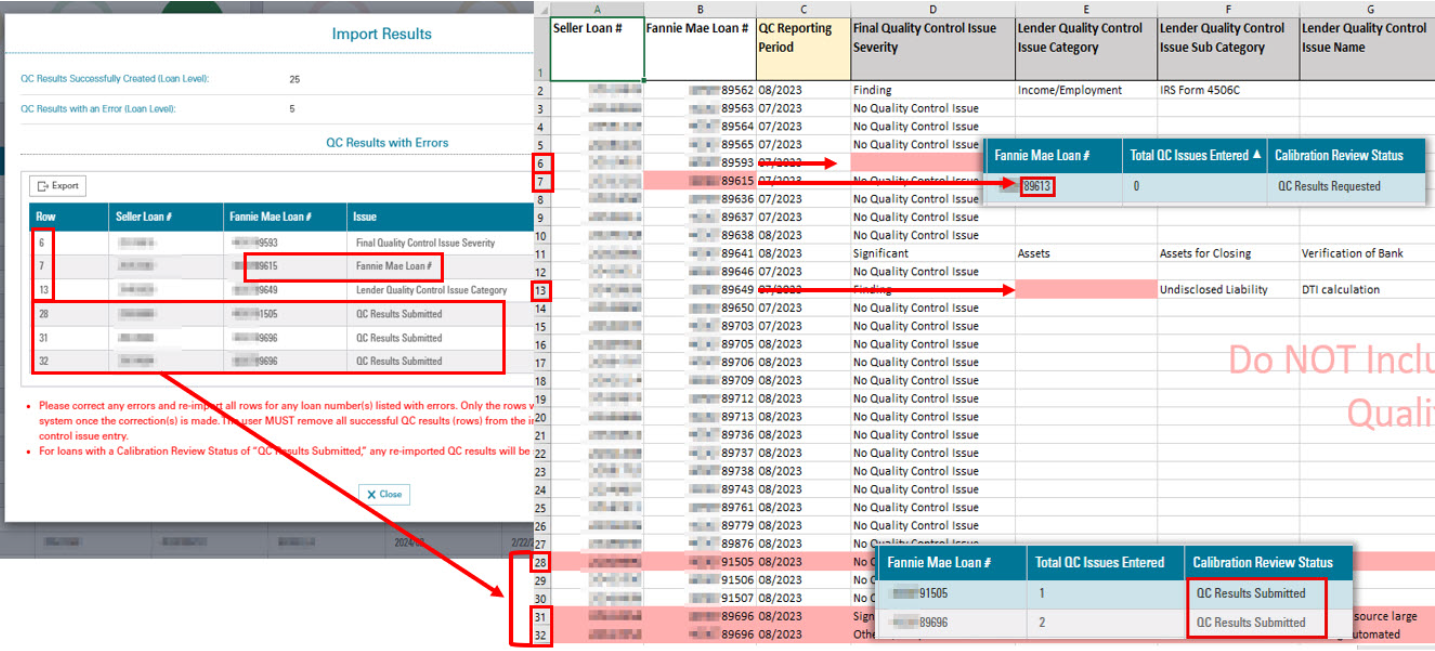
The user reviews the QC results with errors grid to identify the row(s) and data field(s) that need to be addressed. The Row and Issue columns within the grid directs the user to the associated rows and columns in the Excel spreadsheet that need to be addressed.

After the corrections are made, only those rows of the QC results data that were not imported into the QC Calibration Queue need to be re-imported to the system.

Once errors are corrected and the template is re-imported the user receives a successful message.

When the QC results are successfully imported, the user needs to validate the imported QC results data and then submit the data.
At import, the QC results are displayed on the QC Results screen within the lender quality control issues grid. The lender can edit and/or delete the entries. The user can access the QC Results screen by either double clicking on the loan in the QC Calibration Queue or highlighting a row and selecting the QC Results button.
To edit or delete a previously added QC issue, the lender needs to select the QC issue in the grid in order to make the modification.
QC issues can be added, edited, and/or deleted until the QC results are submitted. Once the Calibration Review Status has been changed to “QC Results Submitted," the QC issues in the grid are no longer editable and no additional issues can be added to the loan.
Edit or Delete: When the user selects the Edit or Delete buttons and has not selected a row in the grid, a message opens that requires the user to select at least one single row.

Edit: All the lender quality control issues displayed in the grid can be modified by selecting the Edit button. The drop-down menu selections available are Fannie Mae Defect Category, Fannie Mae Defect Sub Category and Fannie Mae Defect Name. If the record was imported with a value that was not a valid enumeration, the user must select from one of the drop-down menu selections.
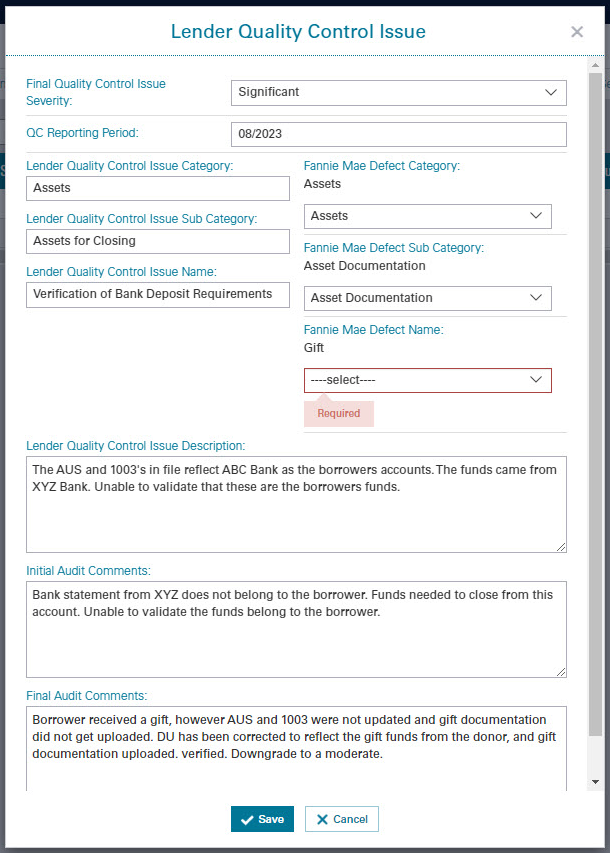
Note: In the event that the Fannie Mae Defect Category, Fannie Mae Defect Sub Category, and/or the Fannie Mae Defect Name data values were not populated using the Fannie Mae Loan Defect Taxonomy enumerations, the data values for these data fields in the Lender Quality Control Issue pop-up is set to “-select-" when the user edits a record. The application only allow the user to select from the enumerations. A user is not be able to save the QC issue until a valid value is selected. The saved value(s) then overwrite the previously provided data.
Delete: When the user wants to delete a QC issue, click on the Delete button and a confirmation message opens.
When "OK" is selected, the QC issue is removed from the grid and the existing Lender Quality Control Issue # is renumbered to exclude the deleted Issue(s). The user has the option to cancel the delete action.

Note: If multiple rows are selected in the grid and the user clicks on Delete, when 'OK' is selected all selected rows are deleted and the existing QC issues are renumbered.
Submit: When the user clicks on the Submit button, a confirmation message opens advising the user that the ability to edit or delete the QC issue for this loan is no longer available once submitted.

When the lender quality control issues have been submitted, the Calibration Review Status is changed to "QC Results Submitted." The QC issues in the grid are no longer editable and no additional issues can be added to the grid. The only button available is the Export to Excel button.

Manual Data Entry
QC Results – The QC Results button allows the user to manually add a loan’s post-close QC results. To manually add a QC issue, select a loan with the Calibration Review Status of "QC Results Requested" or "QC Results in Progress." Click on the QC Results button or double click on the loan in the calibration sample grid.

The QC Results screen is displayed. The general loan information banner contains the following fields with titles shown displayed across the top of the screen:

- Seller Name
- Seller Loan Number
- Fannie Mae Loan Number
- Borrower Last Name
- Selection Period
- Highest Final Quality Control Issue Severity Level
Below the general loan information banner are buttons. The buttons are: Add, Edit, Delete, Export to Excel, and Submit. The Add button allows the user the ability to manually add QC issues. The Edit, Delete, and Submit buttons are used for manually added and imported QC issues. The Export to Excel button gives the user the ability to export the QC issues for the specific loan to an Excel spreadsheet.

The lender quality control issues grid is visible with the following titles below the screen banner:

- Lender Quality Control Issue #
- Final Quality Control Issue Severity
- QC Reporting Period
- Lender Quality Control Issue Category
- Lender Quality Control Issue Sub Category
- Lender Quality Control Issue Name
- Lender Quality Control Issue Description
- Fannie Mae Defect Category
- Fannie Mae Defect Sub Category
- Fannie Mae Defect Name
- Initial Audit Comments
- Final Audit Comments
Add: When the user selects the Add button, The Lender Quality Control Issue pop-up window opens.

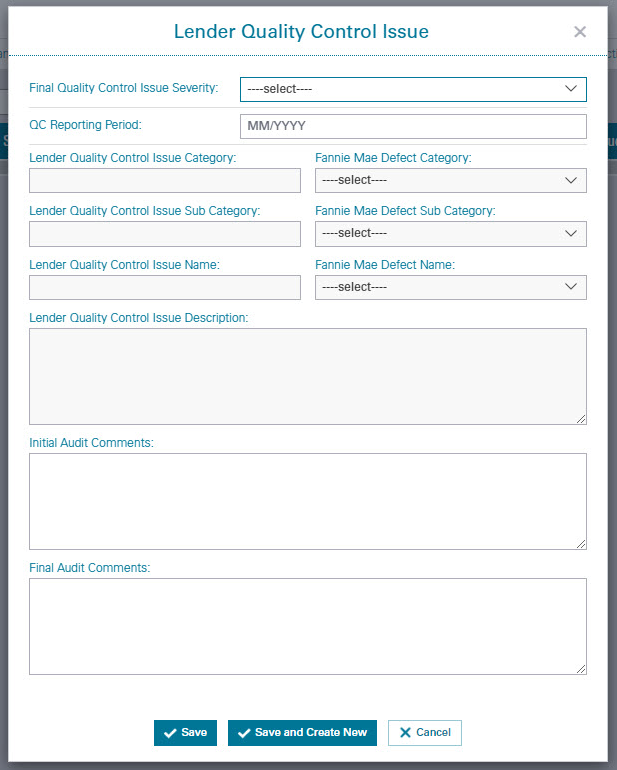
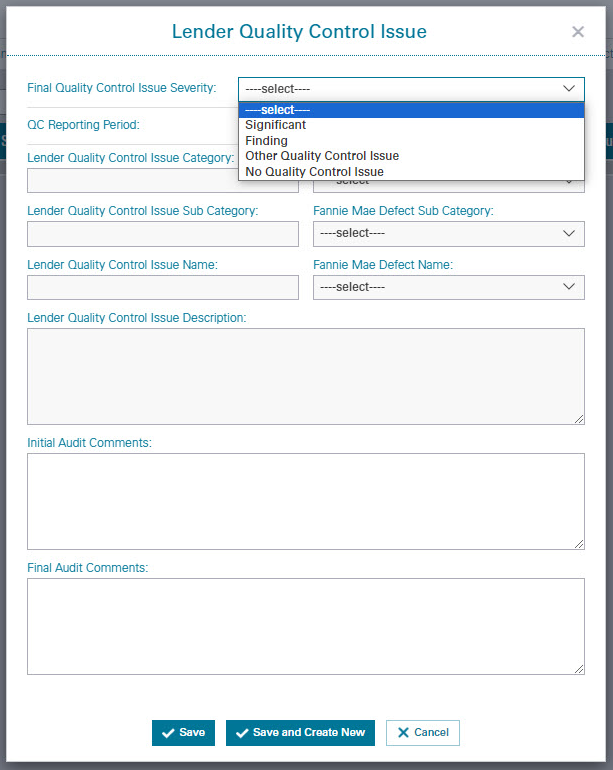
Click on the ‘select’ drop-down menu for the "Final Quality Control Issue Severity” and the following options are displayed.
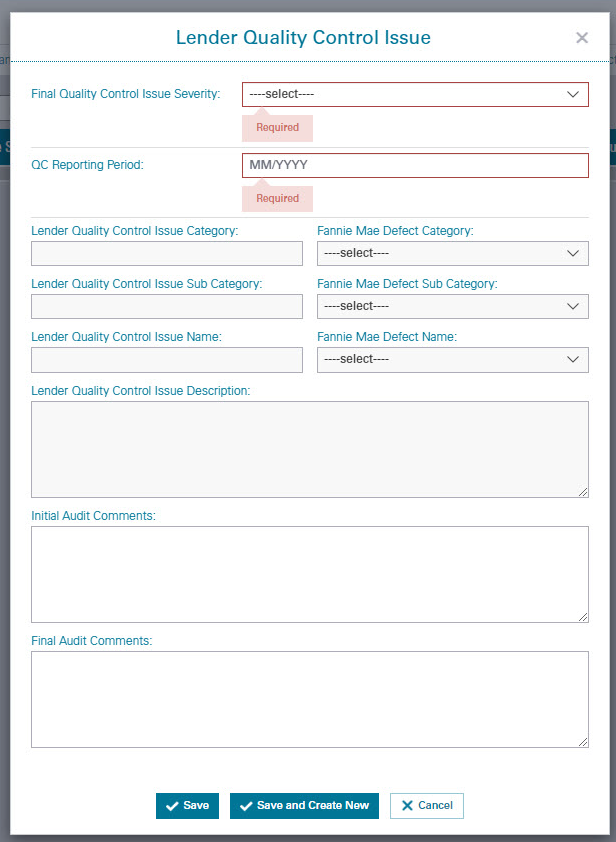
When a value is not entered for the Final Quality Control Issue Severity or QC Reporting Period data fields on Lender Quality Control Issue pop-up, and the user clicks on 'Save' or 'Save and Create New' button a red 'Required' message displays for the required fields.
TIP - If you have more than one QC issue to enter, the 'Save and Create New' opens a new pop-up for the user to enter additional issues.
When the user selects Significant, Finding, or Other Quality Control Issue for the Final Quality Control Issue Severity and clicks ‘Save’ or ‘Save and Create New, button a red 'Required' message always displays if the field is required.
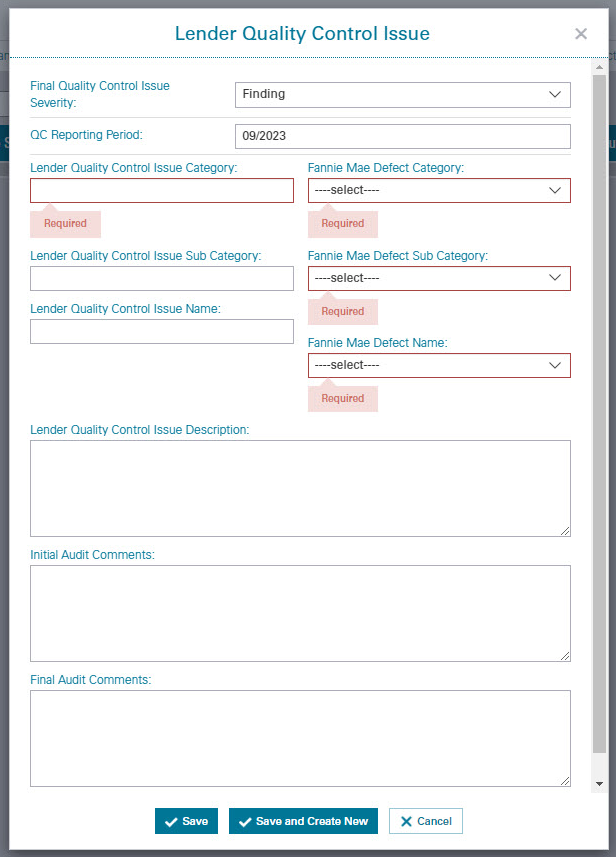
The Lender Quality Control Issue # is determined by the order that the QC issues are input and saved in the application. The system assigns the Lender Quality Control Issue # and the number is incremented by 1 for each new QC issue added (starting with 1 for the first issue added).

Note: When the user selects a loan with the Calibration Review Status of "QC Results Requested" and the user selects 'Save' or 'Save and Create New' and the issue is saved, the Calibration Review Status changes to "QC Results in Progress."
As QC issues are added, the lender quality control issues grid is populated and displayed on the QC Results screen. Once the grid is populated, the lender can edit and/or delete the entries. To edit or delete a previously added QC issue, the lender needs to select the QC issue in the grid in order to modify.
QC issues can be added, edited, and/or deleted until the QC results are submitted. Once the Calibration Review Status has been changed to “QC Results Submitted," the QC issues in the grid are no longer editable and no additional issues can be added to the loan.
Edit or Delete: When the user selects Edit or Delete buttons and has not selected a row in the grid, a message is displayed that requires the user to select at least one single row.

Edit: All the Lender Quality Control Issues displayed in the grid can be modified by selecting the Edit button. The drop-down menu selections are Fannie Mae Defect Category, Fannie Mae Defect Sub Category and Fannie Mae Defect Name. If the record was imported with a value that was not a valid enumeration, the user must select from one of the drop-down menu selections.
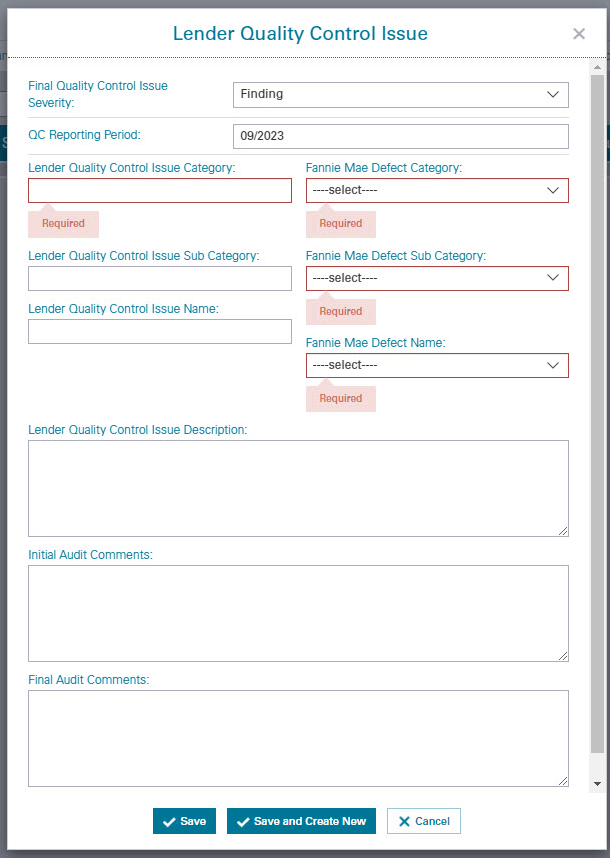
Note: In the event that the Fannie Mae Defect Category, Fannie Mae Defect Sub Category, and/or Fannie Mae Defect Name data values were not populated using the Fannie Mae Loan Defect Taxonomy enumerations, the data values for these data fields in the Lender Quality Control Issue pop-up is set to "--select--" when the user edits a record. The application only allows the user to select from the enumerations. A user is not able to save the QC issue until a valid value is selected. The saved value(s) then overwrites the previously provided data.
Delete: When the user wants to delete a QC issue and clicks on the Delete button, a confirmation message opens.

When ‘OK’ is selected, the QC issue is removed from the grid and the existing Lender Quality Control Issue # is renumbered to exclude the deleted issue(s). The user has the option to cancel the delete action.
Note: If multiple rows are selected in the grid and the user clicks on Delete, when ‘OK’ is selected all selected rows are deleted and the existing QC issues are renumbered.
Submit: When the user clicks on the Submit button, a confirmation message opens advising the user that the ability to edit or delete the QC issues for this loan is no longer available once submitted.

When the Lender Quality Control Issues have been submitted, the Calibration Review Status is changed to “QC Results Submitted.” The QC issues in the grid are no longer editable and no additional issues can be added to the grid. The only button available is the Export to Excel button.
