My web
Edit History CSV
![]()
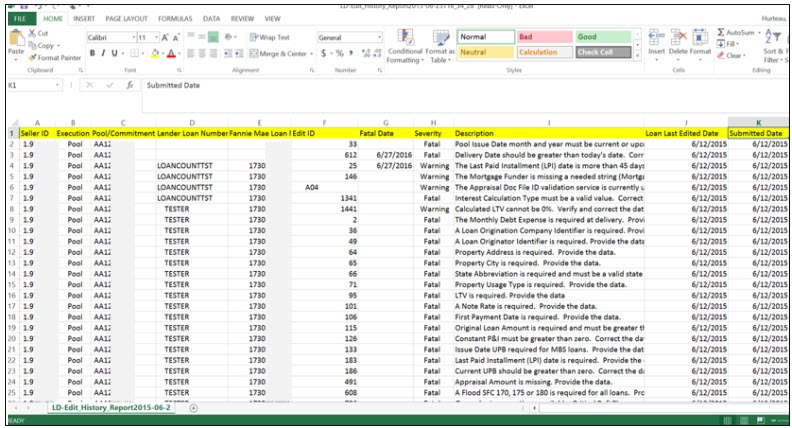
What this Report Represents: This file opens as an Excel® spreadsheet, by default, which contains a detailed list of all the remaining edits on specific loans after submission for existing pools or commitments. The report can be run in monthly increments for pools or commitments submitted within a given month. Select the option of the month you would like to display. The Edit History CSV report provides information on when the loan was submitted, what the severity status of the edit was at the time of submission (including edits that are informational severity) and a new field that identifies whether the edits are planned to go from ‘warning-to-fatal’ (new field called Fatal Date).
The Primary Components of this Report: Seller Number, Execution Pool or Commitment Number, Lender Loan Number, Fannie Mae Loan Number, Edit ID Number, Fatal Date, Severity, Edit Description, Last Date Edited, Last Date Submitted.
The Reasons to Export this Report: It provides the ability to keep track of all the edits still left remaining on all the loans for specific pools, commitments or both within the selected monthly time frame. This
report is useful in performing root cause analysis for edits that are left unresolved at the time of submission.
The report allows you to sort, filter and store the data in the order that is most convenient for you and your colleagues, share the information downstream to others in the company, and enter it into your own systems (such as investor reporting).
Saving the data in this format also provides the ability to analyze the trends and perform your own analysis to determine the quality of the loans.
Step-by-Step Instructions for Exporting this Report:
-
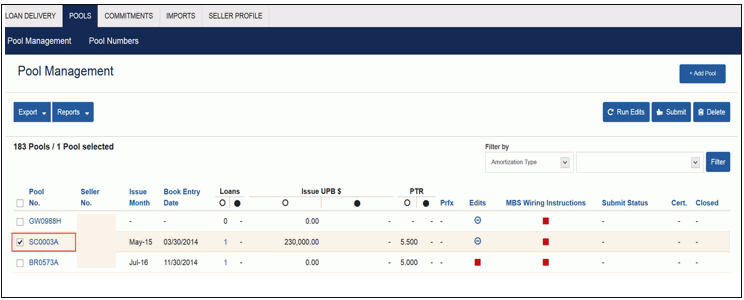
From the Pool or Commitment Management pages select the Pool or Commitment Number for each pool or commitment you want to export.
-
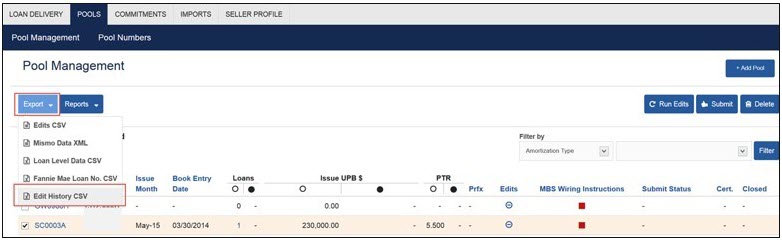
Click Export and select Edit History CSV.
-
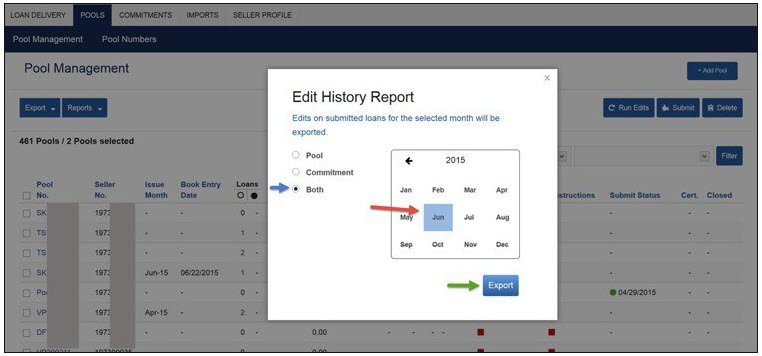
A new Edit History Report dialogue box is displayed. Select the radio button for a Pool, Commitment or Both (see left arrow). Select the month you desire (see middle arrow).
-
Click Export (see right arrow).
-
Open the Excel® file.
NOTE: The system will generate an Excel® file that will look similar to this.